
Motorcycle Low Speed Control Techniques
This post contains affiliate links. As an Amazon Associate, we earn from qualifying purchases.
Motorcycle low speed control fundamentally comes down to managing three things in concert: the clutch friction zone for propulsion, the rear brake for speed regulation, and deliberate counterweighting for balance. While electronic aids exist, core skill is paramount. Smooth, coordinated inputs between your left hand, right foot, and hips keep the bike upright and precise under 10 mph.
That coordination is a physical skill, not an intellectual one. Your brain understands the concepts quickly, but your muscles and nerves need dedicated parking-lot practice to wire them together. Mastering motorcycle low speed control techniques bridges the gap between knowing and doing, which is where most riders drop the bike, lurch through a turn, or freeze in tight traffic.
What follows breaks the skill into its mechanical parts, then stitches them back together with progressive drills. You will learn why the rear brake is your primary speed control, how to find your bike’s friction zone by feel, and where to put your weight when the handlebars are at full lock in motorcycle low speed control techniques. We will also cover how heavy cruisers and light standards demand different techniques, and a practice plan that moves you from cones to real-world scenarios.
Key Takeaways
- Control speed with the rear brake, not the throttle. A gentle, consistent pressure gives a stable platform; chopping the throttle introduces lurching instability.
- Find and live in the clutch friction zone. This is the narrow range where the clutch plates begin to engage, allowing you to modulate power with millimeter adjustments of your left hand.
- Counterweight by shifting your hips to the outside of the turn. On a heavy bike at full lock, you may need to stand on the outside peg and lean your upper body out over the sidewalk.
- Practice U-turns within a standard test box as your benchmark. If you can smoothly execute a turn inside that space, you have integrated the core three techniques.
- Avoid constant low-speed, light-load operation on a new engine. The Suzuki ADDRESS 110 manual explicitly warns this can cause engine glazing during the first 1,000-mile break-in period.
The Core Three: Friction Zone, Rear Brake, Counterweight
You cannot think your way through a 20-foot U-turn. You must feel it. The process links three physical inputs into one fluid motion.
First, the clutch. The friction zone is not a point you find once and leave. It is a range you work within, constantly. To find it, pull the clutch lever in, put the bike in first gear, and very slowly release the lever until you feel the engine note change and the bike begin to creep forward. That initial bite is the start of the zone. Now practice holding the bike in that exact spot, using tiny back-and-forth lever movements to keep it crawling without stalling or leaping. This is the foundation of using the clutch for precise propulsion.
Second, the rear brake. This is your speed governor. Once you are moving in the friction zone, apply light, steady pressure to the rear brake pedal. This creates drag, which stabilizes the bike and allows you to add more clutch/throttle without accelerating. The bike becomes planted. If you need to slow further, add more brake pressure. To speed up slightly, release a little brake while maintaining clutch engagement. The throttle stays constant. This rear-brake-first method is the single biggest shift from normal riding for most people, and it is essential for tight maneuvers.
A steady rear brake application provides drag force that counters the drive force from the clutch, creating a balanced, slow-speed equilibrium. This allows the rider to modulate speed with millimeter adjustments to brake pressure instead of erratic throttle changes.
Third, counterweighting. At very low speeds, the bike must lean to turn, but if you lean with it, the combined center of gravity tips too far and the bike falls. The fix is to keep the bike leaned while you move your body mass the opposite way. For a right-hand turn, press down on the left peg and shift your butt to the left side of the seat. For a tighter turn, stand on the left peg and lean your torso out over the left side. Your head and eyes should be over the handlebar grip on the outside of the turn. This body positioning keeps the bike balanced while it is steered to full lock.
How Heavy Cruisers and Light Standards Demand Different Tactics
A 550-pound sport standard and an 800-pound touring cruiser handle low-speed physics differently. The techniques are the same, but the emphasis shifts.
On a heavy bike, inertia is your enemy and your friend. The weight wants to keep going in a straight line, which makes initial turn-in feel sluggish. Once it is leaning, however, that same mass wants to stay leaned, making it feel stable mid-turn. The key is using more aggressive counterweighting to initiate the lean. You will need to commit your upper body weight to the outside more decisively. The clutch and rear brake inputs must be even smoother, as a lurch is harder to correct. The Kawasaki Versys 1000 owner’s manual advises “sudden acceleration, braking or turning may cause loss of control, especially when riding in wet conditions or on loose road surfaces.” That warning is amplified on a heavy machine.
On a light bike, the response is immediate. It flicks into a lean easily, but it can also fall over quickly if you are not supporting it with counterweighting. The rear brake is even more critical here to prevent the bike from running wide from too much throttle. The friction zone might be narrower, requiring more delicate clutch control.
| Bike Type | Primary Challenge | Technique Adjustment | Common Mistake |
|---|---|---|---|
| Heavy Cruiser/Tourer | Overcoming straight-line inertia | More pronounced upper-body counterweight; earlier, smoother inputs | Not committing weight outboard, causing a tip-over at the turn’s apex |
| Light Standard/Sport | Managing quick, twitchy responses | Exaggerated focus on steady rear brake; finer clutch modulation | Letting the rear brake off mid-turn, causing a sudden surge and wide exit |
The principle is universal, but the force required is not in motorcycle low speed control techniques. Practice on your own bike.
Practice Drills That Build Muscle Memory
Reading does not build skill. Repetition does. Start in a large, empty parking lot.
Drill 1: The Straight-Line Crawl. This isolates clutch and brake. Pick a straight line (like a parking stripe). Using no throttle, find the friction zone to get moving. Once crawling, apply light rear brake. Practice moving up and down the line, using only the clutch and brake to control speed. The goal is to move slower than a walking pace for 50 feet without putting a foot down. This builds the fundamental clutch control and braking feel.
Drill 2: The Cone Weave. Set up five cones or water bottles in a straight line, spaced a comfortable distance apart. Weave through them at a crawl, focusing on turning your head to look at the next cone before you reach the current one. Your hands will follow your eyes. Keep the rear brake on and modulate the clutch. This links vision to the basic controls.
Drill 3: The Expanding Box. Use parking lines or chalk to create a large square. Practice making right-hand turns around the perimeter. Then, slowly reduce the size of your loop inside the box over multiple laps. Your final goal is to be able to consistently make a turn within a 24-foot space—the standard for many road skills test U-turn evaluations. This is where you integrate counterweighting.
Where this goes sideways: Staring at the ground three feet in front of the front tire. Your head is a significant weight. Where it goes, the bike follows. Look through the turn to the exit point, and the bike will track there almost automatically.
Drill 4: The Slow Race. If you have a riding partner, parallel park two bikes a distance apart. The goal is to be the last one to reach the other bike without putting a foot down. This adds mild pressure and simulates the need for ultra-slow control in traffic.
What Your Bike’s Electronics Can (And Cannot) Do
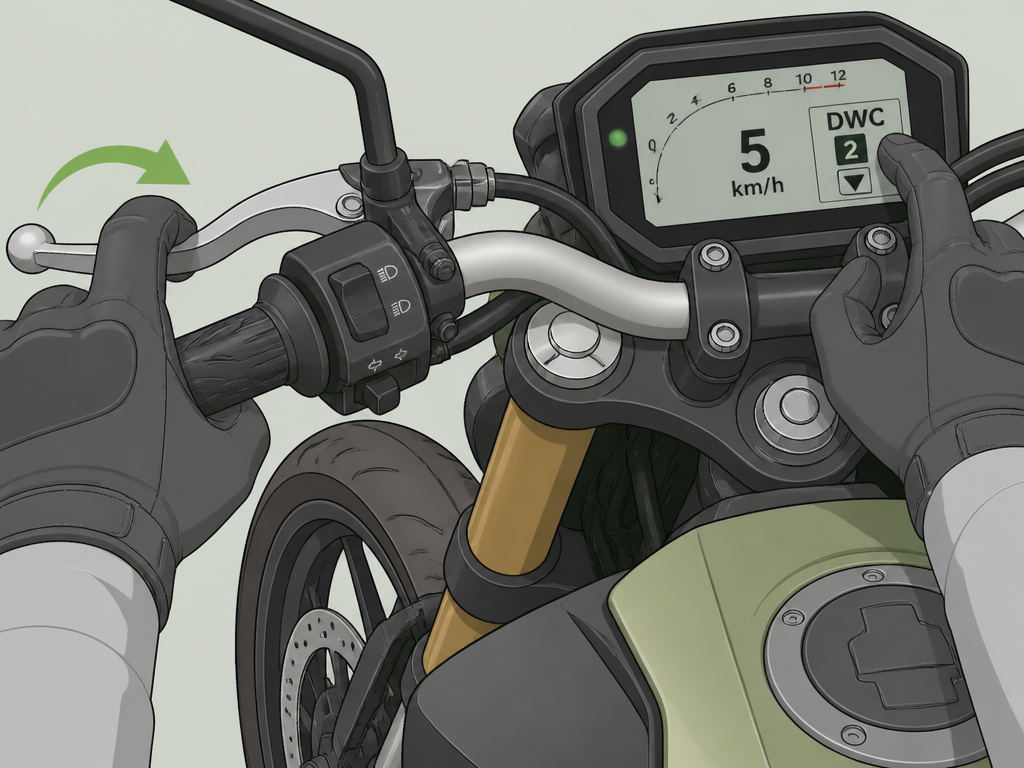
Modern rider aids are not a substitute for skill, but they can be a safety net. It is critical to know what they are designed for.
Some systems have explicit low-speed functions. Honda’s Low Speed Braking Control on certain continuously variable transmission models activates automatically at speeds below 6 mph (10 km/h). A patented system described in US Patent 9809222 defines a “slow speed mode” for take-around operations under 8 km/h, where it can even apply brake force to prevent rollback on an incline. Honda’s Low Speed Braking Control system for some models is active below 10 km/h. These are specialized cases, typically for scooters or specific touring models.
For most standard motorcycles, the relevant electronics are traction control and wheelie control. Ducati, for example, recommends using DWC (Ducati Wheelie Control) level 8 for road use in its Monster 1200 manual, noting that levels 1-3 are for expert riders only. The Hypermotard 950 SP manual is more specific, stating DWC levels 1-3 are for track use and experts. The takeaway is that these systems are calibrated for higher-speed stability, not parking-lot maneuvers. They will not prevent a tip-over from poor clutch control.
Furthermore, accessing these settings often requires the bike to be at a near-standstill. The Ducati Monster 1200 instrument panel’s Setting menu can only be entered when vehicle speed is less than or equal to 20 km/h (12 mph). Set your riding mode before you need slow control, not during it.
Common mistake: Relying on electronic aids to compensate for poor technique. At 3 mph, your bike’s inertial measurement unit (IMU) and cornering ABS are largely irrelevant. The physics are governed by your hands and feet.
Troubleshooting Common Low-Speed Problems

You will make mistakes. Here is what is happening and how to fix it.
Problem: The bike falls inward at the apex of a tight turn.
Cause: Insufficient counterweighting. You are leaning with the bike.
Fix: As you initiate the turn, consciously press down on the outside footpeg and shift your hips outward. Look over your outside shoulder. Add a tiny bit more rear brake to further stabilize the chassis.
Problem: The bike lurches or surges uncontrollably.
Cause: You are using the throttle to control speed instead of the rear brake. Throttle response is too abrupt for fine control.
Fix: Set the throttle to a steady, very low rpm (just above idle). Control all speed changes with the rear brake and by modulating the clutch within its friction zone. Re-practice Drill 1.
Problem: You keep stalling.
Cause: You are releasing the clutch lever too quickly through the friction zone, or you are not giving enough throttle to match.
Fix: Find the friction zone again and hold it. You should be able to keep the bike stationary against the rear brake with the clutch in the zone. Practice this “hold” feeling. Ensure you are not in too high a gear; first gear is mandatory.
Problem: The bike wants to run wide and you cannot tighten the turn.
Cause: You are looking at the outside boundary (the curb, the line) instead of where you want to go.
Fix: Force your head and eyes to turn farther, looking back over your inside shoulder toward the turn’s exit. Your performing a U-turn will immediately tighten.
These are mechanical issues with physical corrections. Diagnose, isolate, drill.
A Structured 30-Day Practice Plan for Confidence
Random practice yields random results. Follow this progressive plan, aiming for two 30-minute sessions per week.
Weeks 1-2: Foundation. Focus entirely on Drills 1 and 2. Goal: Complete the straight-line crawl 10 times without a foot down. Complete the cone weave 5 times without touching a cone. Do not rush to turns.
Weeks 3-4: Integration. Introduce Drill 3 (The Expanding Box). Start with the large 30-foot box. Each session, try to make your turning circle one foot smaller. Use chalk to mark your best loop. Goal: Consistently execute a turn within a 26-foot space by the end of week 4.
Weeks 5-6: Application. Practice Drill 4 if possible. Then, take the skills to a quiet residential street. Practice stopping on a slight incline and starting from a stop without rolling back. Practice making a U-turn using the full width of the road. Finally, navigate a real parking lot, aiming for a specific spot between cars.
This plan builds competence in stages, which builds confidence. The Yamaha owner’s manual recommends beginners receive training from a certified instructor—this structured practice complements that advice.
Steering technique at low speed
At very low speeds, such as during parking lot maneuvers or tight turns, you primarily use direct steering, turning the handlebars in the direction you want to go. The Kawasaki Versys 1000 manual advises avoiding sudden turning inputs, especially on loose or wet surfaces. Keep your head and eyes up, looking through the turn to where you want to go. Smooth, deliberate inputs are key. Avoid sudden movements with the handlebars, throttle, or brakes, as these can easily upset the bike’s balance, especially on loose or wet surfaces where control is more delicate.
Frequently Asked Questions
How do I control my motorcycle at low speeds?
You control it by coordinating three inputs: the clutch friction zone for drive, the rear brake for speed stability, and counterweighting your body to the outside of the turn for balance. The throttle is set at a low, steady rpm and left alone. This method provides precise, lurch-free control.
What is the 12 second rule on a motorcycle?
The “12-second rule” is a visual lead-time guideline for highway speeds, not a low-speed technique. It advises scanning the road ahead for 12 seconds worth of travel distance to identify potential hazards early. For low-speed control, your visual focus should be on your intended path, not the immediate foreground.
Should I use the front brake at low speeds?
Generally, no. The front brake is highly effective at higher speeds but can drastically affect steering geometry and balance at a crawl. Applying it during a tight turn can cause the fork to compress and the bike to stand up and run wide, or worse, tip over. The rear brake is the correct tool for low-speed modulation.
Does practicing low-speed maneuvers wear out my clutch?
Minimal, responsible practice will not cause undue wear. You are using the clutch as designed—to smoothly engage and modulate power. Abusive practice (constant “slipping” with high engine RPM for extended periods) can generate excessive heat. Keep engine revs low (just above idle) and your practice sessions focused. The clutch is a wear item designed for this use.
My bike feels unstable at low speeds. Is something wrong?
It is likely a technique issue, not a mechanical one. The most common causes are: using the throttle for speed control (causing surging), not using the rear brake (missing a stabilizing force), or having a death grip on the handlebars (transferring your body’s wobbles directly to the steering). Go back to the straight-line crawl drill to re-establish a stable base.
Before You Go
It is the moment in real traffic when you need a tight turn and your body executes the drill without your brain having to think. That takes dedicated, deliberate practice.
One rule most guides skip: if you have a brand-new motorcycle, consult its break-in procedure before doing extended low-speed drills. The Suzuki ADDRESS 110 manual warns that constant low-speed, light-load operation for the first 1,000 miles can cause engine glazing. Adapt your practice—use short, focused sessions with cool-down periods.
Everything above assumes you are the one in control. If your motorcycle has a linked braking system, know that its function may change at very low speeds. A recent NHTSA technical service bulletin notes a software update for linked braking systems to improve functionality at speeds greater than 20 mph, implying that behavior below that threshold is distinct. Understand your bike’s systems, but trust your fundamentals first.
