
How to Test a Motorcycle Battery With a Multimeter
This post contains affiliate links. As an Amazon Associate, we earn from qualifying purchases.
To test a motorcycle battery with a multimeter, perform a static voltage test on the disconnected, rested battery, then a load test while cranking the engine. A fully charged battery has an open circuit voltage of 12.7 volts at rest. If cranking voltage drops below roughly 10 volts, the battery is likely failing and you should move to electrical troubleshooting.
The 12.7-volt target is specific. Harley-Davidson’s latest service manuals define a 100% state of charge at that exact voltage. A drop to 12.3V means you’ve lost 50% of your capacity, and a battery that weak will freeze and crack its case in cold storage. This is why it is useful to know how to test a motorcycle battery with a multimeter.
What follows is the two-test sequence central to how to test a motorcycle battery with a multimeter that separates a tired battery from a dead one. We’ll cover the gear you need, the safety you can’t skip, how to read the numbers, and what to do next if the test fails.
Key Takeaways
- A fully charged battery reads 12.7 volts after resting for 1-2 hours. Harley-Davidson’s spec sheet uses this as the 100% benchmark.
- The load test is definitive. If voltage stays above 10 volts while cranking, the battery is usually fine. A drop below that points to the battery or a bad connection.
- Never measure amps directly across the battery terminals. This creates a dead short, can weld your probes, and will blow the multimeter’s fuse instantly.
- For storage, an automatic, constant monitoring battery charger/tender with a charging rate of 5 amps or less at less than 14.6 volts is recommended. The use of constant current chargers to charge sealed maintenance free batteries is not recommended.
- Clean terminals with a baking soda solution (5 teaspoons per quart of water) and apply dielectric grease. Corrosion causes more phantom electrical issues than most exotic faults.
Before You Start: The Non-Negotiables
This isn’t scare talk. It’s the chemistry of lead, acid, and hydrogen gas. Skip this, and the best outcome is a ruined multimeter. The worst doesn’t bear thinking about.
Before you start: Wear a protective face shield and rubberized gloves. Work in a well-ventilated area away from flames or sparks. Always turn your battery charger OFF before connecting or disconnecting the clips. Connect the positive (+) cable first; disconnect the negative (-) cable first.
Battery acid doesn’t just burn; it reacts. The antidote table in the Harley manual is stark: flush externally with water, drink milk or water internally, and get to a doctor. The hydrogen gas released during charging or a heavy discharge is explosive in confined spaces. Your garage with the door closed counts.
Your multimeter is the other safety item. Set it to DC Volts (usually a V with a solid and dashed line). The 20V range is perfect. Never turn the dial to the “A” or amps setting for this test. Putting the probes across the battery terminals on the amps setting creates a dead short. The pop is loud, the spark is bright, and the repair bill for your meter starts at a new fuse.
The Static Voltage Test: Your Battery’s Report Card
This is the first number you write down. It tells you the battery’s state of charge after it has sat, disconnected, for an hour or two. The keyword is rested. A battery that’s just been charged or discharged will give a surface charge reading that lies.
Pull the seat or side cover to access the battery. Disconnect the negative (-) cable first, then the positive (+). This order prevents a short if your wrench touches the frame while the positive is still connected. Let the battery sit. An hour is minimum; two is better.
Now, get your multimeter. The red probe goes to the positive (+) terminal. The black probe goes to the negative (-) terminal. It doesn’t matter which port on the meter they’re in for voltage testing, as long as they’re seated firmly. Read the number.
| Reading (Volts) | State of Charge | What to Do |
|---|---|---|
| 12.7 | 100% | Battery is charged. Proceed to load test. |
| 12.6 | 75% | Battery is usable but should be charged soon. |
| 12.3 | 50% | Charge immediately. A battery this discharged can freeze. |
| 12.0 | 25% | Charge immediately. Risk of permanent damage is high. |
| 11.8 | 0% | Battery is deeply discharged. May not recover. |
Harley-Davidson sources disagree on the voltage threshold for charging: one says charge if below 12.6V, while another says charge if below 12.7V. If you see 12.6V, your battery is at 75%, not terrible, but not full. It needs a battery charging session before long-term storage.
A 100% charged condition is 12.7V, not 12.6V. That 0.1-volt difference is the gap between a ready battery and one that’s already begun to self-discharge.
If your reading is below 12.7V, charge the battery. A completely discharged battery has a much higher risk of freezing in cold weather, which can crack the case and destroy it. This is the most important job of the voltmeter test in how to test a motorcycle battery with a multimeter: preventing a storage disaster.
The Load Test: Where Batteries Prove Themselves
Resting voltage lies. I’ve seen batteries read 12.6V on the bench and then crumble to 8V when asked to start the bike. The load test takes about ten seconds and shows you the truth.
Reconnect the battery cables, positive (+) first, then negative (-). Make sure they’re tight. Set your multimeter to DC Volts again. You’ll need a helper for this, or you can carefully wedge the probes onto the terminals and watch the meter from the rider’s seat.
- Place the red probe on the positive terminal and the black probe on the negative terminal. Press the probes firmly onto the terminals.
- Have your helper press the starter button, or press it yourself while watching the meter.
- Watch the voltage. A healthy battery will dip, but it should stabilize and not drop below roughly 10 volts.
What are you seeing?
- Stays above 10V: The battery is likely strong. If the bike still won’t start, move on to checking the starter, solenoid, or testing the stator.
- Drops to 9–10V: The battery is weak. It may start the bike on a warm day but will fail when cold. Plan on a new battery soon.
- Drops below 9V: The battery is finished. It cannot provide the current needed. Replace it.
Where this goes sideways: Assuming a low load-test reading always means a bad battery. Corroded or loose terminals can mimic a dead battery by adding massive resistance. Clean and tighten everything before you condemn the battery.
This test isolates the battery from the rest of the electrical system guide. If the battery passes the load test but the bike dies while riding, your problem is almost certainly elsewhere, likely the charging system, which you can check by testing the regulator rectifier.
When Tests Give Borderline or Weird Readings
Sometimes the numbers don’t make an obvious call. Here’s how to break the tie.
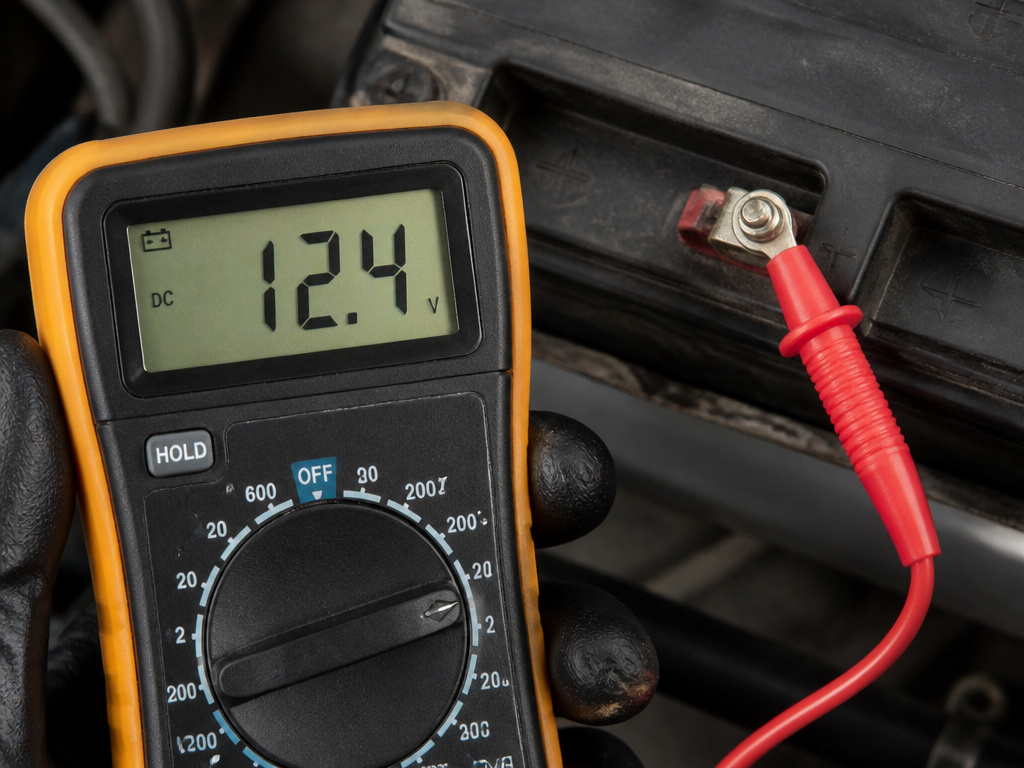
The battery reads 12.4V after sitting. This is a 50-75% charge. It’s not dead, but it’s not healthy. The first question is: how long did it sit? To reduce the self-discharge rate, store the battery in a cool, dry place. If it dropped to this in a week, it’s dying or you have a parasitic drain. If it took three months, that’s normal. Charge it fully and retest in a week. If it’s dropped again, it’s failing.
The load test voltage is okay, but the starter sounds slow. This points to high resistance in the circuit. The battery is okay, but the power isn’t getting to the starter. Check:
- Battery terminal torque (should be 6.8–7.9 N·m or 60–70 in-lbs)
- Corrosion on the cables
- The ground connection where the negative cable bolts to the frame or engine
Clean any corrosion with a wire brush and a solution of 5 teaspoons of baking soda per quart of water. After rinsing and drying, apply a light coat of dielectric grease like Harley-Davidson Electrical Contact Lubricant (99861-02).
The battery tests fine but goes dead overnight. You have a parasitic drain. Something is drawing power with the key off, a GPS, alarm, or a faulty regulator. This is a more advanced diagnose electrical problems scenario, but it starts with the multimeter set to milliamps (mA) in series with the disconnected negative cable.
The Right Gear for the Job

You don’t need a $500 Fluke meter, but you do need one that won’t lie to you. A basic digital multimeter from any hardware store works. Look for:
- DC Voltage range up to 20V
- A continuity beeper (helpful for other troubleshooting guide work)
- Overload protection
For AGM batteries, you must follow the Harley-Davidson specification for a charger: an automatic, constant-monitoring battery tender with a charging rate of 5 amps or less at less than 14.6 volts. They explicitly warn against constant-current chargers, which overcharge and “cause dry-out and premature battery failure.”
Automatic, constant-monitoring battery tenders that meet the specification are available. If you’re storing the bike, this is the tool. Harley-Davidson sources give different advice for storage charging frequency: one says charge a battery stored in the vehicle every two weeks, and charge a battery stored out of the vehicle once per month. Another source says charge the battery every month if stored at temperatures below 60°F (16°C), and more frequently if stored above that temperature.
What Your Test Results Tell You to Do Next
Your multimeter has given you a verdict. Now, execute.
Battery is Good (≥12.7V static, ≥10V load): Reinstall it. If you’re putting the bike away, connect a battery tender. Consider cleaning the terminals and applying dielectric grease to prevent future corrosion.
Battery is Low (12.0V – 12.6V static): You need to charge the battery. Use a proper tender, follow the safety rules, and re-run the static test 1-2 hours after charging is complete. If it won’t hold 12.7V, it’s failing.
Battery is Bad (<12.0V static, or <10V load): Replace it. A jump might get you home, but a jump start is a temporary fix. If the bike has other starting problems, solve those before installing the new battery, or you’ll kill it too.
Battery is Dead but System Tests Fine: This is the classic mystery. The cause is often a parasitic drain or a faulty charging system that isn’t replenishing the battery as you ride. Your multimeter journey continues to the stator and regulator/rectifier.
Battery Types and Voltage Readings
The open circuit voltage readings from your multimeter apply directly to common lead-acid and AGM batteries. For these types, a reading of 12.7 volts indicates a full charge, while 12.3 volts shows about a 50% charge. A battery reading below 12.7 volts generally needs charging. Lithium motorcycle batteries have a different voltage profile and charging requirements. The charging advice and voltage thresholds provided by the manufacturer are specific to lead-acid and AGM types. Always consult your battery’s manual for its specific voltage specifications and charging limits, as using the wrong settings can damage the battery.
Frequently Asked Questions
How do you know if a motorcycle battery needs to be replaced?
You need two pieces of evidence from your multimeter: a low static voltage (consistently below 12.7V after charging) and a failed load test (voltage drops below 10V while cranking). If it fails both, replace it. If it fails just the load test, also check for corroded or loose terminals first.
How to tell if a 12V battery is bad with a multimeter?
“bad” 12V battery won’t hold a charge. Charge it fully with a proper tender, let it rest for two hours disconnected, and test it. If it reads 12.7V, it’s holding. If it reads 12.3V or lower 24 hours later (with no load), it has high internal resistance and is bad. The load test confirms this.
Can you test a motorcycle battery without a multimeter?
You can do a crude test. Turn the key on and honk the horn or flash the brights. If they’re strong, the battery has some charge. Press the starter. If everything goes dead or the starter barely turns, the battery is weak. This doesn’t give you numbers or isolate the problem, but it’s a field check. A multimeter costs $20 and gives you the real answer.
How to bring a completely dead motorcycle battery back to life?
If it’s truly dead (below 10V), a standard charger may not recognize it. Some modern smart chargers, like certain NOCO models, have a “force mode” or “repair” function that applies a small voltage to wake the battery before charging. If that doesn’t work, the battery has a dead cell or is sulfated. Recovery is unlikely. Your time is better spent on a replacement.
What should a motorcycle battery read when running?
With the engine at idle, a healthy charging system should produce between 13.5V and 14.6V at the battery terminals. This shows the stator and regulator are working. If you see less than 13V, the battery isn’t charging. If you see more than 14.6V, the regulator may be overcharging and damaging your battery.
The Bottom Line
Start with the static test. If the battery isn’t at 12.7V, charge it. Then do the load test. If voltage stays above 10V while cranking, your battery is not the cause of your motorcycle won’t start troubleshooting. The real value of this test isn’t in diagnosing a completely dead battery, that’s obvious. It’s in saving you from replacing a battery that was fine all along, while the real culprit was a dirty connection or a failing charging component. Trust the meter, not the myth.
