
How to Set Motorcycle Suspension Sag: The 5-Step Process
This post contains affiliate links. As an Amazon Associate, we earn from qualifying purchases.
To set motorcycle suspension sag, you measure the difference between the bike’s fully extended and settled ride heights, then adjust the spring preload to hit a manufacturer-specific target. The numbers are not universal, they’re printed in your manual.
Those numbers are the whole game. They tell you if the spring rate matches your weight and if the bike sits in the part of its travel where the damping works. A fundamental first step is learning how to set motorcycle suspension sag. Get them wrong, and the clickers you fiddle with are just adjusting a problem, not solving it.
What follows: the official measurement steps from KTM and WP manuals, the tool you can use alone, and the table that shows when you need a new spring instead of more preload. By the end, you’ll know your numbers and whether your suspension is set up or just set.
Key Takeaways
- Target sag is model-specific, the 2022 KTM 65 SX manual calls for 30 mm static / 70 mm rider, while the 2009 450 SX‑F wants 33 mm / 107 mm.
- If you cannot reach the riding sag range by adjusting preload, the spring rate is wrong and must be replaced per KTM and WP manuals.
- Always measure with full riding gear, including boots and helmet, for an accurate rider weight.
- Adjust damping clickers only after sag is correct, the Öhlins manual states incorrect preload makes other adjustments useless.
- For a solo check, use a zip-tie on the fork leg and a strap to compress the rear, eliminating the need for a helper.
Why Sag Numbers Aren’t Guesswork (And Why Yours Are Probably Wrong)
You have probably read generic sag ranges, but targets vary widely by model. For example, KTM specifies 107-110 mm for some dirt bikes, while WP specifies 36 mm for the APEX PRO 6746 shock, and Öhlins recommends 25-35 mm of ride height for road use. Those are commodity numbers. They are also wrong for your specific bike, and using them is why your suspension feels vague or harsh.
The factory engineers who built your shock and spring did not pick a random number when defining how to set motorcycle suspension sag. They calculated a sag target that positions the suspension at the optimal point in its stroke for the linkage ratio, the spring rate, and the intended damping curve. A KTM manual states: “The static sag should be as close as possible to 35 mm, with a permitted deviation of ± 2 mm.” That is a 4mm total window. WP’s manual for the APEX PRO 6746 shock specifies 20 mm static and 36 mm rider sag. Öhlins recommends 5-15 mm of free sag. These are not suggestions. They are the spec.
Common mistake: Setting sag in street clothes. Your helmet, boots, and jacket add significant weight. The sag measurement will be off, which can put you outside KTM’s ±2 mm tolerance before you even start.
The consequence is predictable. Too little sag (over-preloaded spring) keeps the suspension riding high in its stroke. The bike feels harsh on small bumps and tops out over jumps. Too much sag, from an under-preloaded spring, makes the bike sit too low. This uses up travel, slows the steering, and increases the chance of bottoming out on compression. You can chase the feeling with damping clickers all day, but as the Öhlins manual puts it when discussing how to set motorcycle suspension sag: “The spring preload is fundamental for the suspension function. If the preload is incorrectly set, any other adjustments will not help to get the intended performance from the suspension.”
The 5-Step Measurement Process (No Helper Needed)
You need a tape measure, a zip-tie, and about 20 minutes. The classic method requires a helper to hold the bike upright. This one does not.
Step 1: Get the bike ready. Park on a level surface. Put the bike on a stand so the rear wheel is off the ground. This is the fully extended, unloaded position. Wear all your riding gear.
Step 2: Take the first measurement (L1). Measure from the axle vertically up to a fixed point on the chassis or fender. Mark the point with tape. Write down this number. This is your fully extended length.
Step 3: Take the second measurement (L2). This is the trick. Get off the stand and have the bike support itself. Now, compress the rear suspension fully a couple of times to overcome stiction, then let it settle naturally. Do not bounce it. Measure from the axle to your marker again. This is the bike’s own weight sag. Record it.
Step 4: Take the third measurement (L3) with you on board. Sit on the bike in your normal riding position, feet on the pegs. Have a hand on the front brake to steady yourself. Look straight ahead. Get a friend to take the measurement, or use a strap around the rear wheel to the swingarm to hold the bike compressed while you get off and measure. Record this number.
Step 5: Do the math.
- Static Sag = L1 – L2. This tells you if the spring rate is in the ballpark.
- Rider Sag = L1 – L3. This is your target adjustment number.
Measure from the axle vertically to a point on the subframe or fender for consistency. Record each measurement to the nearest millimeter. Compress the suspension several times before each settled measurement to account for stiction, which can add significant error if ignored.
The front fork uses the same process, but with a zip-tie around the fork leg as a marker. Push the zip-tie down to the wiper seal, then get on and off. The travel used is the distance the zip-tie moves. KTM explicitly states that “for various reasons, no exact riding sag can be determined for the forks,” but the zip-tie method gives you a usable baseline for fork spring preload.
Static vs. Rider vs. Free Sag: What Each One Actually Tells You
People use these terms interchangeably. They measure different things, and each one diagnoses a specific problem.
| Measurement | What It Is | What It Tells You | Official Target Examples |
|---|---|---|---|
| Static Sag | Bike’s weight compressing the spring. (L1 – L2) | Is the spring rate roughly correct for the bike’s weight? | KTM 450 SX-F (2009): 33 mm. KTM (2007): 35 mm ±2 mm. WP APEX PRO 6746: 20 mm. |
| Rider Sag | Bike + rider weight compressing the spring. (L1 – L3) | Is the spring rate correct for YOUR weight? This is the primary adjustment target. | KTM 450 SX-F: 107 mm. KTM XC-F: 110 mm. KTM 65 SX: 70 mm. WP APEX PRO 6746: 36 mm. |
| Free Sag | The remaining spring compression after setting rider sag. (L2 – L3) | The final check for spring rate. Too much or too little free sag means wrong spring. | Öhlins recommendation: 5-15 mm. |
If your static sag is way off, the spring is too hard or too soft for the bike itself. If you achieve perfect rider sag but have no free sag (less than 5mm), the spring is too soft, you’ve had to preload it too much to hold the bike up. If you have tons of free sag (more than 15mm) with correct rider sag, the spring is too stiff. The preload vs damping balance is only possible when the spring rate is right.
How to Adjust Preload (And Know When to Stop)
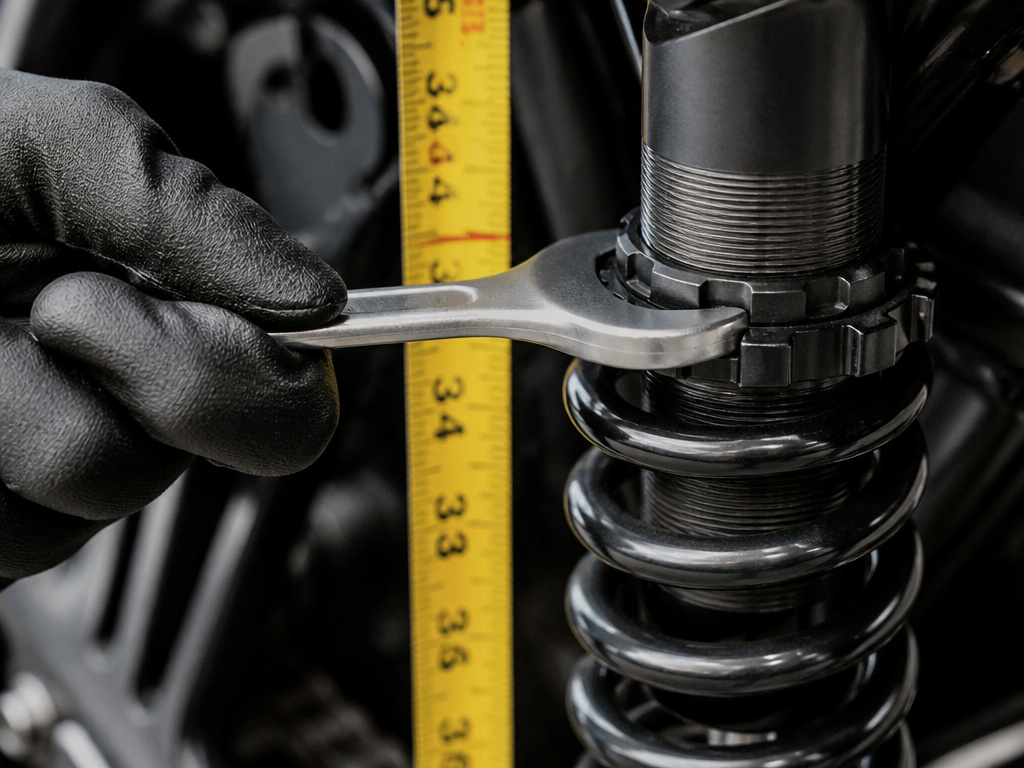
Adjusting preload is simple: turn the adjuster to change sag. Knowing when to stop is what matters.
On most rear shocks, you use a spanner wrench on the locking ring. Loosen the lock ring, then turn the main adjuster. Clockwise increases preload (less sag). Counter-clockwise decreases preload (more sag). Make small adjustments, a quarter turn at a time, then re-measure. For forks with external adjusters, like the WP XPLOR PRO, you turn the clicker. Their manual specifies “Comfort: 6 clicks, Standard: 10 clicks, Sport: 12 clicks, Full payload: 16 clicks.”
Where this goes sideways: Cranking preload beyond the adjuster’s range. If you run out of thread and still have too much sag, the spring is too soft. Forcing it further risks damaging the shock body and will not fix the handling.
The 2009 KTM manual states: “Small weight differences can be compensated by adjusting the spring preload, but in the case of large weight differences, the springs must be replaced.” The 2007 manual is more direct: “If the riding sag cannot be brought into the specified range by adjusting preload, the spring itself is incorrect (too hard or too soft) and must be replaced.”
This is the line. If you are far from the “standard rider weight” of 75–85 kg (165–187 lb), you will likely need a new spring. No amount of preload adjustment will create a good suspension setup.
The Spring Rate Table That Decides If You Need a New Spring
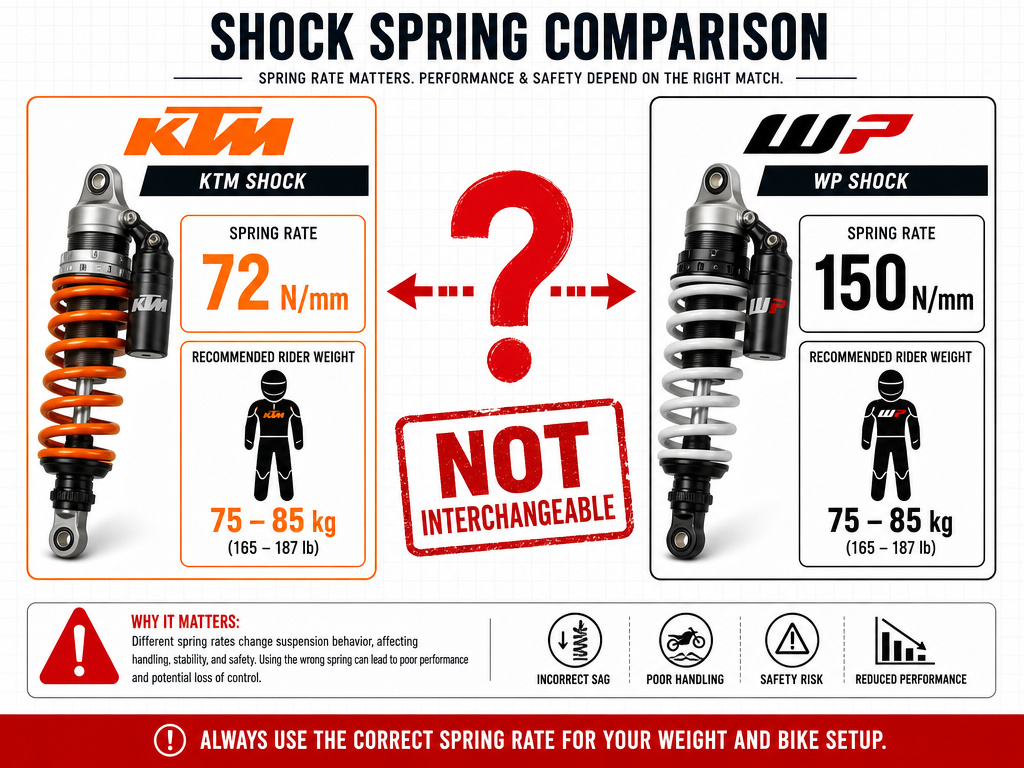
Spring rate is measured in N/mm (Newtons per millimeter) or lb/in. It’s the amount of force needed to compress the spring one unit. This table from the OEM manuals shows how rider weight dictates spring rate.
| Rider Weight | 2009 KTM XC‑F Spring Rate | WP APEX PRO 6746 Spring Rate |
|---|---|---|
| 65–75 kg (143–165 lb) | 69 N/mm (394 lb/in) | 140 N/mm |
| 75–85 kg (165–187 lb) | 72 N/mm (411 lb/in) | 150 N/mm |
| 85–95 kg (187–209 lb) | 76 N/mm (434 lb/in) | 160 N/mm |
Notice the disagreement? The KTM shock for a 75-85 kg rider uses a ~72 N/mm spring. The WP shock for the same rider uses 150 N/mm. These are not the same shock. You cannot swap numbers between models. This is why you must find your manual.
If your weight and your sag numbers point to a new spring, that’s a job for a shop or a confident home mechanic. The KTM manual includes a stark warning: “The shock absorber is filled with highly compressed nitrogen, so never dismantle the shock absorber or carry out any maintenance on it yourself.” Changing a spring often requires re-pressurizing the shock with nitrogen, a 10 bar (145 psi) charge for the 2009 KTM XC‑F.
What to Do After You Set Sag: The Damping Reset Rule
Sag and preload set the bike’s ride height and attitude. Damping controls the speed at which the suspension moves. Now you can adjust the damping.
Start with the manufacturer’s baseline clicker settings. Start with the manufacturer’s baseline clicker settings. The Öhlins manual’s rule is golden: “Always begin your setting by taking a test ride with all adjustments at their recommended basic setting. Take notes, adjust in small steps and make only one adjustment at a time.”
Change one thing. Ride the same loop. Note the change. Then, and only then, change another. If you changed springs, the 2007 KTM manual notes that “the rebound damping may need reduction or increase by ‘a few clicks,’ though compression damping can remain unchanged.” Start with rebound.
This is where understanding compression and rebound damping pays off. Rebound controls how fast the spring returns after being compressed. Too fast, and the bike will pogo or feel loose. Too slow, and it will “pack down” over successive bumps. Your correct sag ensures you are working from a neutral position.
Troubleshooting: When the Numbers Don’t Add Up
Sometimes, you follow the steps and the sag is still wrong. Here’s what to check.
Problem: Cannot achieve enough rider sag (bike sits too high).
You’ve backed off all preload, but L1 – L3 is still less than the target.
- Likely Cause: Spring is too stiff for your weight.
- Fix: You need a softer spring. Refer to the spring rate table for your weight range.
Problem: Achieve rider sag, but static sag is huge (over 40mm).
- Likely Cause: Spring is too soft. You’ve added so much preload to support your weight that the bike’s own weight sags it excessively.
- Fix: You need a stiffer spring. This is a classic sign of a mismatched spring rate.
Problem: Sag measurements are inconsistent.
- Likely Cause: Stiction or not settling the bike. Did you bounce it a few times before measuring L2 and L3?
- Fix: Repeat the measure-settle-measure process. Also, check the shock linkage and swingarm bearings for wear or dryness. A binding bearing will throw everything off and is a safety issue.
Problem: Bike handles poorly even with “correct” sag.
- Likely Cause: Ride height is wrong, affecting steering geometry. Sag might be right, but the bike is too high or low overall.
- Fix: Consider how to lower a motorcycle or raise it via shock length. This is an advanced step. First, ensure your seat height isn’t the primary comfort issue.
If you’ve checked everything and the suspension still frequently bottoms harshly, the manual is clear: “If your fork is often overloaded (hard end stop on compression), you must fit harder springs to avoid damage to the fork and frame.” The same applies to the rear shock. No rear shock adjustment can save a spring that’s too weak.
Difference between front and rear sag setup
The process for setting sag differs between the front and rear because the suspension components work differently. For the rear shock, you measure both static sag and riding sag to determine if the spring rate is correct for your weight. If adjusting preload cannot bring the riding sag into the specified range, the spring itself is too hard or too soft and must be replaced. For various reasons, no exact riding sag can be determined for the forks. Front fork setup often relies more on adjusting spring preload to specific clicker settings, like Comfort or Sport, and ensuring the fork does not frequently bottom out, which would require harder springs.
Frequently Asked Questions
Should I set my shock sag standing or sitting?
You should be in your normal riding position, which for most bikes means sitting. Sit upright, feet on the pegs, hands on the bars or tank. This replicates the weight distribution when you’re riding straight. Standing would be for setting up a dedicated off-road bike where you stand most of the time.
How do you calculate sag on a motorcycle?
You don’t calculate it; you measure it. The formula is simple: Fully Extended Length (L1) minus Loaded Length (L2 or L3). L1 – L2 = Static Sag. L1 – L3 = Rider Sag. Use a tape measure and record in millimeters.
Is 30% sag too much?
The 30% rule is a generic starting point for rear suspension (e.g., 100mm of sag on 300mm of travel). Whether it’s “too much” depends entirely on your motorcycle’s manual. For a 2022 KTM 65 SX with 70mm of target rider sag, 30% would be wrong. Always defer to the OEM spec.
Do I need to adjust the front fork sag?
You should check it, but precise targets are rare. Use the zip-tie method to see how much travel you’re using at rest. The goal is to have the fork sitting in a reasonable portion of its travel. The main focus for the front is ensuring the spring rate is correct so you aren’t using excessive preload, which affects steering feel.
What if I ride with a passenger or luggage?
The Öhlins manual states: “When riding with a passenger or changing the load, the spring preload must be adjusted for proper function and vehicle balance.” Add preload to compensate for the extra weight, then re-check rider sag. For permanent changes, a stiffer spring might be needed.
Before You Go
One rule most guides skip: if your sag measurements are more than 5mm outside the manual’s target after a sincere preload adjustment, stop fiddling. You need a different spring rate. Buying a spring is cheaper than wrecking a shock body or living with handling that never feels right.
The whole process hinges on finding your bike’s real numbers. Don’t guess. Pull the owner’s manual. If it’s lost, the OEM manual PDFs are online, the sources for this article are all linked from official KTM and WP sites. Trust those numbers over any forum post or generic guide.
Set the sag first. Write down your baseline clicker settings. Then go ride one familiar road. That sequence, spec, measure, adjust, test, turns a vague art into a repeatable half-hour job. Your bike will tell you what it needs next.
