
How to Adjust a Motorcycle Rear Shock: Step-by-Step
This post contains affiliate links. As an Amazon Associate, we earn from qualifying purchases.
To adjust a motorcycle rear shock, follow this sequence: set spring preload for your weight and load, then adjust compression damping for bump absorption, and finally set rebound damping for wheel control after a bump. For most riders, setting the correct preload—measured as sag with the rider seated—makes a bigger difference than fine-tuning damping. Factory settings for models like the Buell S1 or Honda CRF450R provide a crucial baseline to start from.
The factory baseline matters because it’s the only reference point that isn’t a guess. Turning clickers randomly without it is how you end up with a bike that wallows in corners and kicks on bumps, feeling worse than before you started. Understanding how to adjust a motorcycle rear shock begins with this baseline.
What follows: the four safety steps you cannot skip, the real-world order of adjustments (preload, compression, rebound) for how to adjust a motorcycle rear shock, and the specific torque numbers and procedures from Buell, Honda, and Harley-Davidson service manuals that generic guides leave out.
Key Takeaways
- Manufacturers disagree on this procedure: Buell and Öhlins specify measuring and adjusting with the rider seated, while Honda specifies placing the motorcycle on a workstand with the rear wheel off the ground.
- Adjust only one setting at a time and take notes. Changing preload, compression, and rebound together makes it impossible to know what fixed or ruined the feel.
- Factory damping settings are your baseline. For a Buell S1, start at full damping minus 2.25 turns for compression and minus 1.5 turns for rebound.
- Torque values are not suggestions. The locknut on a Buell’s preload adjuster needs 65–72 ft-lbs, while a Honda CRF450R’s shock spring locknut is 32 ft-lbs. A cross-threaded locknut is a stripped shock body.
- If preload is wrong, damping adjustments won’t fix it. A shock with too little preload will use up its travel too easily, making any compression or rebound setting feel harsh and ineffective.
The 4 Non-Negotiable Safety Steps (Before You Touch a Clicker)
Before you start: The shock absorber contains high-pressure nitrogen gas. Puncture or attempting to disassemble it can cause an explosion. Service or disposal should only be done by a dealer or qualified mechanic with the proper tools and safety equipment. This is not a liability disclaimer; it’s from the Honda CRF450R owner’s manual.
Your first move isn’t grabbing a spanner. It’s making the bike and the workspace safe. A motorcycle falling off a stand or a shock unexpectedly unloading can break bones as easily as bike parts.
- Support the motorcycle securely. Use a dedicated rear stand or a lift. For Harley-Davidson Softail models, the manual explicitly warns to support the rear wheel when removing shocks, as the rear fork can drop down. A simple screw jack under the wheel is the specified method.
- Let the bike cool completely. If you need to remove an exhaust component for access—common on dirt bikes like the Honda CRF series—the engine must be cold. A burnt hand can’t hold a torque wrench.
- Gather the right tools. You need more than a wrench. For most adjustments, you’ll require a C-spanner or pin spanner for the shock spring locknut, a torque wrench, and a tape measure. For Harley Softails, the service manual calls out a specific Snap-on Tool Co. Adapter, Part Number SRES 24, to access the shock bolts. Using the wrong tool rounds fasteners and costs more than the right tool.
- Check the linkage and bushings. Before adjusting anything, push and pull on the rear wheel side-to-side. Any clunk or lateral play isn’t a damping issue—it’s a worn linkage or swingarm pivot bearing. Adjusting a shock with seized or sloppy linkage is like tuning a guitar with broken strings.
Skip any of these, and you’re not tuning suspension. You’re risking injury while fiddling with a dangerous, unstable object.
Step 1: Set Preload (The Foundation)
This is the most important adjustment and the one most owners get wrong. Preload doesn’t make the spring stiffer; it sets the starting position of the spring so the shock sits in the correct part of its travel when you’re on the bike.
The spring preload is fundamental for the suspension function. If the preload is incorrectly set, any other adjustments will not help to get the intended performance. Öhlins Motorcycle Shock Absorber Manual
Here is where the manuals disagree, and following the wrong one guarantees a poor setup.
For street motorcycles (Buell, Harley, Öhlins-equipped bikes): Measure and adjust with the rider seated. The Buell service instruction is unambiguous: “Measurements should be made with rider seated on motorcycle.” Their optimum preload measurement for 1995-2000 models is 15.2-15.5 in (386-394 mm) with the rider seated.
For off-road motorcycles (Honda CRF models): Adjust with the bike on a stand, wheel off the ground. The Honda CRF450R manual states: “Place your motorcycle on a workstand or equivalent support with the rear wheel off the ground.”
| Bike Type | Procedure | Key Manual Reference |
|---|---|---|
| Street (Buell, Harley) | Measure & adjust WITH rider seated. | Buell SIP Document |
| Off-Road (Honda CRF) | Adjust on stand, wheel unloaded. | Honda CRF450R Owner’s Manual |
| Aftermarket (Öhlins) | Measure & adjust WITH rider seated. | Öhlins DTC Manual |
How to adjust preload:
- Loosen the locknut on the shock body.
- Turn the adjusting ring or collar. Clockwise typically increases preload (raises ride height for heavier loads). Counter-clockwise decreases it.
- For precise changes, know your bike’s increment. On a Honda CRF450R, one full turn of the adjusting nut changes spring length by 0.06 inches and preload by 18 lbf.
- Once set, hold the adjuster and torque the locknut. This is critical. For a Buell, torque the preload adjuster locknut to 65–72 ft-lbs (88-98 Nm). For a Honda CRF450R or CRF250R, torque the shock spring locknut to 32 lbf·ft (44 N·m).
Common mistake: Overtightening or cross-threading the aluminum locknut on the shock body. Apply wheel bearing grease halfway around the shock (180 degrees) to the mating faces of the locknut and adjuster nut and to the first few threads (as specified in the Buell manual) to prevent galling. Do not skip this.
If you cannot achieve the correct sag within the shock’s preload range while learning how to adjust a motorcycle rear shock, you may need a different spring rate. No amount of damping adjustment will compensate for a spring that is too soft or too stiff for your weight.
Step 2: Adjust Compression Damping
Compression damping controls how fast the shock compresses when it hits a bump. Think of it as the “inbound” resistance.
Compression damping controls the energy absorption when the shock absorber is being compressed. Öhlins Motorcycle Shock Absorber Manual
Start at the factory baseline. This is not a vague “middle setting.” It’s a specific count from full hard.
- For a Buell S1, S1W, M2, or X1: Set compression to full damping minus 2.25 turns.
- For a Buell S2, S2T, S3, or S3T: Set compression to full damping minus 2.5 turns.
To find “full hard,” gently turn the clicker or screw clockwise until it stops. Do not force it. Then, count the specified number of turns counter-clockwise. Make a note of this position.
Symptoms and fixes:
- If the ride is harsh, jarring over small bumps: The compression damping is likely too high (too hard). Turn the adjuster counter-clockwise (out) in 1/4-turn increments.
- If the bike dives excessively under braking or feels mushy: The compression damping is likely too low (too soft). Turn the adjuster clockwise (in) in 1/4-turn increments.
Test after every two clicks. The change should be subtle. If you need to go more than a full turn from the factory baseline to feel a difference, double-check your preload.
Step 3: Adjust Rebound Damping
Rebound damping controls how fast the shock extends back to its normal length after being compressed. This is the “outbound” speed. Get this wrong, and the bike will feel unstable.
Rebound damping controls the energy absorption when the shock absorber is being extended. Öhlins Motorcycle Shock Absorber Manual
Again, start at the factory setting. It’s different from compression.
- For a Buell S1, S1W, M2, or X1: Set rebound to full damping minus 1.5 turns.
- For a Buell S2, S2T, S3, or S3T: Set rebound to full damping minus 1 turn.
Diagnosing rebound issues is about timing. After hitting a sharp bump:
- If the rear end “pogo-sticks” or bounces multiple times: Rebound is too fast (too soft). Increase damping by turning the adjuster clockwise.
- If the rear end “packs down” and feels like it’s not returning, making successive bumps feel worse: Rebound is too slow (too hard). Decrease damping by turning the adjuster counter-clockwise.
Rebound is the fine-tuning adjustment. Set your preload correctly first, then get compression in the ballpark, and finally use rebound to calm the wheel down. Understand the relationship between preload and damping.
Tools You Actually Need (Not a Marketing List)
You do not need a full mechanic’s set. You need four specific tools to do the job without damaging your shock. A stripped locknut means a full shock replacement.
| Tool | Purpose | Critical Note |
|---|---|---|
| C-Spanner / Pin Spanner | To hold and turn the shock spring locknut and adjuster. | The Honda manual specifies “optional pin spanners” for this job. Do not use a screwdriver and hammer. |
| Torque Wrench | To correctly tighten locknuts and mounting hardware. | Must be calibrated. Guessing torque strips threads. |
| Crow’s Foot Adapter (if needed) | To access recessed locknuts. | If used, it must be set at a 90-degree angle to the torque wrench to prevent torque multiplication (per Buell manual). |
| Tape Measure | To measure sag and spring length. | Use a flexible, non-metallic tailor’s tape for accuracy. |
For a complete suspension setup, you’d add more, but these four handle the shock alone. If you’re considering lowering a motorcycle, these are the same tools you’d use to adjust the preload collar on lowering shocks.
Torque Specs: The Numbers That Prevent Failures
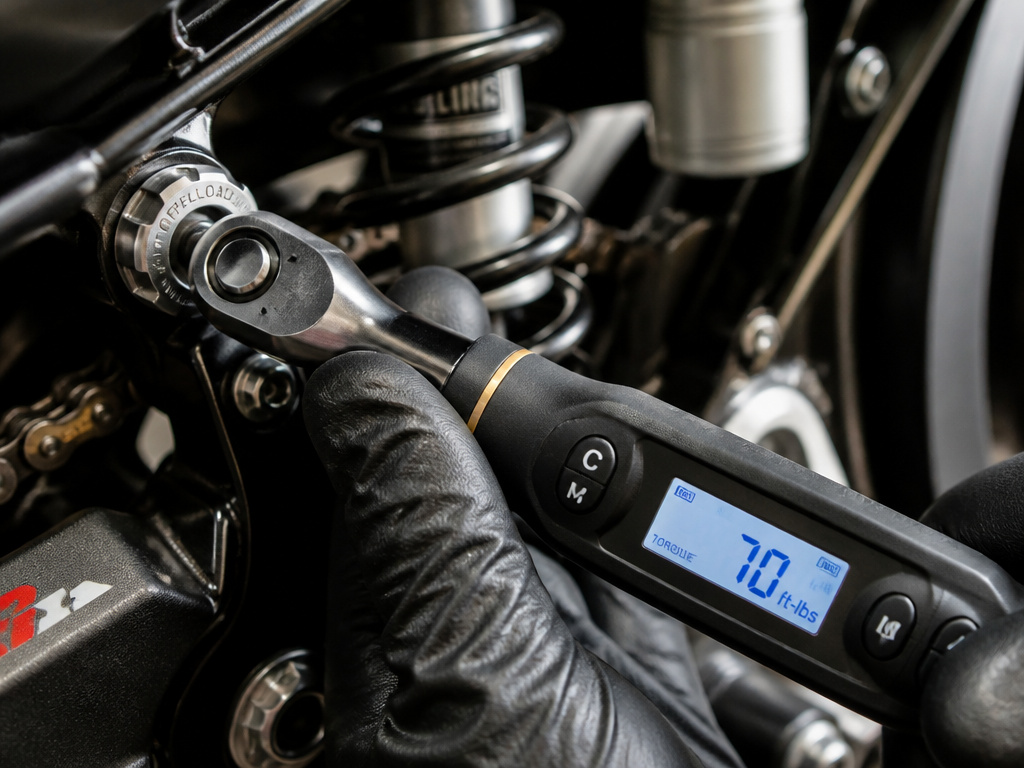
These are not guidelines. They are engineering specifications from the manufacturer’s service documents. Using them prevents the shock from coming loose or the mounting points from failing.
| Application | Torque Specification | Source |
|---|---|---|
| Buell Front Shock Mounting Bolt (1995-2000) | 40–45 ft-lbs (54.2–61.0 Nm) | Buell SIP Document |
| Buell Rear Shock Mounting Nut (Steel Swingarm, 1995-1998) | 40–45 ft-lbs (54.2–61 Nm) | Buell SIP Document |
| Buell Rear Shock Mounting Nut (Aluminum Swingarm, 1999-2000) | 30–33 ft-lbs (41–45 Nm) | Buell SIP Document |
| Buell Preload Adjuster Locknut | 65–72 ft-lbs (88–98 Nm) | Buell SIP Document |
| Honda CRF Shock Spring Locknut (CRF450R/CRF250R) | 32 lbf·ft (44 N·m) | Honda Owner’s Manuals |
| Harley Softail Shock Mounting Bolt (Profile Low Kit) | 115–130 ft-lbs (156–176 N·m) | Harley-Davidson Instructions |
| Harley Softail Flanged Nut (Profile Low Kit) | 32–39 ft-lbs (43.4–52.9 N·m) | Harley-Davidson Instructions |
Notice the Buell spec changes based on the swingarm material. Using the steel-swingarm torque on an aluminum one risks damaging the threads. This is the detail a generic article never provides.
When Adjustment Isn’t Enough: Diagnosing a Worn-Out Shock
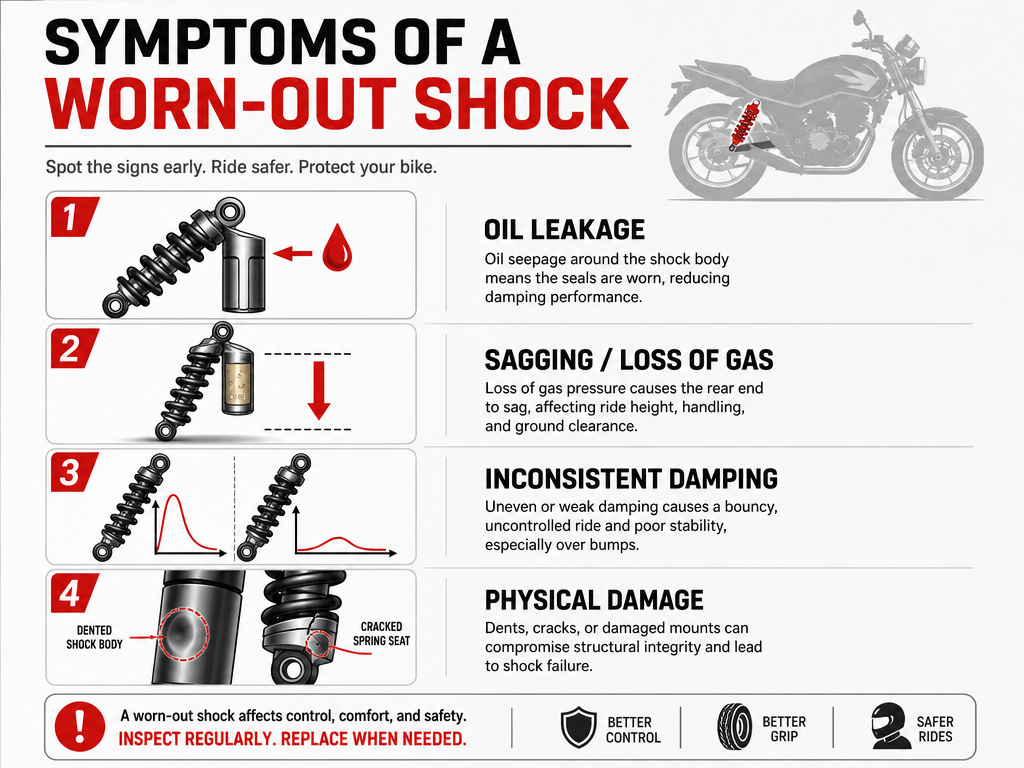
You can turn clickers all day, but you can’t adjust away physical wear. If your bike exhibits these symptoms even after a correct suspension setup, the shock may be finished.
- Oil Leak: Any visible oil on the shock body or spring is a definitive failure. The internal seals are gone.
- Nitrogen Loss: If the shock feels incredibly harsh over small bumps and the bike sits lower than normal, the gas charge has likely leaked. This often requires specialist service.
- Inconsistent Damping: The damping feels different on the left and right side of the same bump, or it changes drastically as the shock heats up.
- Physical Damage: Dents in the shock body, a bent shaft, or a cracked spring seat mean replacement, not adjustment.
At this point, it’s time to research best motorcycle shocks for a replacement. Throwing adjustment at a broken component is a waste of time.
How to Set Motorcycle Sag
Setting sag is the first and most critical adjustment. Always adjust both shocks equally, the same number of turns, to maintain balance.
How to Record Shock Settings
Always keep a written log of your adjustments. Start by noting the manufacturer’s recommended baseline settings, like the factory damping turns specified for various Buell models. When you make a change, write down the exact adjustment, such as ‘increased preload by one full turn’ or ‘softened compression damping by half a turn.’ Take notes, adjust in small steps, and make only one adjustment at a time. Record the date and the riding conditions you were trying to improve. This log prevents you from getting lost and allows you to return to a known good setup if a change makes handling worse.
Frequently Asked Questions
How do I adjust the rear shock on my motorcycle?
Follow the sequence: safety first (support bike, cool engine), set spring preload for your weight and load, then adjust compression damping, and finally fine-tune rebound damping. Always start from the manufacturer’s baseline settings, which are often a specific number of turns out from full hard, not just a “middle” position.
What is the 12 second rule on a motorcycle?
The “12-second rule” is not a standard suspension term. It may be a misunderstanding of a 12 o’clock position on a spanner or a reference to a specific technique. For shock adjustment, the relevant rule is the one-adjustment-at-a-time rule: change only one clicker setting, then test ride before changing another.
How do you adjust your rear shock without a spanner?
You should not adjust the rear shock without the proper spanner. Using improvised tools like screwdrivers and hammers will mar the soft aluminum adjuster collars and locknuts, making future adjustments impossible and potentially damaging the shock body. A C-spanner or pin spanner is a required tool for the job.
How to tell if a motorcycle suspension is too soft?
If the suspension is too soft, it will use up too much of its travel easily, leading to the bike bottoming out over bumps or under hard braking, feeling vague or wallowy in corners, and having excessive sag even with preload maxed out. The fix is usually a stiffer spring, not more damping.
Should both shocks be adjusted equally?
Yes, absolutely. On dual-shock motorcycles, both shock absorber adjuster plates must be adjusted to the same length. The Harley-Davidson Softail manual warns that unequal spring adjustment may result in erratic handling and loss of control. Always adjust both sides the same number of turns.
Before You Go
Set your suspension sag correctly first. That single step, done with you in the riding position, fixes more handling problems than any other adjustment. If you get nothing else from this guide, get that.
Then, understand the relationship between compression and rebound damping. They work as a pair. A change to one often requires a small tweak to the other to keep the wheel controlled.
Finally, write your settings down. Factory baseline, your final clicker positions, and the sag measurement. A note in your phone or under the seat is all it takes. You’ll need them the next time you change riding conditions, add a passenger, or simply want to know how to get back to a setup that worked.
