
Motorcycle Preload vs Damping: Key Differences Explained
This post contains affiliate links. As an Amazon Associate, we earn from qualifying purchases.
Preload sets the motorcycle’s ride height and sag for your weight; damping controls how fast the suspension compresses over a bump and rebounds afterward. You set preload first, by adjusting the spring collar until the unladen and laden sag measurements match the manufacturer’s spec. Then you fine-tune damping, using rebound to control kickback and compression to manage bottoming, adjusting in small steps.
The two adjusters do different jobs, but the front and rear ends have to match each other. An inch too high at the rear leans the bike forward, loads the front tire, and makes it twitchy on corner entry. Understanding motorcycle preload vs damping is key. Set preload wrong, and the damping tuning you just spent a weekend on feels like you broke something.
What follows is the sequence every factory manual hides at step five: measure sag first, find the preload for your actual weight, then adjust damping one click at a time with notes. There are exactly two times you should stop and pay a professional: when the spring is too soft or stiff for your weight, a change no preload adjustment can fix, or when you suspect the oil is shot.
Key Takeaways
- Set static sag first, adjust preload until unladen sag is 25-35% of total travel. Skipping this makes correct damping impossible.
- Rebound damping controls kickback; symptoms of too much rebound include skipping over bumps, while too little makes the bike feel loose.
- Compression damping controls bottoming; too much makes the ride harsh on small bumps, too little lets the bike dive under braking.
- Always adjust damping in small steps; Öhlins’ R&T manual warns not to change more than four clicks at a time, while Öhlins’ DTC manual recommends staying within ±5 clicks from baseline.
- Preload does not stiffen the spring; it only raises the ride height. A too-soft spring will still bottom out even with max preload, requiring a spring swap.
What Is Preload and How Does It Work?
Preload moves the spring seat. It’s the difference between the spring’s free length and its installed length when the shock is fully extended, expressed as a measurement or a number of turns on a collar.
Spring preload is a crucial part of setting your motorcycle since it affects the height of the motorcycle and the fork angle. When riding with a passenger or changing the load, the spring preload must be adjusted for proper function and vehicle balance., Öhlins DTC Manual
That initial force determines where the bike sits at rest, its static ride height, and consequently, how much suspension travel is used up before you even get on. The goal is to set the correct sag: the amount the bike settles under its own weight and the rider’s. Many manufacturers provide a target range for laden sag. Preload gets you there.
When you compare a motorcycle preload vs damping, where people get sideways is thinking preload makes the spring stiffer. It does not. It just changes the starting point. A soft spring with max preload will still bottom out over a big bump; it just does it from a higher starting height. The only cure for that is a stiffer spring rate.
What Is Damping and How Does It Work?
Damping is the shock absorber’s job. It controls the speed at which the spring compresses and rebounds. A spring without a damper would bounce uncontrollably like a pogo stick.
Compression damping resists the shock as it shortens, when you hit a bump. Rebound damping resists the shock as it extends, after the bump is passed. Adjusters, usually clickers or screws, vary the size of an orifice inside the damper, controlling oil flow. More clicks closed (harder) slows the movement; fewer clicks open (softer) speeds it up.
Some higher-end systems use a sub-piston system with separate compression and rebound valves that can be changed individually for more precise control over different impact speeds.
Manufacturers provide baseline settings, often as a number of clicks from fully closed. Öhlins’ DTC manual states the recommended adjustment range for rebound and compression damping is ±5 clicks from original (basic) setting. Their R&T manual is more conservative: do not adjust more than four [4] clicks at a time.
Harley-Davidson takes a different approach, providing complete tables that map clicks from minimum to specific rider weights and passenger loads for models like the Softail.
Symptoms of Incorrect Preload and Damping
You feel these long before you see them. A preload problem shows up as a geometry shift; a damping problem reveals itself in how the bike reacts to road texture.
Too Much or Too Little Preload
Too little preload means too much laden sag. The bike sits low, using too much of its travel just standing there. The steering feels slow and heavy, and the bike might wallow in corners. Under hard acceleration, the rear squats excessively, unweighting the front end.
Too much preload means too little laden sag. The bike rides high, feeling stiff and transmitting every small bump directly to you. It can make the front end feel light and vague, especially during corner entry. Harley-Davidson explicitly warns that adjusting both shock absorbers equally is critical, as improper adjustment can adversely affect stability and handling.
Where this goes sideways: Setting preload by “feel” without measuring sag. You’ll chase damping problems for weeks that are actually a ride-height issue, and the bike will never handle right.
Incorrect Rebound Damping
Too much rebound (too slow): The shock can’t extend fast enough to follow the road. After one bump, it stays compressed, “packing down” over successive bumps. The ride gets progressively harsher, and the bike feels like it’s skipping over the pavement instead of tracking it. You lose traction.
Too little rebound (too fast): The shock extends too quickly, causing the bike to “kick back” or feel loose after a bump. The rear can feel like it’s trying to overtake the front on corner exits. The bike lacks control and feels busy.
Incorrect Compression Damping
Too much compression (too hard): Small bumps feel sharp and harsh. The suspension doesn’t use its initial travel, making the ride uncomfortably stiff. You might feel vibrations in the handlebars that weren’t there before.
Too little compression (too soft): The bike dives excessively under braking and wallows in corners. It can bottom out easily on larger impacts, sending a solid thunk through the chassis.
How to Adjust Preload and Damping Safely
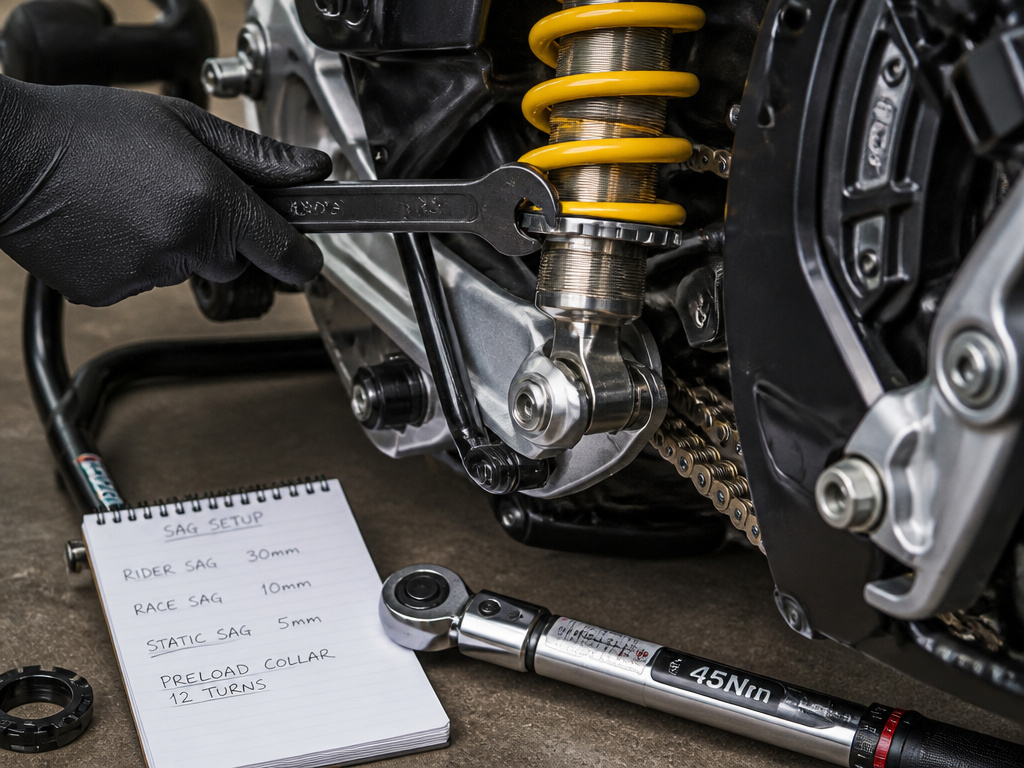
Follow this order. Changing two things at once guarantees you won’t know which one fixed the problem.
Before You Start: Tools and Safety
You’ll need a few things, and a warning.
- Tools: A work stand to lift the rear wheel, a tape measure or caliper, a helper, and the right wrench. Many shocks require a C-spanner for the spring collar; Öhlins specifies a tightening torque for the spring platform lock nut of 40–50Nm.
- A helper to hold the bike upright and take measurements.
- A notepad. Write everything down. Öhlins’ first warning is “Take notes, adjust in small steps and make only one adjustment at a time.”
Before you start: Never adjust preload with the wheels on the ground and the suspension loaded. Öhlins warns this risks damage to suspension parts and personal injury. Always raise the vehicle so the wheels are off the ground. And never force an adjuster. Harley-Davidson cautions that compression and rebound adjusting valves may be damaged if too much force is used at either end of the adjustment range.
Step 1: Set Static and Laden Sag
This is the essential first step. All damping tuning assumes your sag is correct.
- Measure Total Travel: With the bike on the stand and wheel off the ground, measure from the axle to a fixed point on the chassis (like the fender). Mark it. Push down on the bike to fully compress the suspension and measure again. The difference is total travel.
- Measure Unladen Sag: With the bike still on the stand, take your first measurement (A). Have your helper gently lower the bike to the ground and hold it upright, balanced but without leaning on it. You get on in full riding gear and sit in your normal riding position. Have your helper take the second measurement (B). The difference (A – B) is your laden sag.
- Adjust Preload: Aim for laden sag to be 25–35% of total travel. If sag is too small (bike rides high), decrease preload (turn the collar counter-clockwise). If sag is too large (bike sits low), increase preload (clockwise). Re-measure after each adjustment.
Many OEMs provide tables to skip the math. Harley-Davidson’s service info gives specific preload tables specifying full turns of knob based on rider weight and additional weight of passenger/cargo. For a rider weighing 86–95 kg (190–210 lb) on a specific Softail model, the manual presets 7 clicks from minimum for the rear shock.
Step 2: Fine-Tune Damping
With sag set, now adjust damping. Start with the factory baseline. For Öhlins, that’s the “basic setting” they ship with. For Harley-Davidson, it’s the “Standard” mode settings in their tables (e.g., Compression 1.5, Rebound 1 for the rear shock).
- Find a Test Loop: Pick a short, familiar route with a mix of conditions, smooth pavement, sharp bumps, long corners. You’ll ride this loop repeatedly.
- Adjust One Thing: Start with rebound. Ride the loop, then adjust no more than two clicks. Ride the same loop again. Does it feel better or worse? Note it.
- Listen for the Click: Most clickers have distinct, tactile clicks. If you don’t feel them, stop. Harley-Davidson warns: Do not force adjusters beyond mechanical stops.
- Check Compression: Once rebound feels controlled, no kicking or packing, repeat the process for compression damping.
The goal isn’t perfection on one road; it’s a compromise that feels safe and predictable everywhere. As Öhlins puts it: “there are no setups that will be 100% perfect on all tracks, you will need to compromise.”
When Preload Isn’t Enough: Springs and Service
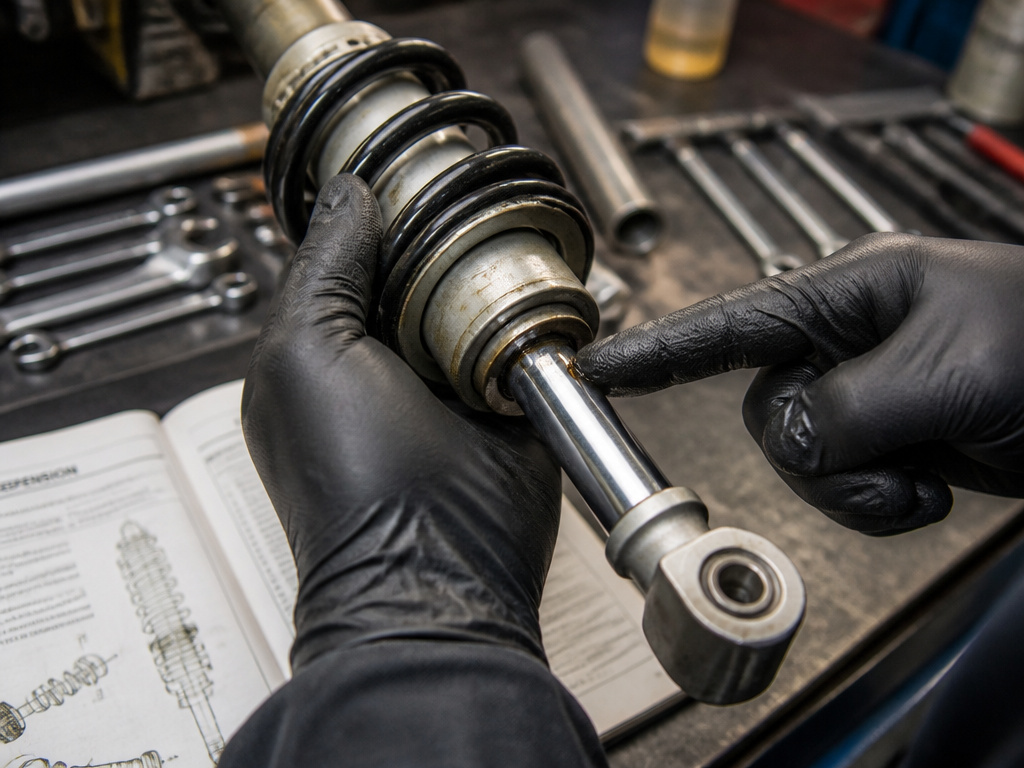
Sometimes, the adjustment range isn’t the problem. The parts are.
The spring is wrong for your weight. If you’re at the maximum preload and still have too much sag (or at minimum and too little), the spring rate is incorrect. No amount of preload will fix it. Sources disagree on compensating for large weight differences: the WP/KTM manual notes that for large differences the springs must be replaced, while Harley-Davidson’s approach uses preload tables for a wide range of rider and passenger/cargo weights. This is a job for a suspension shop.
The shock needs service. Damping fade, inconsistent behavior, or oil leaks mean it’s time. Service intervals vary by use:
- Nitron for road use: Every 12,000 – 18,000 miles (20,000 – 30,000 km) or 2 years. For race use: Every 10-15 hours or 1 year.
When servicing, use only approved fluids and cleaners. Nitron explicitly warns: Never use strong detergents, thinners or brake cleaner as they can damage the surface finish of the shock and seals.
Preload vs Damping on Different Bike Types
The principles are universal, but the priorities shift with the machine.
| Bike Type | Preload Priority | Damping Priority | Common Tool |
|---|---|---|---|
| Cruiser (Harley-Davidson) | High – often has detailed passenger/cargo tables. | Low to Medium – focus on comfort. | Spanner wrench or indexed knob. |
| Sportbike (Honda CBR1000RR) | Critical – precise sag affects cornering geometry. | High – control during aggressive riding. | C-spanner, often with ride-height adjuster. |
| Adventure Tourer | Very High – compensates for huge load variations. | High – must handle both highway and off-road. | C-spanner, hydraulic preload adjuster (e.g., Nitron HPA). |
| Standard/Naked | Medium – set for rider weight. | Medium – balanced for street comfort. | C-spanner or screwdriver-adjustable collar. |
Cruisers like Harleys lean heavily on preload to manage varying loads, providing specific preload dot tables based on rider and passenger weight. Sportbikes demand precise sag for cornering, making the initial measurement paramount. Modern sport and adventure bikes may feature electronic systems like Honda’s, which automatically adjust compression and rebound damping levels according to current vehicle conditions and rider weight setting, but even these require you to adjust the front and rear suspension preload manually.
How to Tell If Your Compression Damping Is Wrong
If your compression damping is set too soft, the suspension will feel vague and wallowy, diving excessively under braking and squatting heavily during acceleration. You’ll feel sharp impacts from bumps and potholes transmit harshly through the chassis. If the damping is set too stiff, the fork or shock cannot react quickly to road imperfections, making the bike feel skittish and prone to skipping over bumps, which reduces tire contact and stability. Always make damping adjustments in small increments, and avoid forcing the adjusters beyond their mechanical stops to prevent damage.
Frequently Asked Questions
What happens if preload is too high?
The bike rides high, reducing laden sag. This makes the ride harsh over small bumps, can lighten the front end making steering vague, and reduces available suspension travel for impacts. It also negatively affects stability.
What does too much rebound damping feel like?
The bike will feel like it’s “packing down.” Over a series of bumps, the shock doesn’t have time to rebound fully, so it slowly uses up more and more travel until it rides harshly on the bump stops. Traction suffers.
Can I adjust damping without setting sag first?
You can, but you shouldn’t. Damping controls the speed of movement around a set ride height. If that height (set by sag/preload) is wrong, you’re tuning the damping for the wrong part of the suspension’s travel. The result will never feel right.
How often should I service my motorcycle shocks?
It depends on use. For typical street riding, refer to manufacturer guidelines; for example, Nitron recommends service every 12,000 – 18,000 miles (20,000 – 30,000 km) or 2 years for road use. For intensive track or off-road use, service intervals shrink significantly; for example, Nitron recommends service every 10-15 hours or 1 year for race and track use.
What’s the difference between preload on a shock and fork?
The function is identical, to set ride height and sag. The adjustment mechanism is often different. Shocks typically use a collar (C-spanner) or hydraulic knob. Forks often use a screw or cap on top of the fork tube that compresses the spring internally. The procedure for measuring and setting fork sag is the same.
The Bottom Line
Set the sag first, with the bike on a stand and a tape measure in hand. That single step fixes more handling complaints than any magic clicker setting. If your sag is in the 25–35% range and the bike still feels off, then move to damping, one click at a time, with notes.
Remember the limits. Preload doesn’t fix a spring that’s too soft or stiff. Damping adjustments have a safe range, staying within ±5 clicks of baseline is recommended. If you’re outside those bounds and the bike isn’t happy, the solution isn’t more tweaking. It’s a spring swap or a professional service.
Ride the same test loop after every change. Your backside is a better gauge than any forum opinion. When it feels predictable and controlled, stop adjusting. Go ride.
