
How to Ride a Dirt Bike for Beginners: Step-by-Step
This post contains affiliate links. As an Amazon Associate, we earn from qualifying purchases.
To ride a dirt bike as a beginner, you need full protective gear, a safe practice area, and a focus on three core skills: finding the clutch’s friction zone, using both brakes smoothly, and maintaining a balanced, active riding position. The primary goal is building slow, repeatable control before anything else.
That control starts with your body, not the bike. Gripping the bars tightly and sitting down on rough terrain fights the machine. Learning to stand on the pegs and let your legs absorb impacts is the single most important skill for off-road comfort and stability, and it’s a core part of how to ride a dirt bike for beginners. It feels unnatural at first, which is why everyone wants to sit.
What follows is a step-by-step walkthrough of everything you do before you twist the throttle, central to how to ride a dirt bike for beginners: gearing up, learning the controls, starting the bike, and practicing those first few feet of movement. We’ll also cover how to find a legal place to ride and what to practice after you can reliably start, stop, and turn.
Key Takeaways
- Read your owner’s manual first. The U.S. Army Combat Readiness Center stresses this, your bike’s specific starting procedure and maintenance schedule are in there.
- Invest in boots and a helmet. A motocross or adventure boot that covers and supports the ankle and shin is recommended. A properly fitted helmet with a current safety rating is essential.
- Practice the clutch’s friction zone with the engine off. This is the fine control point where the bike starts to move; finding it by feel prevents stalls and lurches when you’re learning.
- Find legal land to ride. Your motorcycle dealer, local off-highway clubs, or the Bureau of Land Management can point you to approved areas, avoiding fines and trespassing.
- Plan for an oil change every 8 hours. Dirt bike engines work hard; one blog’s maintenance guide notes this short interval, which is much more frequent than a street bike.
Gear Up: Your Non-Negotiable Safety Kit
You can’t practice effectively if you’re scared of getting hurt. The right gear is about having the confidence to tip over, dust yourself off, and try again.
A helmet is the obvious start. Fit is everything. A well-fitted mid-priced helmet with a proper safety rating beats a poorly fitted flagship model every time. It should be snug without pressure points; your cheeks should move slightly if you try to rotate the helmet with your hands. Next are boots. Street-style ankle boots are a false economy. You need a motocross or adventure boot that covers and supports the ankle and shin. The difference isn’t just about crashes; a stiff sole gives you a stable platform on the pegs and protects your foot from impact with rocks and roots.
Common mistake: Skimping on boots for “just practicing.” A slow parking-lot drop can bruise an ankle for a week if it’s unsupported.
Round out your kit with goggles (they keep dust and debris out of your eyes, unlike sunglasses), durable gloves, long sleeves, and pants. Knee guards and a chest protector are wise early investments. This is a prerequisite, not a fashion show. For a full breakdown of what to look for, see our guide on choosing essential gear for beginners.
The Pre-Ride Setup: Controls and Safety Check
Before you even think about starting the engine, you need to know what every control does and make sure the bike is ready. Sit on the bike while it’s off. Get comfortable.
Your left hand operates the clutch lever. Pull it in to disengage the clutch (this separates the engine from the rear wheel, allowing you to shift gears or start moving without stalling). Your right hand operates the front brake lever and the throttle. Twist the throttle toward you to increase engine speed. Your right foot operates the rear brake pedal. Your left foot operates the gear shifter. Rock the bike back and forth with the clutch lever pulled in to feel how the shifter clicks between gears.
The clutch lever is the most important control for a beginner. Pulling it in fully disconnects the engine from the transmission, allowing you to start the bike, shift gears, or come to a stop without stalling. Releasing it smoothly is the key to moving forward.
Now, do a quick safety check. Look for loose bolts, check tire pressure (one source notes dirt bike tires generally need less than 15 psi for better grip on loose surfaces), ensure the chain has some slack and is lubricated, and verify the throttle snaps back closed when released. This two-minute check is how you catch a simple problem before it leaves you stranded. If you’re moving from street riding, our guide to universal motorcycle controls covers these in more detail.
Starting the Bike and Your First Moves
With gear on and controls mapped, you’re ready to start. Find a flat, open area free of obstacles, a grassy field or empty dirt lot is ideal.
First, ensure the bike is in neutral. You can usually tell by rocking it back and forth; if it rolls freely with the clutch out, it’s in neutral. Many bikes have a neutral indicator light. Pull the clutch lever in all the way (a standard step, even in neutral). Turn the fuel valve on, and if there’s a key, turn it to the “on” position. Now, start the engine. Most beginner bikes are kick-start: stand on the left side, push the kickstarter lever down firmly with your foot. Electric-start bikes have a button. The engine should idle.
| Step | Action | Why It Matters |
|---|---|---|
| 1. Find Neutral | Rock bike with clutch out; look for green light. | Prevents the bike from lurching forward when started. |
| 2. Pull Clutch In | Pull left lever fully to the handlebar. | Engages safety switch (if equipped) and is a good habit. |
| 3. Start Engine | Use kickstarter or electric start button. | Get the motor running and idling smoothly. |
| 4. Shift to First | With clutch STILL IN, press down firmly on the shifter with your left foot. | Puts the bike in gear, ready to move. You’ll feel a solid click. |
The bike is now in first gear, engine running, clutch pulled in. You are in control. To move, very slowly release the clutch lever. You’ll feel the engine note change and the bike will start to creep forward, this is the “friction zone.” The moment it moves, pull the clutch back in slightly. Practice this creep-and-pause motion for ten feet. Your goal is to walk the bike along with your feet on the ground, using only the clutch, no throttle. This builds the muscle memory for smooth starts. For a dedicated deep dive on this fundamental skill, read our article on mastering motorcycle clutch control.
Mastering the Clutch: The “Friction Zone”

This is the make-or-break skill. The friction zone is the small portion of the clutch lever’s travel where the engine’s power begins to transfer to the rear wheel. Finding it consistently stops the bike from stalling or leaping out from under you.
Here’s how to drill it without the pressure of riding:
- With the bike on a stand or with a friend steadying it, start the engine and pull in the clutch.
- Shift into first gear.
- Slowly release the clutch lever until you hear/feel the engine RPM dip slightly and the bike strains against the stand. That’s the friction zone.
- Pull the clutch back in. Repeat ten times.
Your brain needs to map that exact lever position. When you’re ready to practice moving, add a tiny bit of throttle (a steady, gentle twist) as you reach the friction zone. The bike will accelerate smoothly. To stop, pull the clutch all the way in and gently apply both brakes. This practice for mastering clutch control is the single best use of your first 30 minutes when learning how to ride a dirt bike for beginners.
Basic Riding Techniques: Braking, Turning, and Stance
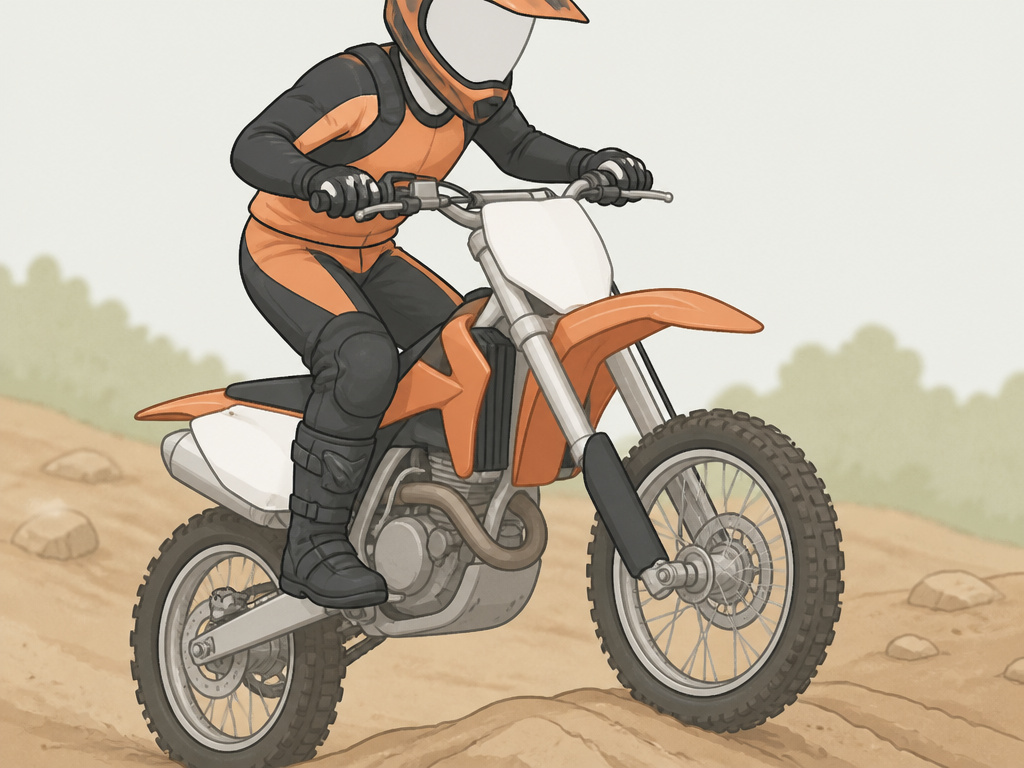
Once you can start and stop in a straight line, connect those moves with turning. Look where you want to go, your head and shoulders should turn first, and the bike will follow. For slow, tight turns, you can even drop a foot out slightly for balance, keeping your leg straight and foot pointed up to avoid catching the ground.
Braking is not a panic move. Use both brakes together, with slightly more emphasis on the front brake as it provides most of the stopping power. Apply pressure smoothly and progressively. Jerky braking, especially on loose dirt, will lock a wheel and cause a skid. Practice stopping from a slow walk, then a slow ride. Good technique for using both brakes is a core street skill that translates directly to the dirt.
Now, get off the seat. The standing position is your key to handling bumps and maintaining control. Grip the bike with your knees, keep your back relatively straight, and bend your elbows and knees. Your legs act as secondary suspension. This technique for standing on the pegs feels awkward at first but soon becomes natural. Practice riding over small bumps and dips while standing. It gives you far more control than sitting.
Finding a Place to Ride and Practicing Safely
You can’t practice in your backyard or a random vacant lot. Riding on unauthorized land is trespassing, gives riders a bad name, and can get your bike impounded. You need legitimate space.
The U.S. Army Combat Readiness Center guide lists practical sources: your local motorcycle dealer, off-highway motorcycle clubs, state maps, the American Motorcyclist Association (AMA) Trail Riding Guide, the U.S. Forest Service, and the Bureau of Land Management. A quick online search for “[your state] OHV (Off-Highway Vehicle) areas” or “motocross tracks near me” will yield results. Many tracks have beginner-friendly practice days.
Where this goes sideways: Assuming any open field is fair game. Landowners and rangers patrol, and fines are steep. The riding community’s access depends on our respect for these rules.
Once you have a spot, don’t just ride aimlessly. Set up simple drills. Use cones or sticks to mark a large rectangle and practice figure-eights, working on smooth clutch control and looking through the turns. Set up a straight line and practice accelerating smoothly to a point, then braking to a complete stop. As you improve, seek out gentle, beginner-rated trails. The goal is progressive overload, slightly challenging yourself each time.
Maintenance and Mindset
A dirt bike is a high-strung machine. One blog’s maintenance guide states they need an oil change every 8 hours of riding. Check your owner’s manual for the exact interval for your model. Clean the air filter regularly, keep the chain lubricated and adjusted, and check spoke tension and tire pressure before every ride. Neglect leads to breakdowns, often miles from your truck.
The right mindset matters as much as maintenance. You will tip over. You will stall. Everyone does. The trick is to start so slow that any tip-over is just a gentle laydown. Wear your gear, laugh it off, and pick the bike up. If you feel frustrated, take a break. Riding tired or angry is when mistakes happen. Consider taking a formal course. Professional instruction is available (www.dirtbikeschool.com or 877.288.7093) and can shortcut weeks of struggling on your own.
Cost and financial considerations
Beyond the initial purchase, you will have ongoing costs to keep your bike running safely. Regular maintenance is a key part of ownership. For example, the engine oil needs to be changed at regular intervals to protect the motor. Your tires also require attention, as running them at the correct pressure is crucial for control and traction on different surfaces. Budget for protective gear as a required upfront cost, and consider joining a club or association, as they can be good sources for finding affordable places to ride and for learning about local rules.
Riding with others or in groups
Riding with more experienced riders is one of the best ways to learn. Have an experienced rider or professional instructor assist you as you practice new skills. They can show you proper techniques, like how to lean the bike into a turn or how to use your brakes smoothly for the terrain. When riding in a group, maintain a safe distance and communicate clearly. Be especially cautious on shared trail features like banked turns, and avoid riding near the top edge of any berm as it might collapse. Local motorcycle clubs can be excellent for finding group rides and learning trail etiquette.
Frequently Asked Questions
How do you start a dirt bike for the first time?
Ensure it’s in neutral, pull the clutch lever in fully, turn on the fuel and ignition, and use the kickstarter or electric start. Once it’s running, pull the clutch in again, shift into first gear with your left foot, and then slowly release the clutch while adding a tiny amount of throttle to begin moving.
What is the easiest dirt bike to ride for a beginner?
Smaller, lower-powered bike is always easier. Look for a smaller, lower-powered four-stroke trail bike. These bikes have predictable, manageable power and are less intimidating. Several manufacturers make excellent, reliable beginner models. For a modern twist, electric dirt bikes offer instant, quiet torque with almost no maintenance, making them great for learning.
Are dirt bikes easy to work on?
Generally, yes, especially air-cooled four-strokes. They have fewer complex systems than street bikes. Basic maintenance like oil changes, air filter cleaning, and chain adjustment is straightforward and outlined in the owner’s manual. Learning these basics is part of the ownership experience and saves money.
How do I get over the fear of crashing?
Accept that small, low-speed tip-overs are a normal part of learning, not “crashes.” Your full protective gear is designed for this. Start in a soft, open area like a grassy field where falling has no consequences. Practice the friction zone drill until moving from a stop is automatic, most fear comes from uncertainty with the controls.
What’s the first advanced skill I should learn?
After mastering starts, stops, and turns while seated, learning to stand on the pegs is the gateway to everything else. It’s the foundation for handling rough terrain, climbing hills, and navigating obstacles like riding over rocks.
Before You Go
The hardest part is the first ten hours. If you can get through those while focusing on clutch control and standing on the pegs, the rest of the sport opens up. Your first bike shouldn’t impress anyone, it should forgive your mistakes and be cheap to fix.
One rule most guides skip: if you haven’t ridden standing up for at least half of your last practice session, you’re still a passenger, not a rider. Make that your next goal. Everything, from techniques for climbing hills to navigating ruts, gets easier when your legs are doing the work. Start slow, gear up, and trust the process. The speed comes later.
