
How to Ride Over Rocks on a Dirt Bike: The 5-Step Approach
This post contains affiliate links. As an Amazon Associate, we earn from qualifying purchases.
To ride over rocks on a dirt bike, you need to stand on the pegs, keep a steady throttle, look ahead for a line, and let the bike move beneath you. The front brake is your enemy here; use the rear to modulate speed. For a CRF250X or 450X, the factory cold tire pressure is 15 psi, but you’ll often air down from there for better grip. Momentum matters, but too much speed turns a mistake into a crash.
The difference between a controlled crossing and a broken bike and body is a handful of techniques applied in the right order. Get one wrong, like stabbing the front brake or locking your arms, and the rock garden wins in under a second. Knowing how to ride over rocks on a dirt bike is central to this sequence.
What follows is the sequence for how to ride over rocks on a dirt bike: how to set your bike up, where to put your body, how to manage the throttle, and what to do when you get stuck. We’ll also cut through the confusion on the two biggest technique disagreements in the sport.
Key Takeaways
- Stand on the pegs with bent knees to let the bike move; however, some sources like Transmoto advocate sitting on slippery rocks for better stability and quicker corrections.
- Maintain light, steady throttle to keep the rear wheel driving and the front end light. Chopping the throttle drops the front wheel into the next rock.
- Look ahead, not at your front tire. Your bike goes where your eyes are pointed.
- Use the rear brake only to scrub speed. Touching the front brake on a loose rock will likely lock the wheel and dump you.
- 15 psi is the starting point for tire pressure on Hondas like the CRF250X/450X, but airing down for rocky terrain can increase the contact patch and grip.
The Non-Negotiables: Bike Setup Before You Hit the Rocks
A stock bike can handle rocks, but a few tweaks turn a survival run into a controlled ride. This isn’t about throwing money at suspension. It’s about the free and cheap changes that prevent the most common damage.
Start with tire pressure. Honda’s manuals for the CRF250X and CRF450X list 15 psi as the standard cold pressure for both front and rear tires. That’s a pavement and hard-pack number. For a rock garden, that’s often too high. Reducing tire pressure allows the tire to conform to sharp edges rather than deflecting off them. The reduced pressure allows the tire to conform to sharp edges rather than deflecting off them. The process of airing down for rocks is your single biggest traction upgrade, and it costs nothing.
Next, armor. A skid plate is not optional. Rocks love to find engine cases, clutch covers, and water pump impellers. A skid plate that bolts to the frame and has enough clearance that it doesn’t trap mud. Handguards are equally critical. You will tag trees and brush, and a rock flicked up by the front tire can snap a lever before you react. A set of dirt bike handguards that wrap around the levers protects your hands and your controls. Finally, consider a roost guard. It’s not just for roost; it’s a plastic shell that keeps a pointed rock from finding your ribs if you come off the pegs.
The part nobody mentions: A rock can sheer off a brake lever in a split second. Wrap-around handguards aren’t just for brush; they’re a mandatory shield for the controls you need to stop.
The 5-Step Approach to a Rocky Section
This is the core sequence for how to ride over rocks on a dirt bike. It works for a 50-foot stretch of baby heads or a mile-long rock slab. Miss a step, and the rest get harder.
1. Scout and Commit. Slow down before you enter. Pick your line. Pick the larger, more stable rocks to use as stepping stones. Avoid the deep gaps. The line is rarely straight; it’s a gentle zig-zag. Once you pick it, commit. Hesitation kills momentum and focus.
- Body Position: Stand Up. As you enter, rise up on the pegs. This is the standard technique for loose, rolling rocks, though some sources like Transmoto advocate sitting on slippery rocks for specific conditions. Standing achieves three goals: it lowers your center of gravity through bent knees, allows the bike to move freely beneath you, and places your weight over the footpegs for control. Your arms should be slightly bent, not locked. Grip the bike with your knees. This proper standing technique is the foundation everything else builds on.
3. Throttle and Clutch: Steady and Slipping. You need drive. Enter with a light, steady throttle, enough to keep the bike moving forward positively. Cover the clutch with one or two fingers. If the engine lugs, smoothly slip the clutch to bring the revs up without a sudden jerk. A sudden chop of the throttle transfers weight to the front wheel, which is exactly what you don’t want when it’s about to hit a rock.
- Vision: Look Where You Want to Go. Your head should be up, eyes looking ahead down your chosen line. If you stare at the rock directly in front of your tire, you will hit it. Your peripheral vision handles the immediate hazards. Focus on the exit. This is the “look ahead” rule every training guide, like the official riding skills manual, emphasizes.
5. Braking: Rear Only, and Early. Need to slow down? Do it before you enter, or with gentle pressure on the rear brake only. The front brake is a liability on loose, uneven surfaces. One rock under the front tire while the brake is applied can lock the wheel instantly. Use the rear brake to modulate your speed as you pick through.
| Step | Action | Why It Works | What Happens If You Skip It |
|---|---|---|---|
| 1. Scout | Pick a line on stable rocks. | Identifies a path of least resistance before momentum commits you. | You enter blind, target-fixate on the first big rock, and hit it. |
| 2. Stand | Rise on pegs, knees bent. | Lets bike pivot beneath you; lowers CG; prepares for impacts. | Bike movement throws you off balance; front end washes out on first shift. |
| 3. Throttle | Light, steady drive; cover clutch. | Keeps rear wheel driving and front end light for obstacles. | Engine bogs, weight shifts forward, front tire dives into next rock. |
| 4. Look Ahead | Eyes looking ahead down the line. | Your body and bike naturally follow your focus point. | Target fixation ensures you hit every obstacle you were trying to avoid. |
| 5. Brake | Rear brake only, before entry. | Controls speed without risking front-wheel lockup on uneven ground. | Front brake application on a loose rock locks the wheel, causing an immediate crash. |
Navigating the Two Biggest Technique Debates
You’ll read conflicting advice. Here’s where each piece comes from, and when to use it.
Standing Up vs. Sitting Down. Most training, including the MSF, teaches standing for obstacles. It’s the standard for a reason: it gives you the most control and ability to absorb shock. However, the Transmoto source makes a case for sitting on slippery rocks. Their reasoning: sitting puts your feet closer to the ground for a quicker dab or correction if the bike slides.
- The Verdict: Stand by default. Use the sitting technique only in specific, slow-speed, super-slick rock situations where you anticipate a slide and need to paddle. For 95% of rock riding, standing is safer and more effective.
Throttle: Roll On or Roll Off Over an Obstacle? The Oregon MSF guide says to apply a little throttle as the front wheel reaches an obstacle, then roll off after it clears. The MSF Adventure handbook says to “blip” the throttle to lighten the front wheel before contact, then roll off to lighten the rear after. It then contradicts itself by saying keeping the throttle on a bit longer maintains ground clearance.
- The Verdict: A steady, slight throttle is best. The goal is consistent drive. A blip can unsettle the bike, and rolling off can cause a weight shift that smacks the undercarriage. For a rock section, not a single log, a smooth, light throttle input works best. It keeps the bike balanced and moving.
Uphill, Downhill, and Flat: How the Rules Change

The core principles hold, but the emphasis shifts with the slope.
Uphill Rocks: Momentum is your friend, but control is king. You need enough speed to carry you up, but not so much that you can’t pick a line. Attack in a standing position, weight forward. Keep the throttle steady. If you lose momentum, the rear wheel will spin on a rock and dig in. The recovery is tricky; sometimes it’s better to stop, back down carefully, and re-attack.
Downhill Rocks: This is about control, not momentum. Shift your weight back, way back, almost over the rear fender. Use the rear brake gently to keep speed in check. Do not use the front brake. Let the bike walk down under its own weight. Your job is to steer and balance. This downhill on rocks technique is a test of nerve and rear-brake finesse.
Flat Rock Gardens: This is the purest application of the 5-step approach. You have the most freedom to pick a zig-zag line. Focus on looking ahead and letting the bike dance underneath you. A set of trail riding tires with an intermediate-hard compound will resist chunking and give predictable feedback.
Common mistake: Stiff-arming the handlebars on a downhill. You feel like you’re holding the bike up, but you’re actually transferring every impact directly to your body and making the front end skittish. Bend those elbows.
When the Bike Wins: The Walk-Off
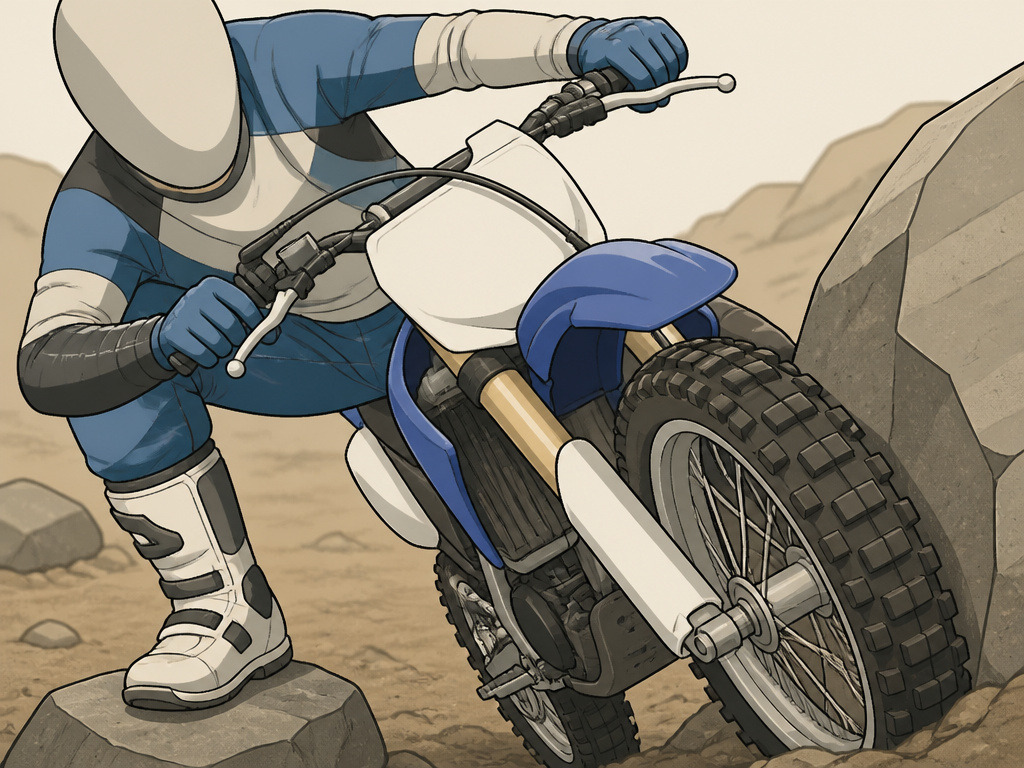
You will get stuck. It’s not an if, it’s a when. The rock moves, you hesitate, the bike stops. The instinct is to whiskey-throttle and fight. That’s how you break levers, burn clutches, and fall over.
The pros have a protocol for this. Get off the bike. Stand on the uphill side if there is one. Lean the bike towards you. Never let it fall away, you’ll never pull it back. Plan your move one rock at a time. Move your feet to secure positions first, then walk the bike a foot. Repeat. Forget momentum. This is a rock-by-rock puzzle. The Transmoto guide calls this “taking it rock by rock,” and it’s the only way through truly extreme terrain without damage.
Practice Drills to Build Rock Confidence
You don’t learn this in the middle of a trail. You learn in a controlled environment.
1. The Static Balance Drill. On flat, solid ground, practice standing on the pegs without moving. Find your balance point. Then, slowly rock the bike side-to-side with your legs, keeping your upper body still. This builds the leg muscles and muscle memory for letting the bike move.
2. The Slow-Speed Weave. Set up a line of small rocks or even water bottles 10 feet apart. Practice standing and weaving through them at a walking pace, using only clutch and rear brake. Focus on keeping your head up and looking at the next “rock.”
3. The Log Cross. Find a small, stable log. Practice the throttle and body position for a single obstacle. Approach standing, light throttle, let the front wheel roll up and over, then shift your weight back as the rear wheel crosses. Master the single obstacle before stringing them together.
Where this goes sideways: Practicing only at speed. Rock riding rewards precision, not horsepower. If you can’t do it at 3 mph, you can’t control it at 13 mph.
Where to Put Your Feet on Rocks
Your feet are your primary stabilizers. Keep the balls of your feet on the footpegs, not your arches. This position enables your ankles to function as additional suspension, absorbing impacts and aiding balance. If you need to dab a foot, do it quickly and get it back on the peg. In extremely technical sections where you choose to get off and walk the bike, move small distances at a time and always lean the bike towards you to keep it under control. When riding, your feet should stay planted and active, ready to counter shifts in the bike’s weight.
Frequently Asked Questions
Should I sit or stand when riding over rocks?
Most sources, like the MSF, recommend standing for obstacles as it provides the most control. However, Transmoto advocates sitting on slippery rocks, arguing it puts your feet closer to the ground for quicker corrections. Standing is the standard, but the sitting technique is used by some in specific, slow-speed, slick conditions.
What is the biggest mistake beginners make in rock gardens?
Using the front brake. On loose, uneven rocks, the front tire has minimal traction. Applying the front brake often causes an immediate lock-up and crash. Always use the rear brake to control your speed in rocky sections.
How do I stop my arms from getting tired so fast?
You’re gripping too tight and likely locking your elbows. You should hold the bars with a firm but relaxed grip, like holding a baby bird. Your arms should be bent, acting as shock absorbers. Let your legs grip the bike and do the work of stabilizing your body.
What tire pressure should I run for rocky trails?
Start with your bike’s factory recommendation (for example, 15 psi for a Honda CRF250X/450X) and then air down. For technical rock gardens, 10-12 psi is a common target. This lower pressure allows the tire to conform to the rocks for vastly better grip.
Can I jump my dirt bike over a section of rocks?
Only in very specific conditions. As the Transmoto source notes, this is an advanced technique for round (not square-edged) rocks with a stable, known take-off. It requires precise speed and body position to land level and in control. For most riders, picking through is the safer, faster strategy.
The Bottom Line
Rock riding is a puzzle of traction and balance, not a test of bravery. The bike setup is simple: air down, armor up. The technique is simpler: stand up, look ahead, steady throttle, rear brake only. The hard part is trusting the process when a boulder field looks back at you.
Start in a safe practice area. Work on standing and slow-speed control before you ever point your front wheel at a real rock garden. When you do graduate to the trail, remember the walk-off is a valid technique, not a failure. Getting stuck and pushing through carefully beats a broken clutch cover every time.
Your first few attempts will feel awkward. Your forearms will pump up. That’s normal. The skill comes from repetition, not revelation. Go find a few rocks and put the steps in order. The confidence follows.
