
How to Corner on a Motorcycle: The 4-Step Sequence
This post contains affiliate links. As an Amazon Associate, we earn from qualifying purchases.
To corner a motorcycle safely, follow the Motorcycle Safety Foundation’s 4-step S.L.P.R. System: Slow before the turn, Look through the corner to your exit, Press the handlebar to initiate the lean (countersteering), and Roll on a smooth, maintenance throttle. Your eyes lead the bike, your hands steer it, and your throttle stabilizes it. More than half of all motorcycle crashes involve riders with less than five months of experience.
That last stat is the measurable outcome of not having a repeatable system. When a corner tightens or gravel appears, instinct takes over. If your instinct is to grab the brake or stare at the ditch, the bike will go there. This is precisely why you must learn how to corner on a motorcycle.
What follows is the system that replaces panic with procedure. We’ll walk through the core S.L.P.R. Sequence, unpack the two lane-position strategies even the MSF manual can’t settle on, and show you how modern electronics like cornering ABS change what’s possible when things go wrong.
Key Takeaways
- Follow the S.L.P.R. Sequence (Slow, Look, Press, Roll) for every corner; it’s the essential foundation.
- Your eyes control the bike. Look through the turn at your intended path, not at the roadside hazard.
- To initiate a turn above walking pace, you must countersteer: push the left bar to go left, right to go right.
- In a normal turn, lean with the bike. In a slow, tight turn, counterbalance by keeping your body upright while leaning the motorcycle.
- If you must brake mid-corner, apply pressure smoothly and gradually; modern cornering ABS systems are designed for this.
The 4-Step Cornering Sequence (S.L.P.R.)
Forget advanced tricks. The entire skill of how to corner on a motorcycle on the street is contained in four letters: S, L, P, R. This is the Motorcycle Safety Foundation’s curriculum, and it works because it’s a checklist you can run through before every bend. Miss a step, and the whole process gets shaky.
Slow. All your speed adjustment happens while the bike is straight up and down. This means braking is complete and you’ve selected your appropriate gear before you even think about turning the handlebars. Your speed should be set so you can comfortably roll on the throttle through the entire corner. Entering too fast is the number one cause of running wide.
Look. This is the command that matters most. Your head turns first, your eyes fix on where you want the bike to go, the exit point of the corner. Your chin should be over your shoulder. This is a deliberate target fixation on your safe path. Your body and the bike will follow your eyes with unnerving accuracy. Stare at the pothole, and you’ll hit it.
The MSF Motorcycle Operator Manual states that in normal turns, the rider and the motorcycle should lean together at the same angle. This “co-leaning” is the default for roadspeed corners.
Press. Above walking pace, you don’t turn the handlebars like a bicycle. You countersteer. To initiate a left turn, press forward on the left handlebar. For a right turn, press the right. This brief input makes the bike fall into its lean. It feels wrong until you feel it work, then it becomes the only way to place the bike precisely. Think of it as pointing the wheel the opposite way for a split second to make the whole machine tip over.
Roll. Once leaned, you need to stabilize the suspension and geometry. You do this by applying a smooth, steady maintenance throttle. This slight acceleration balances the bike. Chopping the throttle mid-corner stands the bike up and pushes it wide. Rolling on too hard can overwhelm the rear tire’s traction. Smooth is the only adjective that matters here.
Where Should You Be in Your Lane?
Here’s where the official guidance gets interesting. The Mississippi Motorcycle Operator Manual presents two valid, but different, strategies for lane position in a curve. They serve different purposes, and knowing when to use which is a mark of a thinking rider.
The first is the classic outside-inside-outside line. You approach from the outside of your lane (left for a right turn, right for a left turn), dive to the inside at the apex, and then drift back to the outside on exit. This gives you the largest possible radius, which means you can carry more speed with less lean angle. It also improves your sight line through the corner earlier. This is the racing line, and it’s great for predictable, open corners with clear visibility.
The second strategy is simpler: move to the center of your lane before the curve and stay there. The MSF notes this “permits you to spot approaching traffic as soon as possible.” This is the defensive choice. It keeps you away from oncoming traffic in left-hand turns and away from the shoulder’s gravel and debris in right-hand turns. It also gives you the maximum margin for error on either side.
| Lane Position Strategy | Best For | The Trade-Off |
|---|---|---|
| Outside-Inside-Outside (Apex Line) | Open corners with clear visibility, maximizing smoothness and speed. | Places you closer to oncoming traffic or the shoulder at different points. |
| Center-Lane Hold | Unknown corners, poor visibility, or when traffic is present. Prioritizes safety margins and escape routes. | Requires a slower, tighter turning radius for the same corner. |
My take? On unfamiliar backroads, I start with the center-lane hold. It’s the conservative default that keeps options open. Once I can see the exit and know the surface is clean, I might adjust my cornering line strategy for the next one. The wrong choice is picking one strategy and using it blindly for every bend.
Vision and Body Position: What Actually Works
You can’t separate where you look from how you sit. They’re the input and the output of the same system. Fix your eyes on the exit, and your body position naturally starts to align to get you there.
For the vast majority of street corners, you don’t need to hang off. The MSF rule is clear: rider and motorcycle lean together. Shift your weight slightly toward the inside of the turn, a gentle cheek-off-the-seat move. This helps the bike lean a little less for the same corner, preserving tire margin. Grip the tank with your knees. Your arms should be loose; if you’re pulling on the bar to hold yourself up, you’re fighting the steering.
Now, the exception. For slow, tight turns, think a U-turn in a parking lot or navigating a crowded lot, the rule flips. Here, you counterbalance. Keep your body upright and lean only the motorcycle beneath you. This keeps your center of gravity over the tires, maximizing stability at walking speeds. It feels completely different from a 40-mph bend.
Where this goes sideways: Stiff arms and a death grip on the bars. This transfers every bump directly into the steering, making the bike wobble and fight you. If your shoulders ache after a twisty section, you’re too tight. Relax your elbows.
Your vision is your primary steering control. Look as far ahead as you can, scanning for the next point you need to reference. The limit point, where the two sides of the road appear to meet, tells you if the corner is tightening or opening up. If it’s moving away, you can safely add throttle. If it’s rushing toward you, the turn is getting tighter and you need to slow down or increase your lean.
How Modern Electronics Change Cornering
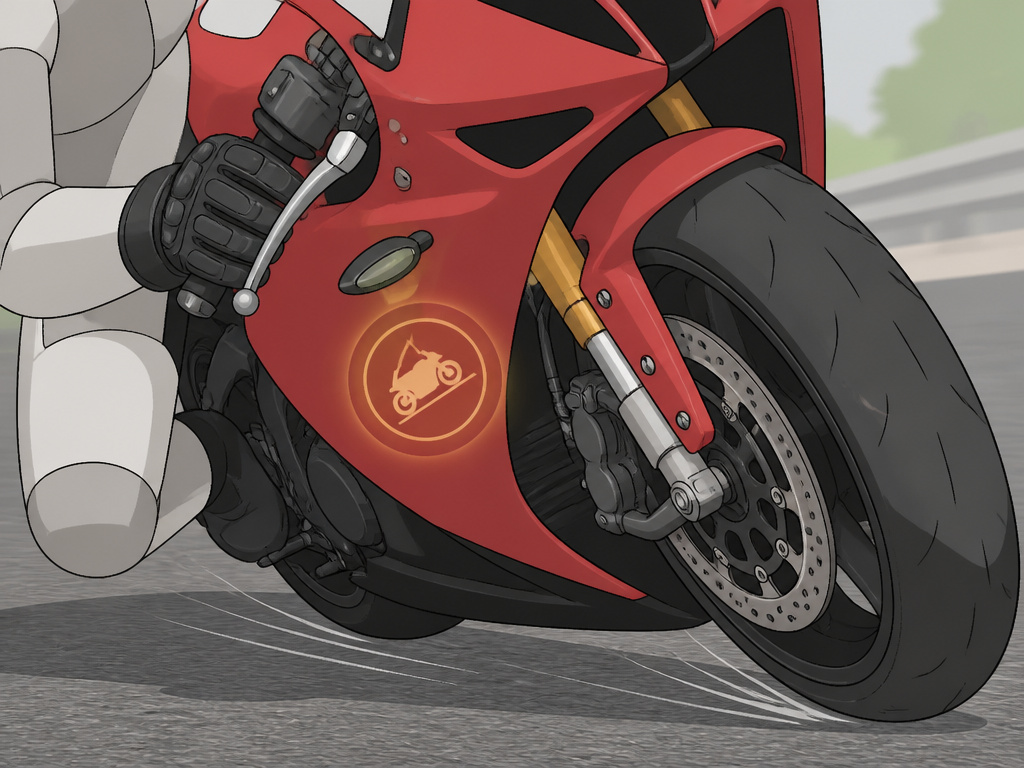
The rulebook you just read was written for motorcycles with basic brakes and tires. Modern bikes with cornering-sensitive rider aids rewrite sections of it, especially for emergency situations. This isn’t about crutches; it’s about expanding the physical limits of traction.
Cornering ABS (C-ABS), like the system on the Ducati Panigale V2 or Harley-Davidson’s C-ABS, is the big one. A standard ABS system can get confused when the bike is leaned over, as tire grip is reduced. Cornering ABS uses a lean-angle sensor to tailor brake pressure, preventing lock-up even while you’re cranked over in a bend. As Harley-Davidson’s documentation states, it “automatically compensates” for the reduced grip available while cornering.
This directly changes the old mantra of “never brake in a corner.” The MSF manual itself provides an edge case: “If you find yourself in a situation that does not allow straightening first… Apply the brakes smoothly and gradually.” With cornering ABS, that smooth application is now a viable, system-assisted strategy to scrub off speed if you enter too hot.
Similarly, Cornering Enhanced Traction Control (C-TCS) modulates power based on lean angle to prevent the rear wheel from spinning up mid-corner, a sure way to lose the back end. These systems allow you to get on the throttle earlier and with more confidence, especially on uneven or damp surfaces.
| Rider Aid | What It Does | How It Affects Cornering |
|---|---|---|
| Cornering ABS (C-ABS) | Modulates brake pressure based on lean angle to prevent wheel lock-up. | Makes controlled braking while leaned over a real possibility in an emergency. |
| Cornering Traction Control (C-TCS) | Reduces engine power if it detects rear wheel spin, adjusted for lean angle. | Allows more aggressive throttle application on corner exit, especially in low-grip conditions. |
| Tire Pressure Monitoring System (TPMS) | Alerts rider to low tire pressure. | Proper pressure is critical for tire profile and grip; a soft tire will fold over and feel vague mid-corner. |
These systems are fantastic safety nets, but they have limits. They can’t override physics. If you slam on the brakes at maximum lean, you’re going down. They work best with smooth, progressive inputs, the same ones good riding demands.
What If You Start Running Wide?
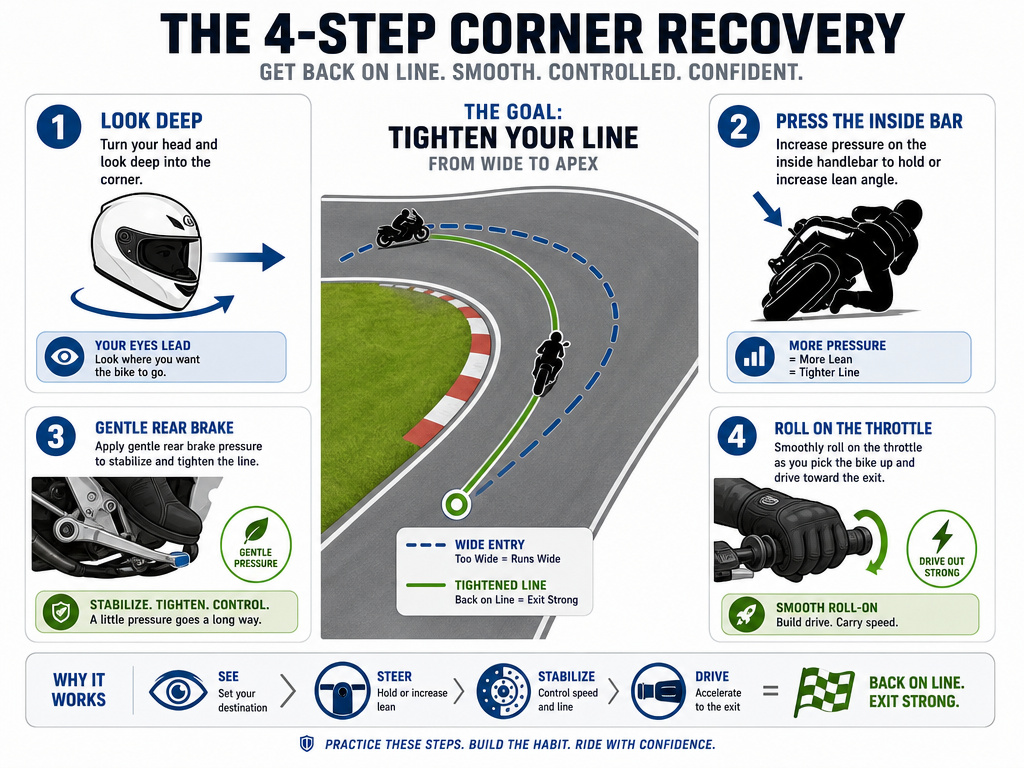
It happens. You misjudge a corner, find decreasing radius, or see gravel mid-turn. The bike starts drifting toward the outside lane or shoulder. Panic screams “BRAKE!” but that’s the worst thing you can do. Braking hard while leaned over will stand the bike up and shoot you straight off the road.
Here is the recovery drill, in order:
- Look harder at your exit. Your instinct will be to stare at the edge of the road. Fight it. Turn your head further, look deeper into the corner where you need to go. The bike will follow.
- Increase your lean angle. This feels terrifying, but it’s necessary to tighten your turning radius. You must trust that the tires have more grip than you think. A smooth, additional press on the inside bar will do it.
- Apply gentle, steady rear brake. If you must slow down, the rear brake is your best tool here. It loads the front tire less and helps stabilize the chassis. Use minimal, gradual pressure.
- Roll on the throttle when possible. Once you’ve tightened your line, a smooth roll-on will help settle the bike and complete the turn.
This is where practice in a controlled environment for how to corner on a motorcycle pays off. Find a large, empty parking lot and use cones to create a corner. Deliberately enter a little too fast and practice the look-press sequence. Feeling the bike respond to increased lean is a confidence you can’t get from a manual.
The Tools: Tires and Pressures
Your technique flows through two patches of rubber. Their condition and inflation dictate everything. The factory knows this, the Ducati Panigale V2 owner’s manual is explicit about using only approved tire sizes, warning that different sizes “may alter the operating characteristics of the system thus making it unsafe.”
For the Ducati Panigale V2, the OE spec is a Pirelli Diablo Rosso II in 120/70ZR17 front and 180/60ZR17 rear. More important than the brand is the pressure. For a solo rider, Ducati calls for 33.4 PSI front and 36.3 PSI rear. With a passenger, it jumps to 36.3 PSI front and 39.2 PSI rear.
Common mistake: Running street tires at track-day pressures (e.g., 30 PSI cold). On the street, lower pressures than the manufacturer recommends can affect handling and tire wear. Stick to the manufacturer’s placard or manual.
A soft tire will squirm and feel unstable mid-corner. An overinflated one will reduce the contact patch and feel skittish. Check pressures weekly when the tires are cold. That five-minute task has a bigger impact on cornering feel than any bolt-on accessory.
Frequently Asked Questions
What are the four principles of cornering?
The four principles are the S.L.P.R. Sequence: Slow (before the turn), Look (through the turn to your exit), Press (the handlebar to countersteer and initiate lean), and Roll (on a smooth, maintenance throttle). This is the MSF’s standardized method for a reason, it works for every corner.
What is the best body position for cornering on a motorcycle?
For normal road-speed corners, lean your body with the motorcycle at the same angle, shifting your weight slightly to the inside. Grip the tank with your knees and keep your arms relaxed. For slow, tight turns like U-turns, counterbalance by keeping your body upright while leaning only the motorcycle.
Should I brake during a corner?
The standard procedure is to complete all braking while the bike is upright before the turn. However, if you must brake mid-corner (e.g., an unexpected obstacle), apply the brakes, primarily the rear, smoothly and gradually. Modern motorcycles with cornering ABS are specifically designed to make this controlled braking possible while leaned over.
How do I practice cornering safely?
Start in a large, empty parking lot. Use cones or chalk to mark a corner entrance, apex, and exit. Practice the S.L.P.R. Sequence at low speed, focusing on turning your head and smooth throttle control. Gradually increase speed as the actions become habit. The goal is muscle memory, not lean angle.
Before You Go
Cornering well is about having a repeatable process that works when you’re tired, when the road is wet, or when a deer steps out. The S.L.P.R. System is that process. Drill it until looking through a bend is automatic, until a gentle press on the bar feels like the only way to turn.
The one rule that overrides all others: look where you want to go. Your hands, your throttle, and the bike’s 500 pounds of metal will follow your eyes every single time. Trust that, and the rest is just practice.
Everything here assumes a reasonably maintained bike with good tires at the right pressure. If you’re running on bald rubber or a tire that’s ten years old, no technique in the world will save you. Fit first, features second. That goes for your skills, too. Master the four-step sequence before you ever think about trail braking or advanced lines. The foundation is everything.
