
How to Check Motorcycle Oil Level: Step-by-Step
This post contains affiliate links. As an Amazon Associate, we earn from qualifying purchases.
To check your motorcycle oil level, you need three things: the engine at the correct temperature, the bike perfectly upright on level ground, and the right technique for your specific engine and checking system. For most wet-sump four-strokes, follow your owner’s manual for the correct engine state (hot, warm, or cold) and wait time before checking that the oil sits between the minimum and maximum marks on the dipstick or sight glass.
The ‘correct temperature’ part is where every manufacturer seems to have a different opinion. Harley-Davidson has a specific 200°F (93°C) hot-check procedure, Suzuki wants a three-minute warm-up, and Castrol says to wait 20 minutes for a cool engine. This isn’t just academic. Getting the engine state wrong can show you a false reading that can be significantly off, which is the difference between safe and starved. This is why knowing how to check motorcycle oil level correctly is critical.
What follows is a breakdown of the two main checking systems, the real manufacturer specs that contradict the generic advice, and how to read what your oil’s color and texture are telling you about your engine’s health.
Key Takeaways
- Check your oil weekly and before any long trip; low oil kills engines faster than old oil.
- For an accurate reading, the motorcycle must be perfectly upright on level ground — a bike leaning on its side stand gives a false low reading.
- Oil level is not the whole story; black, gritty, or milky oil means you need a change or have a bigger problem, regardless of the level.
- Follow your owner’s manual for the engine state (hot/cold) and dipstick method; Harley, Suzuki, and Castrol all publish different, conflicting procedures.
- When adding oil, use small increments (50–100 ml), wait a minute, and recheck to avoid the clutch-slipping, leak-causing disaster of an overfill.
Why “Check the Oil” Isn’t One Answer
You have a dipstick or a little glass window. How hard can it be? It turns out the difficulty isn’t in the act, but in the dozen variables that change the reading. The oil in a motorcycle engine is sloshing around, clinging to parts, and expanding with heat. Where it settles in the sump depends on how long it’s been sitting, how hot it is, and whether the bike is leaning.
I learned this the hard way after an oil change on a test bike. I checked the level with the bike on its side stand, saw it was at the “add” line, and topped it off. The next day, with the bike held upright by a friend, the level was suddenly above the full mark. That extra half-quart of oil went straight into the airbox on the next ride, coating the intake with a slick, smoky mess. Overfilling isn’t just messy; it can foam the oil, reduce lubrication, and cause clutch slip.
The generic advice to “park on level ground” is correct but incomplete. For a true reading, the bike’s frame must be vertical, not just the pavement flat. If you don’t have a center stand, you need a helper, a wall, or a paddock stand. The bike must be vertical for most motorcycles to get an accurate oil level reading.
The Step-by-Step Procedure: Dipstick vs. Sight Glass
Your bike has one of two systems: a dipstick threaded into the filler cap or a sight glass (inspection window) on the side of the engine. The steps diverge right at the start of the how to check motorcycle oil level process.
For a consistent reading, follow your owner’s manual for the correct engine state and wait time. For example, Castrol advises checking on a cool engine after waiting at least 20 minutes, while Repsol recommends checking when the engine is warm and recently turned off after waiting about a minute.
If Your Bike Has a Dipstick
- Warm the Engine. Warm the engine to its normal operating temperature as specified in your owner’s manual. This may involve riding or idling for a specified time. This gets the oil flowing and gives a representative volume reading. Shut the engine off.
- Position the Bike. Get the motorcycle perfectly upright on level ground. Use a center stand, a paddock stand, or a helper. This is the most critical step.
- Wait. Wait for the time specified in your owner’s manual to allow oil to drain. Wait times vary; for example, Suzuki recommends waiting approximately three minutes, while Repsol recommends waiting about a minute. This allows oil to drain down from the cylinder head and galleries back into the sump.
- Check the Level.
- Remove the dipstick and wipe it clean with a lint-free cloth.
- Reinsert the dipstick correctly. This is the big disagreement. For example, Suzuki and Castrol advise inserting the dipstick until it rests on the threads without screwing it in, while Repsol notes that on some models the entire unit must be fully screwed on. Consult your owner’s manual for the correct method.
- Remove it again and hold it horizontally. Look at where the oil film ends.
- Read the Marks. The oil level should be between the “L” (Low) and “F” (Full) marks, or within the cross-hatched area. At the bottom of the hash marks is “ADD,” which, on a Harley-Davidson dipstick, means you’re a half-quart (0.473 liters) low. For other brands, consult your manual.
If Your Bike Has a Sight Glass
- Warm and Position. Same as above: warm engine, shut off, bike upright, brief wait.
- Find the Window. Look at the small, round glass window on the side of the engine crankcase. You may need to crouch down and wipe off dirt.
- Read the Level. With the bike held vertical, the oil level should be between the upper and lower lines etched near the glass. Do not confuse bubbles or foam for the level. The still surface of the oil is what you’re looking for.
| Checking System | Correct Oil Level | Critical Step Most Miss |
|---|---|---|
| Dipstick | Between “L” and “F” / Within cross-hatch | Inserting to threads, NOT screwing in |
| Sight Glass | Between upper and lower lines | Holding bike perfectly upright for reading |
Hot, Cold, or Warm? Why Manufacturers Disagree
Here is the core conflict that no generic guide can answer for you. Your owner’s manual is the final authority because engineers designed the procedure for your specific engine’s oil capacity and circulation.
- Harley-Davidson’s Hot Check: The oil must be at the “FULL HOT” mark. Get the stance wrong, and you’ll misread by a quart.
- Suzuki’s Warm Check: The Suzuki Address 110 manual says to start the engine, let it idle for about three minutes, stop it, wait approximately three minutes, then check. The bike is upright for this check.
- Castrol’s Cool Check: Castrol’s general guide advises checking on a cool/cold engine after waiting at least 20 minutes for all oil to drain back. This is a safe, conservative method for a quick weekly check.
Where this goes sideways: Assuming “hot” means right after a hard ride. Oil at 250°F is thin and splashed everywhere, giving a useless reading. “Hot” to a manufacturer usually means at stable operating temperature, often around 200°F (93°C), after a brief idle or cooldown period.
The pattern is clear: you must know your bike’s designated procedure. If you’ve lost the manual, search for “[Your motorcycle model] owner’s manual PDF.” That five-minute search is cheaper than a new engine.
The Special Cases: Dry-Sump, Trikes, and Sportsters

Standard procedures fail here. These bikes break the rules, and following generic advice will guarantee a wrong reading.
Dry-Sump Bikes & Separate Oil Tanks: Many classic, off-road, and high-performance bikes (like some KTMs or older Brits) store oil in a separate tank, not the crankcase. For these, Repsol notes the check is often done just after turning the engine off, with the bike upright. The oil hasn’t drained “down” because it’s pumped from a remote tank. The manual is your only reliable guide.
Harley-Davidson Trikes (2017-2026): Because a trike doesn’t lean, the check is simpler but strict. For both cold and hot checks at 200°F (93°C), the motorcycle must be upright (not on a stand). You idle for 2 minutes while upright before checking.
Harley-Davidson Sportster RH & Pan America (2021-2026): The hot-check is specific: ride for 5 minutes at mid-range engine speeds, idle for 1 minute upright, then check with the bike upright. The cold check is done on the jiffy stand, looking for the oil to be at or above the “ADD QT” mark.
Oil Color, Smell, and Grit: What Your Oil is Telling You
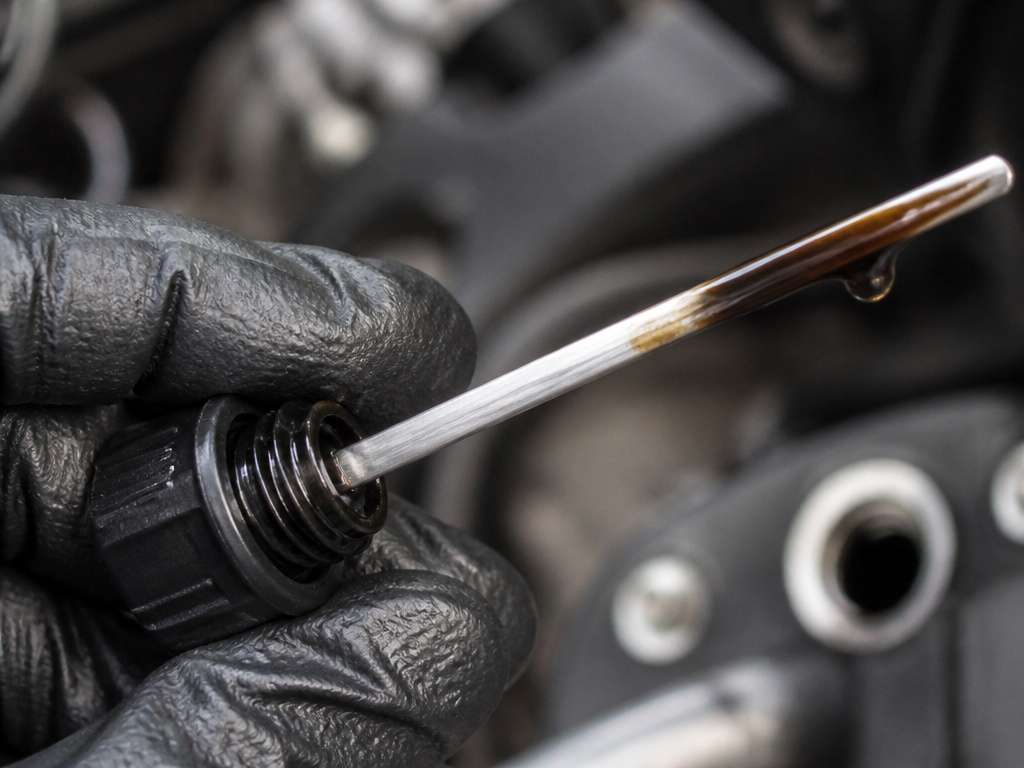
The level is just the first check. The oil’s condition is a live diagnostic report from inside your engine. Pull the dipstick and look at the oil on it, don’t just check the level.
- Healthy Oil: New oil is amber, greenish, or gold and semi-transparent. It has a slick, glossy feel between your fingers.
- Needs Changing: Oil that is dark brown or black has done its job of cleaning and is saturated with combustion byproducts. Time for a change.
- Burnt Oil: Oil that is black and thick, with a burnt smell, has been overheated and broken down. It’s no longer protecting your engine. Change it immediately.
- Coolant Leak (Serious): Oil with a milky, tan, or frothy appearance means coolant is mixing with the oil, usually from a failing head gasket or cracked casing. Stop riding and see a mechanic.
- Metal Particles (Very Serious): If you see fine metallic glitter (like gold or silver sparkles) in the oil, it indicates internal wear. If you feel gritty particles, damage is already occurring. This requires professional diagnosis.
Your nose is a tool, too. A strong fuel smell means gasoline is diluting your oil, often from frequent short rides where the engine never gets hot enough to evaporate the fuel. This washes lubrication off cylinder walls.
Adding Oil: How Not to Create a New Problem
You’ve checked, and the level is at or below the “L” or “ADD” mark. Now you must add oil without overfilling.
- Use the Correct Oil. Check your manual for the recommended viscosity (e.g., 10W-40) and specification (e.g., JASO MA-2 for wet clutches). Using the wrong oil, like car oil with friction modifiers, can make your clutch slip.
- Add Small Amounts. Never just pour in a whole quart. Add about 50–100 ml (roughly 1/5 to 2/5 of a quart) at a time.
- Wait and Recheck. After adding, wait a full minute for the oil to settle down into the sump. Then, repeat the checking procedure: bike upright, correct dipstick method. Repeat steps 2 and 3 until the level is midway between L and F.
- Stop at “FULL”. Do not fill to the absolute top of the marks. The midpoint is the target. Overfilling can cause aerated oil (foam), which doesn’t lubricate, and can force oil past seals, leading to leaks and clutch problems.
Common mistake: Topping up without checking the condition first. Adding new oil to old, sludgy oil just delays the inevitable. If the oil on the dipstick is black and gritty, plan a full oil change soon, and follow the proper manufacturer-recommended oil change intervals.
Symptoms of Low Oil
Watch for the low oil pressure warning light on your instrument cluster. If this light stays on while the engine is running, you must stop the engine immediately to prevent severe damage. Other signs are less obvious but just as serious. Listen for louder mechanical noises like tapping or knocking from the top end, which can indicate insufficient lubrication. Your engine may also run hotter than normal. A quick visual check of the oil itself can reveal low levels; if the oil on the dipstick is barely touching the tip or is below the lowest mark on a sight glass, the level is critically low. Always check with the motorcycle on level ground.
Frequently Asked Questions
Should I check my motorcycle oil hot or cold?
Check your owner’s manual. There is no universal answer. Harley-Davidson specifies a 200°F (93°C) hot check. Suzuki specifies a warm check after a 3-minute idle. Castrol recommends a cool check after a 20-minute wait. For a quick weekly check, a warm (not scalding hot) engine is a good compromise.
Do you check motorcycle oil on the side stand or center stand?
You check it with the motorcycle perfectly upright. A center stand is the easiest way to achieve this. A side stand will lean the bike, giving a falsely low reading on the dipstick or sight glass. If you only have a side stand, you must hold the bike vertical with help.
Why is there no oil showing on my dipstick?
First, ensure you are checking correctly: bike upright, dipstick resting on threads (not screwed in). If it’s still dry, your oil is dangerously low. Add a half-quart of the correct type of engine oil, wait a minute, and recheck. If the level doesn’t rise, you may have a significant leak or consumption issue.
What does it mean if my motorcycle oil is milky?
Milky, frothy, or tan-colored oil indicates that coolant (antifreeze) is mixing with your engine oil. This is a serious problem, typically from a failed head gasket, cracked engine case, or leaking oil cooler. Do not run the engine. Have the motorcycle towed to a mechanic for diagnosis.
How often should I check my motorcycle oil?
Make it a habit to check at least once a week and before every long ride. Oil is your engine’s lifeblood, and a leak or sudden consumption can drain it faster than you think. This simple check is the cheapest engine insurance you can buy.
Before You Go
Checking your oil is the most basic form of mechanical empathy. It takes two minutes and tells you more about your engine’s health than any dashboard light. The rule isn’t complicated: bike upright, engine warm, manual in hand. Trust the marks on the stick or the glass, not a guess.
If your oil is consistently low between service intervals, you have a leak or the engine is burning it. If it turns black quickly, your engine is working hard or your trips are too short. That oil is talking. Get in the habit of listening.
