
How to Change Motorcycle Sprocket Gearing: Step-by-Step
This post contains affiliate links. As an Amazon Associate, we earn from qualifying purchases.
To change your motorcycle sprocket gearing, you alter the final drive ratio by swapping the front and/or rear sprockets. A smaller front or larger rear sprocket increases acceleration and lowers top speed, while a larger front or smaller rear does the opposite. You must match the sprocket’s pitch to your chain and replace the chain if it’s worn or if the new sprocket combination requires a different length.
The numbers in that answer are the easy part. The job itself turns on three specific, physical details that manuals often gloss over and forums argue about endlessly. A key part of the process is understanding how to change motorcycle sprocket gearing.
What follows is the full walkthrough: the math behind the change, the wrench-on-metal steps from my shop floor, and the exact torque specs and warnings that stop a simple swap from costing you a new chain or a stripped shaft, answering the how to change motorcycle sprocket gearing question.
Key Takeaways
- Changing the front sprocket by one tooth has a roughly 2.5x greater effect on gearing than changing the rear by one tooth.
- Always check sprocket tooth shape before installing a new chain; a worn, hooked sprocket will destroy a new chain within 2,000 miles.
- For stubborn front sprocket nuts, the Hayabusa forum sprocket tool guide and other owner groups recommend specific bracing methods, but the Zero Motorcycle manual explicitly prohibits using an impact wrench to avoid encoder damage.
- The chain pitch (e.g., 520, 525, 530) stamped on the old sprocket is essential; a mismatch will not fit.
- Re-calculate your speedometer reading after a gearing change; a 10% taller final drive ratio means your speedo will read about 10% too slow.
How Gear Ratio Changes Acceleration and Top Speed
The final drive ratio is simple division: rear sprocket teeth divided by front sprocket teeth. Stock 2023 Zero S/SR models use a 90-tooth rear and a 20-tooth front, for a 4.5:1 ratio (90 ÷ 20). Drop the front to a 19-tooth sprocket, and the ratio jumps to 4.73:1 (90 ÷ 19).
That 5% shorter gearing means the motor spins 5% higher RPMs at any given road speed. You feel it as a stronger pull from a stop and a quicker rev to peak power. Your theoretical top speed drops because you hit the motor’s RPM redline sooner in each “gear” of the direct-drive system. It’s a trade, not a free upgrade. For every bit of snap you gain in first and second, you lose a few MPH at the top end.
The gear ratio formula is Rear Sprocket Teeth ÷ Front Sprocket Teeth. A higher resulting number means shorter gearing (more acceleration, lower top speed). A lower number means taller gearing (less acceleration, higher potential top speed).
Where this goes sideways: Riders often change only the rear sprocket for a dramatic look. Adding five teeth to the rear might only change the ratio by about 6%, while dropping one tooth on the front changes it by over 5%. The front sprocket is the more efficient lever for gearing changes, but it has physical limits, too small and it increases chain wear dramatically.
The .095 vs .105 Trade-Off That Burns Out Electric Motors
Sprocket size isn’t just tooth count. The chain pitch and width are printed on the spool. Common pitches are 520, 525, and 530.
The width matters for clearance. A wider chain on a sprocket meant for a narrower chain will bind and wear prematurely. More critically, A heavier, wider chain (like a 530) has more rotating mass. On a high-torque electric bike like a Zero, that extra unsprung weight can make the motor controller work harder, potentially leading to overheating on sustained climbs.
Stick with your bike’s stock pitch unless you’re doing a full drivetrain upgrade for racing. The performance gain from a lighter chain is real, but the compatibility headache isn’t worth it for a street bike. I’ve seen more driveline vibration from a mismatched chain than from any sprocket choice.
Front vs. Rear: Which Sprocket Should You Change?
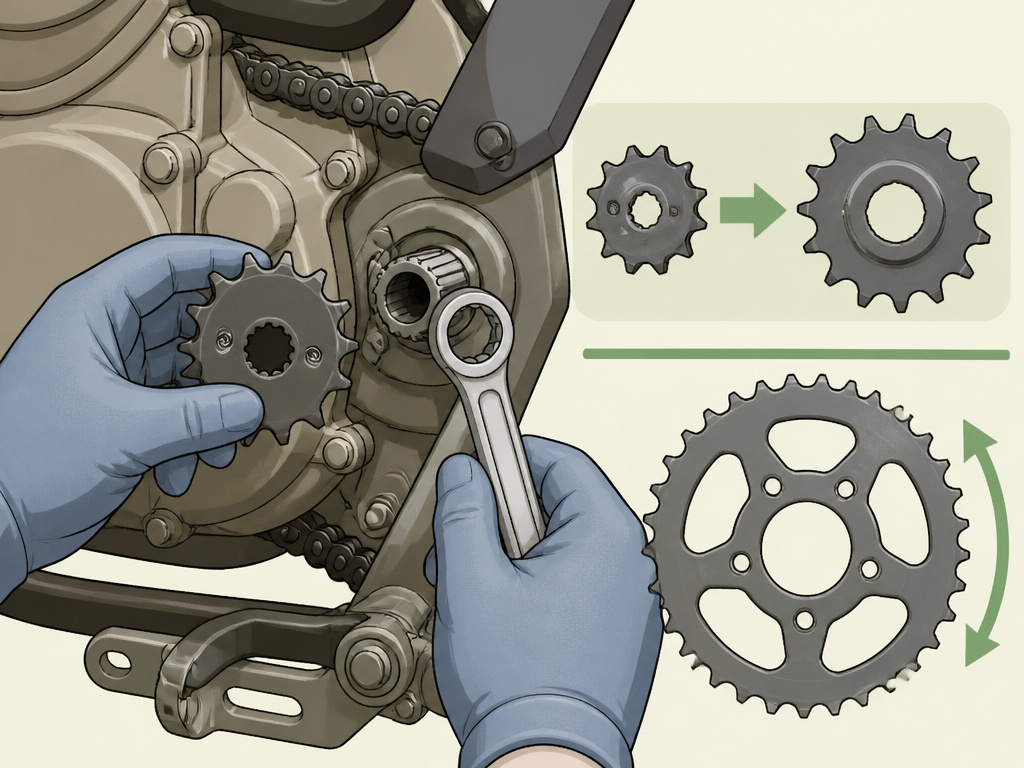
You change the front sprocket for a significant ratio change with minimal cost and weight when learning how to change motorcycle sprocket gearing. You change the rear sprocket for fine-tuning, or when the front can’t go any smaller due to clearance or wear concerns.
A one-tooth change on the front is roughly equivalent to a 2.5-tooth change on the rear. This makes the front the go-to for most riders. But there’s a catch. A smaller front sprocket has to pull the chain around a tighter radius. This increases chain tension and angular load, accelerating wear on both the chain and the sprocket itself. Most mechanics advise against going more than two teeth smaller than stock on the front.
The rear sprocket is the place for small adjustments. Want a bit more cruising comfort without killing acceleration? Add one tooth to the front, or drop two from the rear. The effect is subtler, and the chain runs more smoothly. It’s also the only option if you’ve maxed out the front sprocket’s adjustability. This is a common step in a full chain and sprocket guide.
The part nobody mentions: Aluminum rear sprockets save weight but wear out 2-3 times faster than steel. If you do mostly highway miles, the steel sprocket will outlast several chains. For a track bike where every ounce counts, aluminum makes sense. For the street, steel is the default.
The 3 Tools You Can’t Do This Without
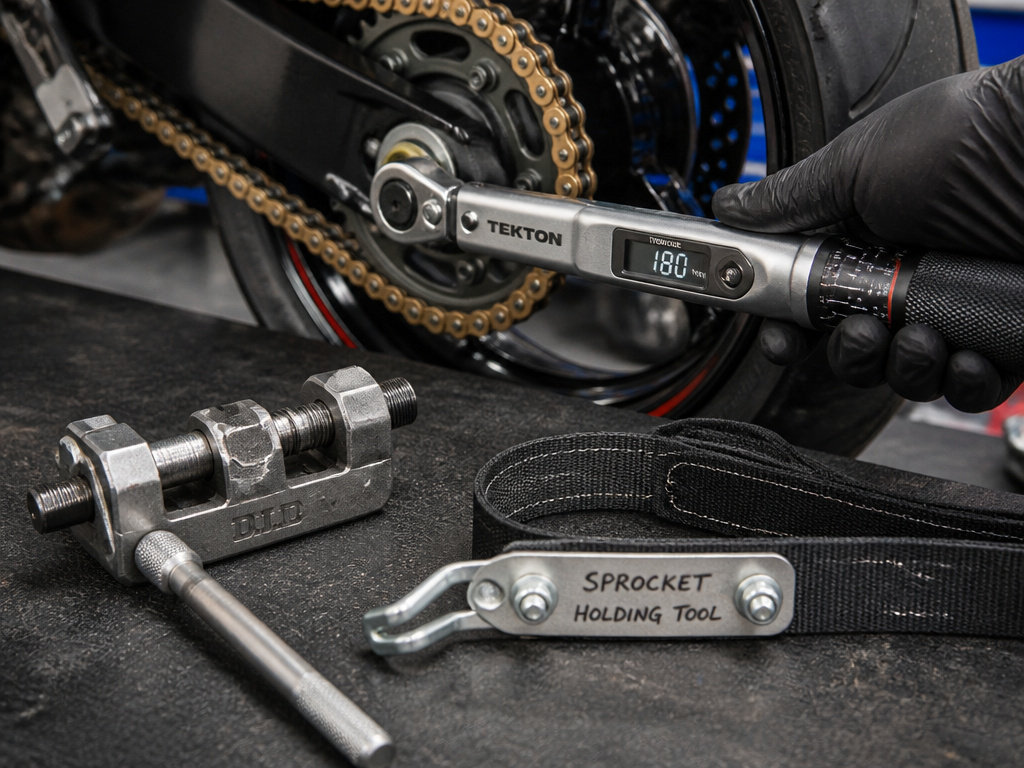
You can get the sprockets off with a basic socket set, but doing it right requires three specific tools most home garages lack.
- A Torque Wrench. This tool is required. The Triumph Scrambler 1200 XC manual calls for 180 Nm on the front sprocket nut. The Zero manual specifies 53 lb-ft (72 Nm) for its front sprocket screw and 26 lb-ft (35 Nm) for the rear sprocket bolts. Guessing these values strips threads or leads to a loose sprocket.
- A Chain Breaker/Riveting Tool. If you’re replacing the chain, you need this to remove the old chain and install the new master link. A clip-style master link is easier but less secure than a riveted link for high-power bikes.
- A Sprocket Holding Tool or Custom Brake. For the front sprocket, you need to stop it from spinning while you loosen the colossal nut. The S&S Cycle instructions for Harley-Davidson M8 models mandate the Harley-Davidson #42314 sprocket locking tool. For other bikes, the Hayabusa Owners Group modification discussion is full of homemade solutions, like a section of old belt clamped in a vise to act as a sprocket brake.
Sources disagree on this method: some forums (e.g., Hayabusa.org) advise against putting the bike in gear and holding the rear brake once the chain is off, as the engine may still rotate, while a simpler textbook approach may imply this method. You’re left hammering on a breaker bar, which is how rounded nuts and damaged output shafts happen.
The 7-Step Bump-Feed Replacement (and the One Step Nobody Skips)
Here is the universal sequence for a chain-drive motorcycle. Belt-drive bikes like Zeros or some Harleys are different, their front sprocket is often part of a sealed motor assembly requiring heat and specific pullers.
- Secure the bike on a rear stand. The rear wheel must be off the ground and free to spin.
- Remove the rear wheel. This gives you slack to remove the chain. For a step-by-step sprocket replacement, this is the most physical part.
- Break the chain. Use your chain breaker tool to push out a pin on the old chain. If you’re reusing the chain, you’ll need a new master link.
- Remove the front sprocket cover. There are usually a few small bolts. On the Triumph Scrambler 1200 XC, the outer-to-inner cover bolts torque to 9 Nm, and the inner-to-crankcase bolts are just 3 Nm. Keep them organized.
- Lock the front sprocket and remove the nut. Use your holding tool or custom brake. Crank the nut off. This is where an impact wrench is tempting, but it’s forbidden on Zero motorcycles to protect the internal encoder.
- Swap the sprockets. Slide the old sprockets off. Clean the output shaft and wheel hub splines thoroughly. The Zero manual specifies applying Loctite 680 to the shaft splines and Loctite 271 to the sprocket screw during reassembly.
- Reinstall in reverse order. Torque the front sprocket nut to spec, then the rear sprocket bolts. Install the new chain, set the chain adjustment, and check alignment.
Skip this if: You are only changing the rear sprocket and reusing the chain. You must still remove the rear wheel and likely the brake caliper and rotor to access the sprocket bolts.
The step everyone tries to skip is checking the old sprocket’s condition. I fitted a new chain to a worn rear sprocket once to save fifty bucks. The teeth were hooked like shark fins. The new chain was noisy and visibly stretching within 2,000 miles. It cost me a second chain. The sprocket is the cheap part. If the teeth are pointed, hooked, or asymmetrical, replace it as a set. Your guide to motorcycle chains will thank you.
How to Calculate Your New Chain Length
Changing sprocket sizes usually changes the needed chain length. A larger rear sprocket or a smaller front sprocket pulls the rear wheel forward, requiring a shorter chain. The opposite requires a longer one.
Don’t guess. Use the formula:
- Divide the number of teeth on the rear sprocket by the number of teeth on the front sprocket to get the ratio.
- Multiply that ratio by the chain’s pitch (distance between pins, e.g., 0.625″ for a 520 chain).
- Multiply that result by 2.
- Add that number to the distance between the center of the front and rear sprocket axles (your wheelbase).
This gives you the theoretical chain length in inches. Chains are sold in even-numbered link counts, so you’ll round to the nearest whole link. Most riders buy a 120-link chain and break it to size. When in doubt, size up, you can always remove links, but you can’t add them. This calculation is why many riders opt for a professional chain riveting job for their final installation.
How to Recalculate Your Speedometer
Your speedometer works off a signal from the transmission or front wheel. Changing the final drive ratio changes how fast the wheel spins for a given engine RPM, throwing the reading off.
If you shortened your gearing by 10% (for 10% more acceleration), your actual speed is now higher than what the speedo shows. At an indicated 60 mph, you’re really doing about 66 mph. That’s a fast way to get a ticket.
You have two fixes:
- A Speedo Healer or similar electronic calibrator. This is the cleanest solution. You plug it into the speed sensor wire and program it with your percentage of change.
- Mental Math. Simpler but prone to error. Just remember your correction factor. A 10% taller gearing means your speedo reads 10% low. Multiply your speedo reading by 1.1 to get your true speed.
The best way to verify your work is with a GPS speedometer app on your phone. Take the bike for a steady cruise on a straight road and compare. It’s the only way to be sure your chain lubrication and gearing haven’t created a hidden liability.
Checking for Physical Clearance Issues with New Sprocket Sizes
Before finalizing your sprocket change, you must check for physical interference. A larger front sprocket or a smaller rear sprocket can cause the chain or belt to contact the engine case, swingarm, or chainguard. With the new sprocket temporarily installed but not torqued, manually rotate the rear wheel through a full revolution. Watch and listen for any contact between the drive system and the bike’s frame. Pay special attention to the area where the chain or belt passes over the swingarm pivot. Even a slight rub under load will cause rapid wear and potential failure. This check is a mandatory step that can save you from costly damage.
Frequently Asked Questions
How much difference does a 1-tooth rear sprocket make?
It depends on your stock gearing. On a bike, adding one tooth to the rear sprocket changes the final drive ratio. You’ll feel a slight increase in acceleration and notice an RPM increase at highway cruising speed. It’s a subtle change, good for fine-tuning.
What is the recommended sprocket ratio for a motorcycle?
There is no universal “recommended” ratio. It’s dictated by your bike’s power band, weight, and how you ride. Manufacturers choose a stock ratio as a compromise. The best ratio is the one that puts your engine’s peak power in the RPM range you use most often. For highway commuting, a taller ratio (larger front/smaller rear) is often better. For city riding or track use, shorter gearing (smaller front/larger rear) improves responsiveness.
Does a bigger rear sprocket make you go faster or slower?
Bigger rear sprocket, by itself, makes your top speed lower. It increases acceleration by making the final drive ratio shorter (numerically higher). The engine reaches its RPM limit sooner in each gear, capping your top speed. It makes you feel faster because of the stronger pull, but your actual maximum velocity decreases.
Should I replace the chain when I change sprockets?
Yes, almost always. It is standard practice to replace the chain and sprockets as a set. If your old chain has significant stretch or you cannot check chain wear confidently, replace it as a set. It’s standard practice for a reason.
The Bottom Line
Changing sprockets is one of the most cost-effective performance mods you can do. The theory is simple, but the execution demands precision, on torque values, chain length, and sprocket condition.
If your goal is sharper acceleration for street riding, start with a one-tooth-smaller front sprocket. It’s the biggest change for the least money and effort. Just buy a steel sprocket, a new chain, and a torque wrench. Ignore the forum debates about impact guns and just use the holding tool specified in your manual.
And after it’s all bolted on and lubricating your chain, check your speedometer against GPS. That final step is what separates a job with a verified speedometer from a guess.
