
How to Replace a Motorcycle Chain and Sprockets
This post contains affiliate links. As an Amazon Associate, we earn from qualifying purchases.
To replace a motorcycle chain and sprockets, you need a chain breaker, torque wrench, and impact driver to remove the old set, then install new sprockets and a correctly sized chain with a riveted master link, torquing all fasteners to spec. Always replace the chain and both sprockets as a set, a new chain on worn sprockets damages itself within weeks.
That last line is the whole job. A chain and sprockets wear together. Installing one new piece on old mates is like putting a new piston in a scored cylinder, it runs, but not for long. The official Ducati service bulletin from 2023 spells it out: a new chain on worn sprockets gets damaged quickly. This isn’t a suggestion. It’s the predictable outcome of mismatched wear. For a reliable result, you must learn how to replace a motorcycle chain and sprockets as a set.
What follows is the walkthrough for how to replace a motorcycle chain and sprockets, but with the numbers and warnings from the manufacturer bulletins most guides skip. You’ll get the step list, the tool rundown, and the specific wear limits for brands like Ducati and Triumph that change when you know to look for them.
Key Takeaways
- Replace the chain and both sprockets together. A new chain on a worn sprocket wears out in a fraction of its normal life.
- Torque every fastener to the factory specification using a crisscross pattern on the rear sprocket nuts. Guessing here strips threads or throws alignment.
- Use a rivet-style master link, not a clip. High centrifugal force can throw a clip link, even with glue or safety wire.
- Lubricate a new chain immediately after installation. Ducati’s bulletin says to lubricate the chain without waiting for it to cool down, but do not use the motorcycle immediately after lubricating.
- Chain pitch is not interchangeable. You cannot install a 520 chain on 530 sprockets. The parts will not mesh and will destroy each other.
The 9 Tools You Cannot Skip
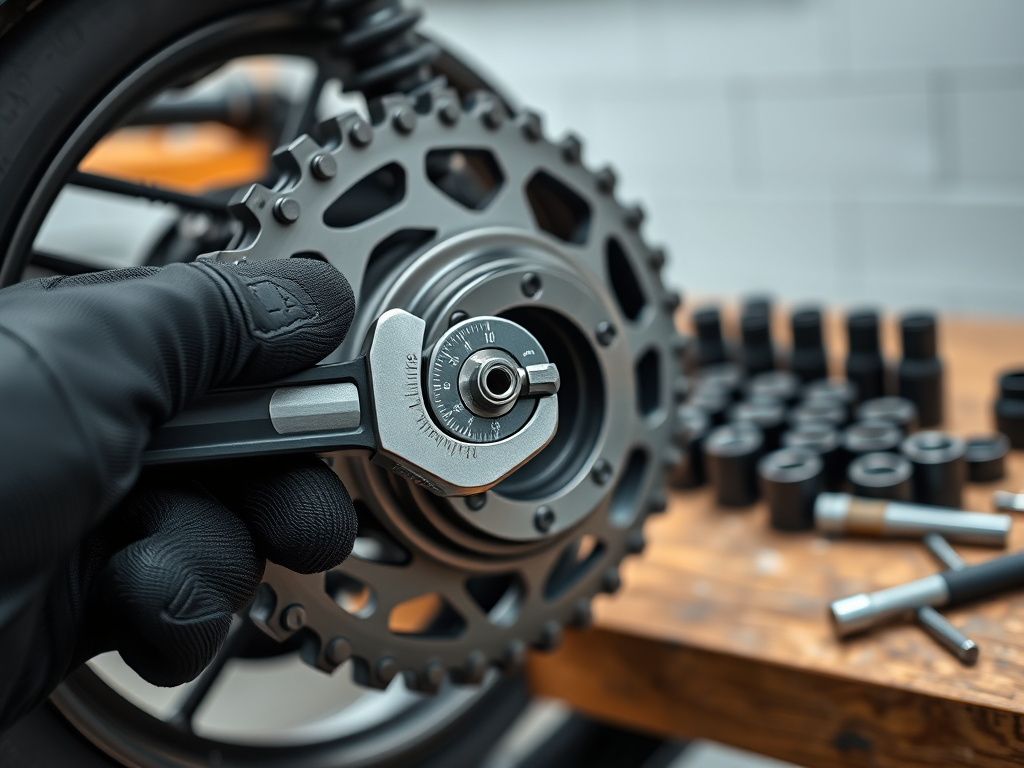
Skip one of these and the job of how to replace a motorcycle chain and sprockets gets harder, slower, or outright unsafe. This isn’t a maybe list.
You need a chain breaker and riveting tool. The Oxford 3-in-1 is a common pick. A grinder is a bodge that risks damaging the new chain’s side plates. A proper chain breaker tool presses the pin out cleanly.
A torque wrench is essential. The rear sprocket nuts and the countershaft nut must be torqued to the value in your service manual. An impact gun can set the initial break, but final torque needs the wrench.
Common mistake: Tightening sprocket nuts “good and tight” by feel. Overtightening stretches the studs; undertightening lets the sprocket walk. The nuts must be torqued in a crisscross pattern to the manufacturer’s specification.
A breaker bar with a pipe extension (or a cordless impact wrench) for the countershaft nut. That nut is often torqued to over 100 Nm and sealed with a lockwasher. You will not budge it with a standard ratchet.
Other essentials:
- Socket set (sizes for your axle, sprocket, and countershaft nuts)
- Rear stand or lift
- Mallet and a block of wood to lock the rear wheel
- Flathead screwdriver or chisel to bend the countershaft lockwasher tabs
- Caliper or ruler for measuring chain slack
- Safety glasses
When Is It Time for a New Set?
You check three things: chain stretch, sprocket teeth, and the chain’s physical condition. Waiting for a skip or a visible crack is waiting for a failure on the road.
First, measure chain stretch. The method changes if the chain is on or off the bike. Ducati’s 2023 bulletin says to measure over 16 pins (center of the first pin to center of the 17th). For their 520, 525, 530, and 532 chains, the maximum is 256.5 mm. Go over that, replace it.
If the chain is off the bike, tension it with a weight to measure. Here’s where manufacturers disagree. Ducati (via NHTSA TSB 2018) says use a weight of about 20 kg, while the Triumph Daytona Moto2 765 manual says to hang a 10-20 kg (20-40 lb) weight. The point is to take all slack out for an accurate measurement. Without tension, your reading is useless.
| Inspection Point | What to Look For | Failure Consequence |
|---|---|---|
| Chain Stretch | Over 16-pin length exceeds maker’s limit (e.g., 256.5mm for Ducati). | Chain rides up sprocket teeth, skips, and can snap. |
| Sprocket Teeth | Teeth are shaped like a ‘hook’ instead of symmetrical. | New chain will wear unevenly and stretch rapidly. |
| Chain Links | Cracks on plates or pins, spinning pins, damaged O-rings, scratched rollers. | Immediate risk of chain failure under load. |
| Master Link | Clip-type link (instead of rivet) on a high-performance bike. | Clip can detach at high RPM, throwing the chain. |
Second, look at the sprocket teeth. Worn teeth lose their symmetrical profile and become hooked. Run your finger over them. A sharp, pointed tooth is new. A rounded, hook-shaped tooth is done. This is a visual check, no tools needed.
Third, inspect the chain itself. The official checklist from Ducati’s 2019 bulletin is definitive. Replace the chain if you see any of these:
- Cracks on the side plates
- Cracks on the link pins
- Pins that spin freely
- Damaged or missing O-rings
- Deep scratches on the rollers
A chain with stiff links that don’t flex smoothly is also a warning sign. It indicates internal corrosion or damage.
Step 1: Preparation and Rear Wheel Removal
Put the bike on a rear stand. Remove the rear axle nut and the axle itself. You may need to loosen the brake caliper and disconnect the rear brake torque arm. Let the wheel drop down slightly.
Now, loosen the chain. Back off the chain adjusters on both sides of the swingarm evenly. This gives you the slack needed to get the chain off the rear sprocket.
Before you disconnect anything, take a picture of the chain adjuster markings with your phone. This gives you a baseline to return to for initial tension later. Getting the wheel straight matters for chain alignment.
With the wheel free, pull it back and down to drop the chain off the sprocket. You can now set the wheel aside.
Step 2: Removing the Countershaft Sprocket
This is often the hardest fastener on the bike. Remove the countershaft sprocket cover. You’ll see a large nut with a lockwasher that has tabs bent over to lock it.
Straighten those tabs with a flathead screwdriver or chisel. Get them completely flat. If a tab is still raised, your socket won’t seat fully and you’ll round the nut.
Lock the rear wheel. Put the bike in gear and have a helper stand on the rear brake. Or, put your block of wood between the rear wheel spokes and the swingarm. With the wheel locked, use your breaker bar and pipe (or impact wrench) to break the nut loose. It will crack loudly. Thread it off by hand.
The sprocket should slide off the shaft splines. If it’s stuck, a gentle tap with a mallet and a pry bar behind it will pop it free. Do not hammer directly on the shaft or its threads.
Step 3: Removing the Old Chain and Sprockets
With both sprockets accessible, you can remove the chain. If your old chain has a clip-style master link, remove the circlip and slide the link plate off. Most original equipment chains use a riveted link, so you’ll need your chain breaker.
Position the chain breaker on a link pin on the lower run of the chain, stabilizing the chain against the rear sprocket if possible. Turn the tool’s handle to press the pin out. Go slow. You want to push the pin just far enough that you can separate the link, not blast it out the other side and damage the opposing plate.
Once the chain is split, feed it off the sprockets. Remove the old rear sprocket by unbolting the nuts. Remember the order of any spacers or rubber dampers behind the sprocket.
Step 4: Installing the New Sprockets
Clean the mounting surfaces. Any grit or old grease left on the rear wheel hub or the countershaft splines can cause misalignment.
Install the new front sprocket. Slide it onto the splines, ensuring it sits flush. Put on the new lockwasher (the bent tabs face out) and thread on the new nut hand-tight.
Install the new rear sprocket. Place it over the studs, ensuring any alignment marks (like a dot near one hole) match the hub. Hand-tighten all the nuts.
Where this goes sideways: Tightening the rear sprocket nuts in a circle. This can warp the sprocket slightly. Always torque in a crisscross pattern, like tightening a cylinder head. This seats the sprocket evenly against the hub.
Now, torque the fasteners. Refer to your service manual for values. Refer to your service manual for the specific torque values for your motorcycle’s rear sprocket nuts and countershaft nut. Use your torque wrench and do the rear nuts in a star pattern. Do not final-torque the countershaft nut yet, you’ll do that after the chain is on and the wheel is positioned.
Step 5: Fitting and Sizing the New Chain
Run the new chain around both sprockets. Pull the ends together on the rear sprocket. The goal is to have the master link land in a position that’s easy to access, usually on the lower run.
You will almost certainly need to shorten the chain. New chains come long. Do not guess. The proper method is to pull the chain tight around the rear sprocket so there’s no slack, and mark where the links meet. The pin you drive out should be the one that gives you the correct number of links for a tight fit.
Here is the critical compatibility check. Chain pitch (520, 525, 530) must match the sprockets exactly. The NHTSA motorcycle chain service bulletin states it is NOT possible to install a 520 chain on 530 sprockets. The parts will not mesh. The numbers stamped on the old chain and sprockets are law.
Also, master links are brand-specific. A DID clip link will not fit an RK chain of the same pitch. You must use the master link supplied with your new chain kit.
Step 6: Installing the Master Link
Prefer a rivet link. A clip link is a weaker point and, as noted in general guides, high speed can potentially cause the circlip to come off. A rivet link, when properly peened, becomes a permanent part of the chain.
If you have an O-ring chain, ensure the O-rings are seated in the grooves on the link pins before you assemble. For Regina chains specifically, the official bulletin notes that special handed O-rings must be installed on the opposite side of the master link with the protruding side facing out.
Assemble the link. Slide the two pins through the chain ends, place the O-rings (if applicable), and press the outer side plate on. Use the pressing function of your chain tool to squeeze the plate onto the pins until there’s a slight gap, about the thickness of a playing card, between the side plate and the link’s inner plates. This is side-play clearance.
Now, peen the pin ends. Switch your chain tool to the riveting attachment. Carefully mushroom the hollow ends of the pins over the side plate. The NHTSA final drive chain precautions include a warning here: too much torque can crack the pin end. Turn the tool carefully; too much torque can crack the pin end. Follow your chain tool and chain manufacturer’s instructions for proper riveting. A small, even flare is the goal.
Step 7: Final Adjustment and Torque
Reinstall the rear wheel. Slide the axle through, get the chain onto the sprocket, and align the wheel using your earlier photo. Push the wheel forward until the chain has about an inch of up-and-down play at the midpoint between the sprockets. Push the wheel forward until the chain has the preliminary slack specified in your service manual.
Now, final-torque the axle nut to spec. Then, return to the countershaft sprocket. With the rear brake locked or the wheel blocked, torque the countershaft nut to its specification. Bend the tabs of the new lockwasher over to lock the nut in place. Use a chisel or punch to bend them cleanly against a flat of the nut.
Finally, set the exact chain tension. Consult your manual for the specific free play measurement. Adjust the chain adjusters evenly on both sides, checking the alignment marks on the swingarm. A chain adjustment guide is useful here. Once set, torque the adjuster locknuts.
Post-Installation: Lube and Test
Your new chain is dry. Lubricate it now. Ducati’s bulletin has a specific method: spray lubricant on the inside of the chain, between the inner and outer links, at the point just before it meshes with the sprocket while spinning the wheel. The centrifugal force pulls the lube into the pin-bushing interface. Then spray the rollers and side plates.
Lubricate the chain without waiting for it to cool down after installation. The residual warmth helps the lubricant penetrate. Do not ride immediately, Do not use the motorcycle immediately after lubricating the chain.
Do a static test. Spin the wheel and check for tight spots or binding. Look at the chain line from behind the rear sprocket to the front; it should be straight. Re-check all torque values.
Take a short, gentle test ride. After a few miles, stop and re-check chain slack. Readjust if needed. This first re-tension is part of the run-in. For road use, Ducati says to inspect and restore proper tension after the first 100 km and every 400 km thereafter.
Frequently Asked Questions
How much does it cost to replace a motorcycle chain and sprocket?
The cost varies depending on parts quality and whether you need to purchase tools. Doing it yourself can save on shop labor costs.
How often should a motorcycle chain and sprockets be changed?
There is no fixed mileage. It depends on maintenance, riding style, and conditions. Ducati cites an average service life of about 20,000 km with proper care. You must inspect regularly. Check tension and lube every 400 km, and look for hooked sprocket teeth and measure chain stretch every few thousand miles. Neglect can drastically shorten the service life of a chain and sprocket set.
What tool do I need to change my motorcycle chain?
Without the chain tool, you cannot safely install a rivet-style master link, which is the recommended method for most street bikes.
Can I replace my bike chain myself?
Yes, if you have the tools, a service manual for torque specs, and patience. The steps are mechanical, not magical. The most critical part is torquing everything correctly and ensuring proper chain alignment. If you are unsure about using a rivet tool, practice on the old chain first.
Can I just replace the chain and not the sprockets?
No. This is the single most important rule. Worn sprockets have a different tooth profile that will not mesh correctly with a new chain. The new chain will wear at an accelerated rate, often stretching beyond adjustment in a few thousand miles. Always replace as a complete set. This is stated explicitly in both Ducati and Triumph documentation.
What’s better, a clip or rivet master link?
For street riding, a rivet link is more secure. The peened-over pins are permanent. A clip link relies on a spring clip that can be dislodged by debris or high centrifugal force. Many track organizations and manufacturers recommend rivet links for this reason. If you do use a clip link, ensure the closed end of the clip faces the direction of chain rotation.
Before You Go
One final check matters more than any other: sprocket alignment. After everything is torqued, sight along the chain from the rear sprocket to the front. The chain should run in a perfectly straight line. If it looks kinked or angled, your rear wheel is misaligned. That misalignment wears out a new chain in months, not years.
The official bulletins have the numbers, 256.5 mm over 16 pins, lube every 400 km, 20 kg of tension for measurement. Your job is to match them. A chain drive is simple until you ignore one of those specs. Then it gets expensive, loud, and dangerous. Follow the numbers, torque the nuts, and the next 20,000 km are quiet.
