
How to Store a Motorcycle for Winter: Step-by-Step Guide
This post contains affiliate links. As an Amazon Associate, we earn from qualifying purchases.
Store your motorcycle for winter by performing five critical tasks: treat the fuel, care for the battery, change the oil, clean and protect the bike, and put it on a stand. Indian Motorcycle and Polaris specify this process for any period over 60 days. The core conflict is between manufacturers who say fill the tank and those who say drain it; street bike manuals typically advise a full tank with stabilizer.
That 60-day threshold is the trigger. It’s not a suggestion for deep winter; it’s the manufacturer’s calculated point where untreated gasoline begins to degrade and a battery left connected starts to discharge. This is a key principle of how to store a motorcycle for winter. Miss that window, and you’re not just delaying a ride, you’re guaranteeing a morning spent dealing with a clogged carburetor or a dead security system.
What follows is the full breakdown: the five universal steps, the manufacturer disagreements you must resolve for your bike, how to adapt for a shed or driveway when considering how to store a motorcycle for winter, and the single biggest mistake that costs riders every spring.
Key Takeaways
- The 60-day rule from Indian and Polaris is your trigger for formal storage, not a calendar date.
- Fill the fuel tank and add stabilizer for street motorcycles; drain the tank completely only if your manual explicitly says to (common for competition models).
- Remove the battery and store it in a 32–90°F (0–32°C) environment, or disconnect the negative terminal if leaving it in place. Harley-Davidson notes that if the security system is armed, a Battery Tender must be connected.
- Do not start the bike periodically. Indian Motorcycle explicitly advises against it, as it introduces moisture without reaching full operating temperature. Harley-Davidson’s procedure involves running the engine after an oil change before storage.
- Use a breathable, canvas-style cover; plastic traps moisture and promotes rust.
The 5 Non-Negotiable Pre-Storage Steps
Every storage guide talks about these. Most get the order wrong. The sequence matters because each step sets up the next. Do them in this order, and you prevent problems instead of creating them.
-
Treat the Fuel System. Add a fuel stabilizer to a full tank of fresh gasoline, then run the engine to circulate the treated fuel through the entire system. This coats the internals and prevents the ethanol in modern gas from separating and turning into a varnish that clogs injectors and carburetors. > Where this goes sideways: Adding stabilizer to old gas. The stabilizer can’t rejuvenate fuel that’s already begun to break down. If your tank has gas older than 30 days, siphon it out and start fresh.
-
Change the Oil and Filter. Do this before storage, not after. Used engine oil contains acids and contaminants that corrode internal components over months of sitting. Harley-Davidson’s procedure includes running the engine after the change to circulate the fresh oil, coating parts with clean lubricant.
-
Address the Battery. You have two valid paths, and they come from different manufacturers. Indian Motorcycle says remove the battery. Honda, for the NC700X, says you can disconnect the negative terminal if you leave it in place. Choose one. Storing a battery inside a motorcycle that will experience freezing temperatures is a sure way to kill it.
-
Give It a Deep Clean and Protect. This isn’t about vanity. Dirt and road salt hold moisture against metal and paint. Wash the bike thoroughly. Dry it completely. Wax all painted surfaces. Honda’s manual says to coat chrome pieces with a rust-inhibiting oil, a thin film that keeps air off the metal.
-
Get the Tires Off the Ground. Flat spots form when a tire bears the bike’s weight in one spot for months. Use a center stand, paddock stands, or a motorcycle lift. If you lack stands, the Honda NC700X manual suggests a simple block under the frame to lift both tires. Over-inflating tires can help, but lifting is the definitive fix.
| Step | Primary Goal | Consequence If Skipped |
|---|---|---|
| Fuel Stabilizer | Prevent ethanol separation & varnish | Clogged carburetors/fuel injectors; difficult spring start |
| Oil Change | Remove corrosive acids from crankcase | Internal engine corrosion; premature wear |
| Battery Removal/Disconnect | Prevent parasitic drain & freezing damage | Dead battery requiring replacement |
| Deep Clean & Wax | Remove moisture-trapping contaminants | Surface rust & corrosion on paint, chrome, and alloy |
| Lift Tires | Prevent tire flat-spotting | Permanent tire deformation; vibration when riding |
Resolving the Big Manufacturer Disagreements
Here’s the part most guides gloss over: the official factory manuals don’t all say the same thing. Following the wrong one for your bike can cause damage. You need to know which rulebook you’re playing by.
Fuel: Full Tank vs. Empty Tank.
This is the most confusing split. Indian Motorcycle, Polaris, and Harley-Davidson all instruct you to fill the tank and add stabilizer. A full tank minimizes internal air space, which reduces condensation that can lead to rust inside the tank. However, Honda’s manual for the CRF250R/RX competition dirt bike instructs to drain the fuel tank completely. This is the exception, driven by different fuel systems and storage expectations for race bikes.
The rule of thumb: If you ride a street-legal motorcycle, fill the tank. If you own a dedicated competition machine, check its manual, it may say to drain it.
Battery: Remove vs. Disconnect vs. Leave On a Tender.
The advice varies based on your bike’s features. Indian says remove it. Honda offers a choice: remove it or disconnect the negative terminal. Harley-Davidson introduces a third option: if your bike’s security system will remain armed, you must connect a Battery Tender to maintain charge.
I lean toward removal. It lets you store the battery in a stable, above-freezing environment and eliminates any chance of a parasitic drain from the clock or computer.
Coolant: Maintain vs. Drain.
For liquid-cooled street bikes, the consensus is to check and fill the system. Harley-Davidson is strict here, specifying use of only Genuine Harley-Davidson Extended Life Antifreeze and Coolant. Draining the coolant is, again, primarily for competition models (like the CRF250R) that use different fluids and procedures.
Adapting Your Storage for a Garage, Shed, or Driveway
Your storage location changes the equation for how to store a motorcycle for winter. A climate-controlled garage is the goal, but a shed or driveway setup needs extra steps.
Ideal Indoor Storage:
Polaris defines this: a dry, well-ventilated space with a firm, flat surface. Keep the bike away from hot water heaters, furnaces, or any device with a pilot light or electric motor. All manufacturers issue a stark warning: gasoline fumes are explosive. Do not store a bike with fuel in the tank near any potential ignition source.
Outdoor or Unheated Shed Storage:
This is where most rider anxiety lives. The principles are the same, but the stakes are higher.
- Cover is Critical: Honda specifically recommends a full-body motorcycle cover for outdoor storage. The cover must be breathable. Harley-Davidson says to use a material like light canvas; plastic tarps trap moisture underneath and will rust your bike faster than the rain would.
- Address Condensation: After any rain or snow, Honda advises removing the cover to let the motorcycle dry completely. A damp bike under a cover is a rust incubator.
- Security Becomes a Priority: An outdoor bike is a target. Beyond a breathable cover, consider a disc lock, chain, or motion-sensitive light. Our guide on how to secure your motorcycle at home covers low-cost, high-effect strategies.
- Rodent Proofing: Indian Motorcycle calls out rodents as a “worst enemy.” For sheds or rural storage, place steel wool or screen mesh over exhaust and intake openings. Remove these before starting the bike in spring.
Before you start outdoor storage: Your battery choice is made for you. You must remove it and bring it indoors. A battery left in an unheated shed will freeze and be destroyed.
The Battery and Electrical System Deep Dive
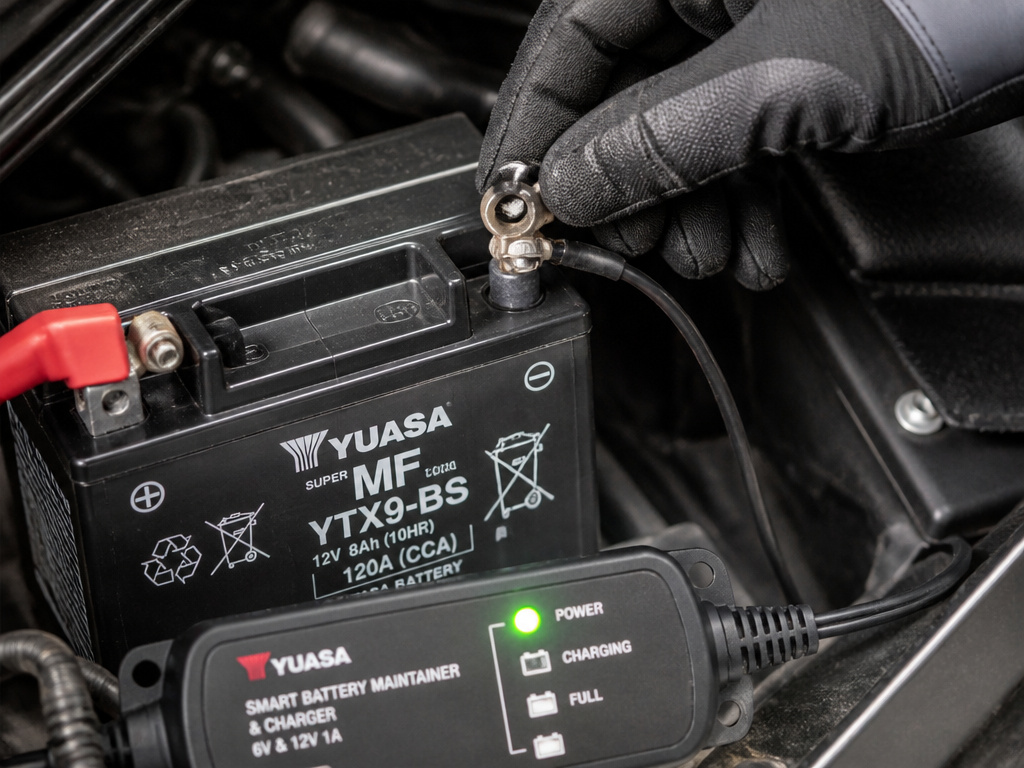
This is the system most likely to fail over winter. A modern motorcycle battery self-discharges even when disconnected. A battery left connected to a bike with an alarm or computer will be dead in weeks.
Your Three Options (Pick One):
- Remove and Store Indoors: This is the gold standard. Store the battery in a cool, dry place like a basement, as per Indian Motorcycle’s 32–90°F (0–32°C) range. Connect it to a battery maintainer for the duration.
- Disconnect the Negative Terminal: If removal is difficult, Honda’s fallback is to disconnect the negative (-) cable. This stops all parasitic drain. The battery still needs to be kept from freezing, so this only works in a garage that stays above freezing.
- Leave Connected on a Maintainer: Harley-Davidson’s procedure for bikes with armed security systems. This requires a dedicated outlet near the bike. Use a quality, automatic maintainer, not a old-school trickle charger that can overcharge and cook the battery.
Charging Safety is Non-Negotiable.
Both Honda and Harley-Davidson emphasize charging in a well-ventilated area, away from sparks or open flames. Batteries release explosive hydrogen gas during charging. A garage with a gas water heater is a dangerous place to charge.
What NOT to Do: The Periodic Start Myth
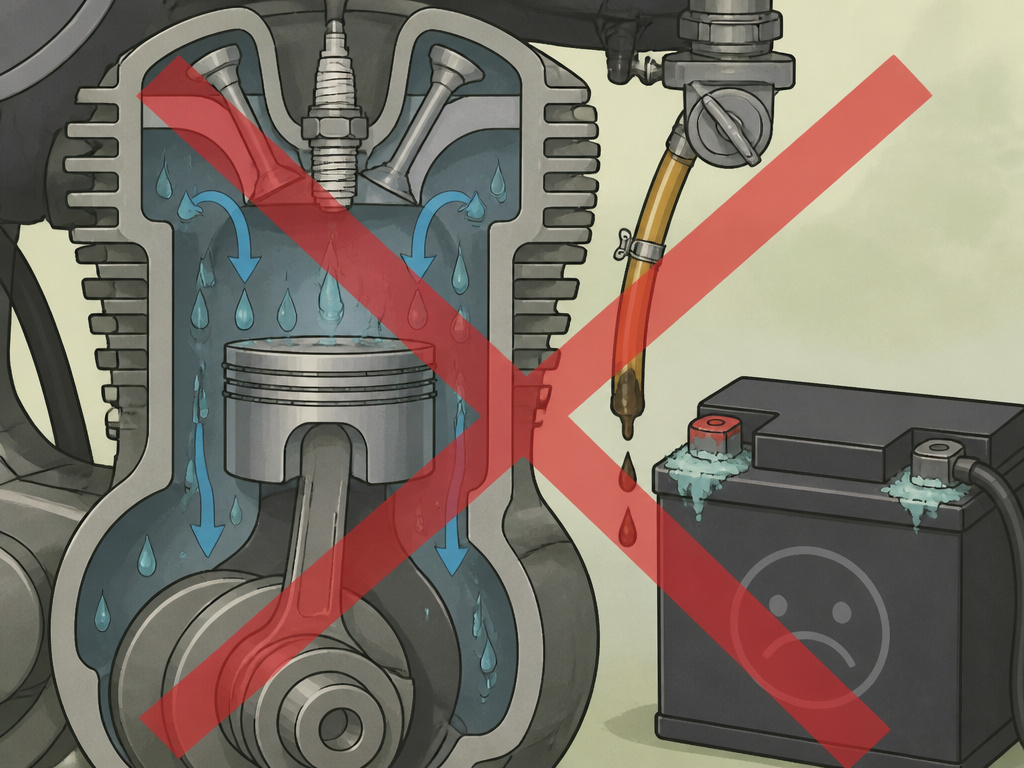
You’ll hear this everywhere: “Just start it up every couple of weeks and let it run for 10 minutes.” This is terrible advice, and Indian Motorcycle explicitly warns against it.
Starting the motorcycle periodically during storage is NOT recommended.
Here’s why: a short run doesn’t get the engine hot enough to boil off the moisture created during combustion. That water condenses inside the oil and the exhaust system, accelerating corrosion. You’re also pumping untreated, old fuel through the system without ever burning it off. You accomplish nothing except draining your battery and coating your engine internals with acidic water.
Preparing for Spring: The De-Winterizing Checklist
Storage isn’t complete until you’ve successfully brought the bike back to life. This is where Harley-Davidson’s clever tip comes in: make a list of everything you did for storage and fasten it to the handlebar. That list is your spring checklist.
- Reinstall the Battery. If removed, give it a full charge before installation. Check terminals for corrosion and clean them.
- Check All Fluid Levels. Oil, coolant, and brake fluid. Harley notes that if the bike was stored outdoors with wide temperature swings, change the engine oil before starting it.
- Inflate Tires. Check pressure and inflate to the spec on the swingarm or manual. Inspect for cracks or flat spots.
- Perform a Visual Inspection. Look for rodent nests, leaks, or any obvious issues. Check the chain and lubricate it if needed.
- Start the Engine. Let it idle and reach full operating temperature. Check for odd noises or warning lights.
- Test Everything. Brakes, clutch, throttle, lights, and horn. Before your first ride, take a slow loop around the neighborhood to ensure everything feels right.
Insurance considerations during storage
Review your motorcycle insurance policy before storage. If your bike will be inoperative for an extended period, typically longer than 60 days, you might have options to adjust your coverage. Some insurers offer storage or lay-up policies that suspend liability and collision coverage while still protecting your bike in your garage against theft, fire, or other damage. This can reduce your premium during the off-season. Ensure the storage location meets any policy requirements, such as being in a locked, secure structure. Before riding again, remember to fully reinstate your policy well in advance.
Storing riding gear/PPE
Your helmet, jacket, gloves, and boots need proper off-season care. Start by giving everything a thorough cleaning according to the manufacturer’s instructions to remove road grime, sweat, and salt. Allow all gear to dry completely in a well ventilated area away from direct heat sources; never use a radiator or hair dryer, as excessive heat can damage protective materials and glues. Store gear in a cool, dry place, ideally on a shelf or in a closet. Avoid compressing your helmet or leaving it in a damp basement, as this can degrade its protective foam liner and compromise its integrity for the next season.
Frequently Asked Questions
How long can a motorcycle sit without being used before needing storage prep?
According to Indian Motorcycle and Polaris owner’s manuals, the formal storage process should begin if the bike will be inactive for more than 60 days.
Should I drain the gas from my motorcycle for winter?
For most street motorcycles, no. Manufacturers like Indian, Harley-Davidson, and Harley-Davidson recommend a full tank with fuel stabilizer to prevent internal rust from condensation. Draining is typically only for competition models where the manual explicitly instructs it.
Is it okay to store a motorcycle outside in the winter?
Yes, but it requires specific preparations. You must use a breathable, weatherproof cover, remove the battery for indoor storage, and take extra measures to prevent rust and rodent infestation. A driveway-stored bike is at higher risk for theft, so additional security is a must.
Can I just disconnect the battery instead of removing it?
Yes, this is an approved method. The Honda NC700X owner’s manual states that if you leave the battery in place, disconnect the negative (-) terminal to prevent discharge. This is a solution for garage storage where temperatures stay above freezing.
What is the single most important winter storage step?
Treating the fuel system with a stabilizer is arguably the most critical. A clogged carburetor or fuel injector from degraded gas is the most common and frustrating springtime problem. It’s also one of the easiest to prevent with a small amount of work in the fall.
The Bottom Line
Winter storage isn’t a mystery. It’s a mechanical process with clear steps defined by the people who built your bike. The 60-day rule is your cue. Fill the tank, pull the battery, change the oil, clean it, and get it on a stand. Ignore the bad advice about weekly startups.
The real cost of skipping these steps isn’t measured in dollars alone, it’s measured in the first sunny Saturday of spring lost to repairs you could have prevented in an afternoon. Do the job once, do it right, and your reward is a motorcycle that wakes up ready to ride.
