
How to Winterize a Motorcycle: A Step-by-Step OEM Guide
This post contains affiliate links. As an Amazon Associate, we earn from qualifying purchases.
To winterize a motorcycle, follow the OEM-prescribed sequence: fill the fuel tank and add stabilizer, change the oil and filter, check and adjust all fluids and tire pressure, prepare the battery with a tender or by removing the main fuse, clean and protect the exterior, and store it under a breathable cover. Skipping any step risks corrosion, fuel system varnish, and a dead battery.
That sequence comes straight from the Harley-Davidson and Honda service manuals, which detail how to winterize a motorcycle. Most online guides get the order wrong or mix in bad advice that manufacturers explicitly warn against.
What follows is the OEM checklist for how to winterize a motorcycle, the common shortcuts that actually cause damage, and the one thing you must do before you even think about covering the bike.
Key Takeaways
- Use a Battery Tender, don’t just start it weekly, short runs promote condensation without recharging the battery, a mistake Harley-Davidson’s guide directly calls out.
- Change the oil before storage, not after, contaminated oil left sitting all winter corrodes engine bearings from the inside.
- A breathable canvas cover beats plastic, plastic traps moisture against paint and chrome, guaranteeing surface rust by spring.
- Winterization is conditional, if you ride regularly in a mild climate, a full storage prep might be overkill.
The OEM Winterization Sequence vs. Common Shortcuts
The official Harley-Davidson storage procedure lists nine steps in a specific order. Honda’s manual for the VT1300 outlines three. They agree on the big pieces but disagree on the details, and both contradict a ton of garage-talk advice.
Harley-Davidson’s official storage procedure (abbreviated): 1. Fill fuel tank, add stabilizer. 2. Warm bike, change oil, run engine. 3. Adjust belt. 4. Check tire pressure. 5. Prepare battery for storage. 6. Address security system/Battery Tender. 7. Check/fill cooling system. 8. Perform cosmetic care. 9. Cover with breathable material.
The order matters in how to winterize a motorcycle. Changing the oil after you’ve stabilized the fuel and run the engine circulates clean oil. Preparing the battery before you lock it away for months prevents a dead cell. This isn’t a random list; it’s a sequence designed to protect each system before the next one is sealed up.
The most common shortcut, and the one OEMs hate, is the “start it every week” battery plan. The Harley-Davidson affiliated resource is blunt: “Some riders recommend starting their bike every week during the winter and letting it run. This is not a good battery maintenance plan. A five-minute idle doesn’t bring the oil to full temp, so water condenses inside the crankcase. It also doesn’t recharge the battery enough to offset the drain from the next cold crank. A Battery Tender is the OEM-approved solution.
| OEM Instruction | Common Shortcut | The Risk |
|---|---|---|
| Fill tank + add stabilizer | Drain the tank or leave it half-full | Internal rust, dried fuel pump seals |
| Connect a Battery Tender | Start the bike for 5 minutes weekly | Condensation in oil, sulfated battery |
| Use a breathable canvas cover | Use a plastic tarp or bag | Trapped moisture causes rust & mold |
| Change oil before storage | Change oil in the spring | Acidic, contaminated oil corrodes bearings |
For Harley-Davidson motorcycles, you have two paths from the manual: if the security system is armed, you must keep a Battery Tender connected; if the system is off and you don’t have a tender, remove the main fuse. Other manufacturers may have different procedures.
Fuel System: Stabilize, Don’t Sabotage
Your fuel tank is a steel or plastic cavity that wants to rust or degrade when empty. Your fuel tank is a steel or plastic cavity that wants to rust or degrade when empty. Modern fuel, especially with ethanol, can separate and degrade over time during storage. This step is essential.
- Fill the tank to the top. This minimizes the air space where condensation can form. Both Harley and Honda specify a full tank.
- Add fuel stabilizer following the manufacturer’s instructions for the correct ratio. Pour it in before you top off for better mixing.
- Run the engine for 5-10 minutes. This circulates the treated fuel through the entire system, fuel pump, lines, injectors, or carburetor. That last part is crucial. Stabilizer in the tank doesn’t protect dry injectors.
Some sources, like a Honda winter storage guide, note there are two ways to prepare the tank (drain vs. Fill), while Harley-Davidson’s official manual specifies only one: fill and stabilize. For fuel-injected bikes, filling is almost always safer. For carbureted bikes stored in very cold, dry climates, some mechanics prefer draining the carbs to prevent gumming, but the tank should still be full and treated. When in doubt, follow your bike’s manual.
Leaving the tank half-full is the worst option. The constant cycle of warming and cooling breaths moist air in and out, painting the tank’s interior with rust. By spring, you’re not just dealing with bad gas, but with flakes of corrosion that can clog your fuel filter.
The Critical Fluid Swap That Most Riders Skip
Oil is the lifeblood of your engine, and dirty oil is acidic. Letting it sit for months is like marinating your crankshaft bearings in a corrosive soup. The OEMs are clear: change it before storage.
Harley-Davidson’s procedure: “Warm motorcycle to operating temperature. Change the oil and run the engine to circulate the new oil.”
Honda’s procedure: “Change the engine oil and filter.”
The “run the engine” part is key. It coats the internal components with fresh, protective oil and ensures any residual moisture from the oil change is evaporated off by the engine’s heat.
The other fluids need attention too, but on a different schedule:
- Coolant: Ensure it’s a 50/50 mix for freeze protection. Harley is strict: “Use only Genuine Harley-Davidson Extended Life Antifreeze and Coolant.”
- Brake/Clutch Fluid (DOT4): This fluid is hygroscopic, it absorbs water from the air. The Harley-Davidson resource states it needs to be changed every two years because water contamination lowers its boiling point and promotes internal corrosion. If yours is due, do it before storage.
Common mistake: Only changing the engine oil. Contaminated brake fluid can damage the seals in your master cylinder and calipers over a long standstill, leading to a spongy lever or worse come spring.
A quick fluid check is a simple visual inspection. Pop the caps on the coolant reservoir and brake master cylinders. The coolant should be between the MIN and MAX lines and look clean. Brake fluid should be clear or light amber, not dark brown or black. If it’s dark, it’s past due.
Battery and Electrical: The Tender is Non-Negotiable
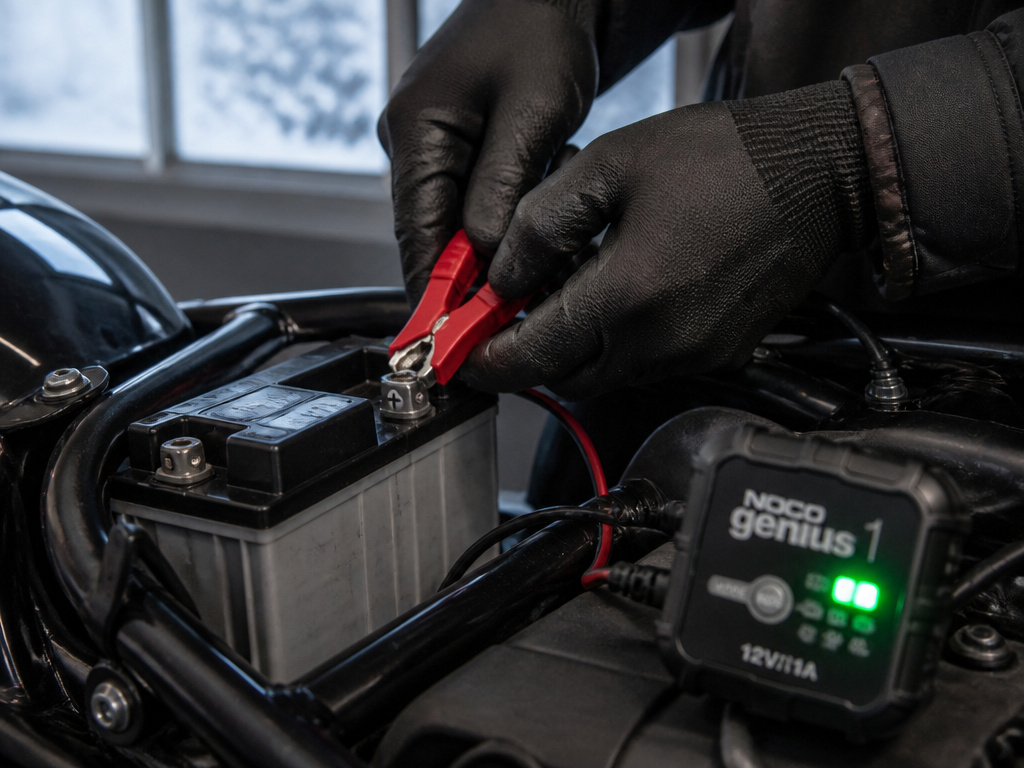
A modern motorcycle battery will self-discharge over time if left unattended during storage. A deeply discharged lead-acid battery sulfates, permanently losing capacity. Your goal is to keep it at a full, maintained charge.
The official, sourced method is to use a Battery Tender (or any quality smart trickle charger). Connect it to the battery terminals, usually directly if the battery is accessible, or via a quick-connect harness if you’ve installed one. The tender will monitor voltage and only provide a trickle charge when needed, preventing overcharging.
If the motorcycle is to be stored with security system armed, it will be necessary to connect a Battery Tender to maintain battery charge. If security system will not be armed and a Battery Tender is not available, remove the main fuse. Harley-Davidson Service Manual
That’s your binary choice. Armed security = Tender. No tender? Disable the system by pulling the main fuse to prevent a parasitic drain. Simply turning the key off might not be enough, as many bikes have clocks or ECU memory that draw a tiny, constant current.
What about just disconnecting the negative terminal? That works for preventing drain, but a battery still self-discharges over months. In very cold climates, a discharged battery can freeze and crack its case. A tender keeps it healthy and ready.
Exterior and Storage: The Last Line of Defense

A clean bike is a happy bike. Corrosion needs a starting point, a speck of dirt, road salt, or bird dropping. Giving the bike a thorough wash and wax before storage removes those catalysts. Pay special attention to the wheels and underside of the fenders where grime builds up.
For chain-drive bikes, the Harley-Davidson resource specifies a maintenance interval that applies before storage: “Every 500 miles of street riding should be followed by cleaning and waxing/lubricating your bike’s chain.” A clean, lubricated chain won’t rust into a stiff mess over the winter.
| Storage Location | Best Practice | Cover Type |
|---|---|---|
| Heated Garage | Ideal. Stable temp, no condensation. | Lightweight, breathable indoor cover. |
| Unheated Garage/Shed | Good. Shielded from rain/snow. | Breathable, water-resistant outdoor cover. |
| Outdoor (No Shelter) | Last resort. Elevate off dirt, use shelter. | Heavy-duty, waterproof yet breathable outdoor cover. |
The cover might be the most argued-about item. The Harley manual is specific: “use a material such as light canvas that will breathe. Plastic materials that do not breathe promote the formation of condensation.” A plastic tarp will trap every bit of moisture evaporating from the bike and ground, creating a perfect rust incubator. Invest in a proper, breathable motorcycle cover.
Finally, check and adjust tire pressure to the manufacturer’s specification for your motorcycle. This minimizes sidewall deformation and flat-spotting. If you can, put the bike on a stand to take the weight off the tires altogether.
How to keep mice and pests out of a stored motorcycle
Rodents seek shelter and nesting material, making a parked motorcycle an ideal target. While the fact sheet does not list specific pest deterrents, practical guidance is key. Thoroughly clean the motorcycle to remove food crumbs or nesting attractants. Choose a storage cover made from a breathable material like light canvas, as recommended, which is less inviting than dense, enclosed spaces. Avoid stuffing the exhaust pipe with rags, as this can trap moisture. Instead, focus on sealing the storage area itself from pests and consider placing approved repellents around, but not on, the motorcycle to avoid damage to finishes or components.
When to have a professional winterize your motorcycle
A professional service can handle tasks you might lack the tools, space, or confidence to perform. The fact sheet mentions procedures like changing the oil and filter, checking and filling the cooling system with the correct antifreeze, and adjusting the drive belt, all of which benefit from a technician’s expertise. If you are unsure about properly preparing the battery for storage or adding fuel stabilizer according to manufacturer instructions, a shop ensures it’s done correctly. This is especially valuable if your storage location makes routine checks difficult.
Should I change my motorcycle insurance for winter storage
The fact sheet notes that full winterization might not be necessary if you ride regularly in mild winters, and your insurance needs may similarly adjust. Contact your insurance provider to discuss options for a stored motorcycle. Some companies offer reduced coverage or a lay-up policy that suspends certain liabilities while the bike is not in use, which can lower your premium. Still, keep at least a full coverage policy to protect against theft, fire, or damage from falling objects in the storage location. Before riding again in the spring, ensure your policy is fully reinstated to provide the necessary liability and collision protection.
Frequently Asked Questions
Do I need to winterize if I live in a mild climate?
According to the Harley-Davidson resource, “Full winterization might not be necessary if you live in a region with mild winters and continue to ride your motorcycle regularly.” If you’re riding at least once every two weeks, the battery stays charged and the fluids stay circulated. You should still add fuel stabilizer if you won’t be using a full tank within a month.
What is the “12 second rule” on a motorcycle?
This isn’t a storage tip. The “12 second rule” is a riding safety principle for following distance. It advises maintaining at least a 12-second gap between you and the vehicle ahead in ideal conditions, giving you more time to react to hazards.
How cold is too cold for motorcycle riding?
That’s subjective and depends on your gear and tolerance. The practical limit for motorcycle riding depends on your gear, tolerance, and road conditions. Below that, tire traction decreases significantly, and black ice becomes a real risk. For storage, the concern is prolonged exposure to freezing temperatures, which can damage a discharged battery.
Can I store my motorcycle with an empty fuel tank?
No. Both OEM sources here advise against it. An empty tank is prone to internal corrosion from condensation. Always store with a full tank treated with fuel stabilizer.
The Bottom Line
Winterizing a motorcycle isn’t a mystery. It’s a mechanical checklist sourced from the people who built your bike. Follow the OEM sequence: treat the fuel, change the oil, tend the battery, clean and cover it.
Skip the folk wisdom. Starting it weekly hurts more than it helps. A plastic cover is worse than no cover at all. And if your brake fluid is more than two years old, change it now, that’s a maintenance item you can’t afford to ignore.
The goal is simple: you should be able to pull off the cover, connect the battery, and start the bike in the spring. No coughing, no clicking, no surprises. That only happens if you do the work now.
