
How to Detail a Motorcycle: Step-by-Step (Without Damage)
This post contains affiliate links. As an Amazon Associate, we earn from qualifying purchases.
Detailing a motorcycle is a five-phase process: decontamination, contact washing, drying, polishing, and protecting. The goal is a deep clean that doubles as a mechanical inspection, finding leaks, cracks, and wear before they become roadside problems. Use dedicated motorcycle cleaners, soft microfiber, and specific tools for wheels, chain, and chrome to avoid damaging sensitive components.
That inspection angle is what separates a real detail from a simple wash. A clean surface shows everything—a weeping fork seal, a fraying clutch cable, a stone chip turning to rust. You are not just making it shine; you are reading the bike’s condition with your eyes and fingers. This is the core of how to detail a motorcycle.
What follows is the toolkit, the five-phase sequence, and the specific warnings for matte paint, chains, and seats that most quick guides on how to detail a motorcycle skip. By the end, you will know how to turn a Saturday wash into a preventative maintenance session.
Key Takeaways
- Treat detailing as an inspection routine, not just cosmetics. A clean bike reveals problems.
- Never spray a pressure washer near wheel bearings, seals, or electrical connectors. The force drives water and grime in.
- Match your cleaners and protectants to the surface: aluminum polish for exhaust, vinyl cleaner for seats, and dedicated chain cleaner for the drivetrain.
- Clean the chain last and re-lubricate immediately after. Getting degreaser or polish on the chain or sprockets contaminates the lubricant.
- For matte or flat paint, use only products labeled for matte finishes. Standard wax or polish will create shiny, permanent streaks.
Tools and Supplies You Actually Need
Skip the kitchen soap and the random rags. Using the wrong products strips wax, leaves residue, and can damage finishes. This is not about buying the most expensive kit; it is about getting the right tool for each surface.
You need a few buckets, a hose with a gentle nozzle, and a stack of clean, soft microfiber towels. Dedicated wheel brushes with soft bristles get behind spokes without scratching. A set of detailing brushes with various sizes reaches into crevices around the engine and instruments. For the chain, you must use a dedicated grunge brush and a motorcycle-specific chain cleaner; general degreaser can damage O-rings.
For cleaners, I reach for brands like Muc-Off or Maxima for their bike-specific formulas. They are designed to cut road grime without harming paint, plastics, or rubber. A quality motorcycle polish and a separate protective wax or sealant are the final steps, not an all-in-one shortcut. All-in-one products often leave a filler-heavy shine that washes away quickly.
Common mistake: Using dish soap as a wash. It strips all wax and sealant, leaving paint bare and exposed to UV damage and staining from road film. Your paint will look duller faster.
The 5-Phase Detailing Process
This sequence matters when you compare a how to detail a motorcycle guide to a simple wash. Jumping straight to polishing or doing the wheels last just means you will re-clean surfaces you already did. Follow the phases in order to work cleanly and efficiently.
Phase 1: Decontamination and Pre-Wash
Start with a cold bike in the shade. Remove any loose debris with a soft brush or leaf blower. Then, soak the entire bike with a dedicated pre-wash or snow foam. This product loosens and lifts the top layer of dirt so you are not grinding it into the paint during the contact wash. Let it dwell for 5-10 minutes.
This is when you tackle heavy contamination. For bug splatter, tar, or road salt, use a dedicated tar remover or bug remover on a microfiber applicator. Spray it on, let it soften the gunk, then gently wipe it away. Do not scrub.
Where this goes sideways: Using a pressure washer for decontamination. High-pressure water can force itself past fork seals, wheel bearings, and electrical connectors like the ignition switch or spark plug wires. Once inside, it mixes with grease to form an abrasive paste or causes corrosion. Use a garden hose with a gentle shower setting only.
Phase 2: The Two-Bucket Contact Wash
Fill one bucket with clean water and your chosen bike wash solution. Fill a second bucket with plain water for rinsing your wash mitt. This two-bucket method traps dirt in the rinse bucket, keeping your wash solution clean.
Start high and work down. Wash the windscreen, fairings, and tank first, using a soft microfiter wash mitt. Rinse the mitt in the plain water bucket after every pass. Move to the saddle and rear fender, then finally to the filthy lower areas: the engine, swingarm, and wheels. For intricate areas and crevices around the engine cases and instruments, use your detailing brushes dipped in wash solution.
| Surface | Tool | Risk If Skipped |
|---|---|---|
| Paint & Plastics | Soft chenille wash mitt | Swirl marks from trapped grit |
| Wheels & Tires | Dedicated stiff-bristle brush | Brake dust etches into clear coat |
| Engine Fins & Crevices | Detailing brush kit | Grime bakes on, becomes permanent |
| Chain & Sprockets | Grunge brush & dedicated cleaner | General degreaser destroys O-rings |
Phase 3: Thorough Drying
Water spots are mineral deposits. Letting the bike air-dry guarantees them. Use a large, clean drying towel made of waffle-weave microfiber. It absorbs water instead of pushing it around.
Pat and blot dry; do not scrub. Use a compressed air blower or a leaf blower on a cool setting to blow water out of mirrors, badges, and crevices. A drying aid spray (a quick detailer used while wet) can add lubricity to help the towel glide and add a light layer of protection.
Phase 4: Polishing Paint and Metal
Polishing removes fine scratches, swirls, and oxidation to restore depth and clarity. This is a separate step from protecting. For clear-coated paint, use a fine machine polish applied by hand or with a dual-action polisher and a soft foam pad.
For metal surfaces like chrome exhaust headers or aluminum engine covers, use a dedicated metal polish. Apply with a microfiber applicator, work in small sections, and buff off with a clean towel before the product dries. The process for cleaning and protecting motorcycle chrome requires specific products to avoid pitting.
Easy to miss: Exhaust pipes stay hot long after a ride. The Harley-Davidson manual notes tires can remain warm for up to 2 hours; exhaust metal holds heat even longer. Always let the exhaust cool completely to the touch before polishing it. Applying polish to hot metal can bake it on and stain the surface.
Phase 5: Applying Protection
Protection locks in the shine and creates a barrier. Choices include synthetic paste wax, spray sealant, or a ceramic coating. Paste wax, spray sealants, and professional-grade ceramic coatings offer varying levels of durability. For most riders, a spray sealant offers the best balance of durability and ease.
Apply protection to a clean, polished surface in thin, even layers. Buff off any haze immediately. Do not apply wax or sealant to rubber, grips, or seat surfaces. This phase is where a dedicated guide on how to wax a motorcycle provides the nuance for perfect results.
Surface-Specific Guides and Warnings
Detailing is not one-size-fits-all. Using a chrome polish on a matte black fender ruins the finish. Using tire shine on your sidewall can sling onto your brake rotors.
Cleaning Wheels and Tires
Brake dust is corrosive. Clean wheels every wash. Use a dedicated wheel cleaner that is safe for your wheel type (painted, polished, anodized). Agitate with a soft brush, rinse thoroughly. For tires, use a dedicated tire cleaner and a stiff brush. Avoid “wet-look” tire dressings that can sling onto paint or, worse, onto the brake rotors.
Before you start: DOT 4 brake fluid damages paint. The Harley-Davidson manual warns to protect surfaces from spills and to rinse skin immediately with water for 15–20 minutes upon contact. If you are cleaning near the brake reservoir or calipers, cover painted areas with a towel.
The Engine and Exhaust
Do not fear a cool, clean engine. After the bike is washed and dried, use a dedicated engine cleaner or all-purpose cleaner diluted for plastics. Spray on, agitate with brushes, rinse lightly. Avoid spraying directly at electrical components like the ignition coil, spark plug wires, or fuse box. After cleaning, consider applying a light engine coating or protectant to plastics and rubber hoses to prevent fading. For the exhaust, polishing is key. A clean, polished exhaust sheds road grime better and resists rust. For a deeper guide on this, our resource on how to clean motorcycle wheels covers the aggressive grime you often find here.
Safe Chain and Sprocket Cleaning
This is a maintenance procedure disguised as detailing. Do this last, after all polishing and waxing is complete and fully dried. You do not want polish or wax contaminating the chain.
- Place the bike on a rear stand to rotate the wheel.
- Spray a motorcycle-specific chain cleaner (like Motul Chain Clean) onto the chain and sprockets.
- Scrub with a dedicated grunge brush, rotating the wheel to access all links.
- Wipe away dissolved grime with a rag.
- Allow the chain to dry completely.
- Apply your preferred chain lube to the inner rollers while rotating the wheel.
The official NHTSA technical service bulletin for the Kawasaki Versys-X 300 emphasizes not leaving components hanging by their hoses or lines—a good general rule when securing the bike for chain work.
Caring for Different Seat Materials
Seats take UV and weather damage constantly. Using the wrong product accelerates cracking.
- Vinyl: Clean with a mild vinyl-specific cleaner. Protect with a UV-protectant vinyl conditioner.
- Leather: Use a pH-balanced leather cleaner and a leather conditioner to keep it supple. Never use vinyl products on leather.
- Custom/Suede: Use a suede eraser and brush for dry dirt. For stains, a specialist suede cleaner is required. Test in an inconspicuous area first.
How to Detail Matte and Flat Paint
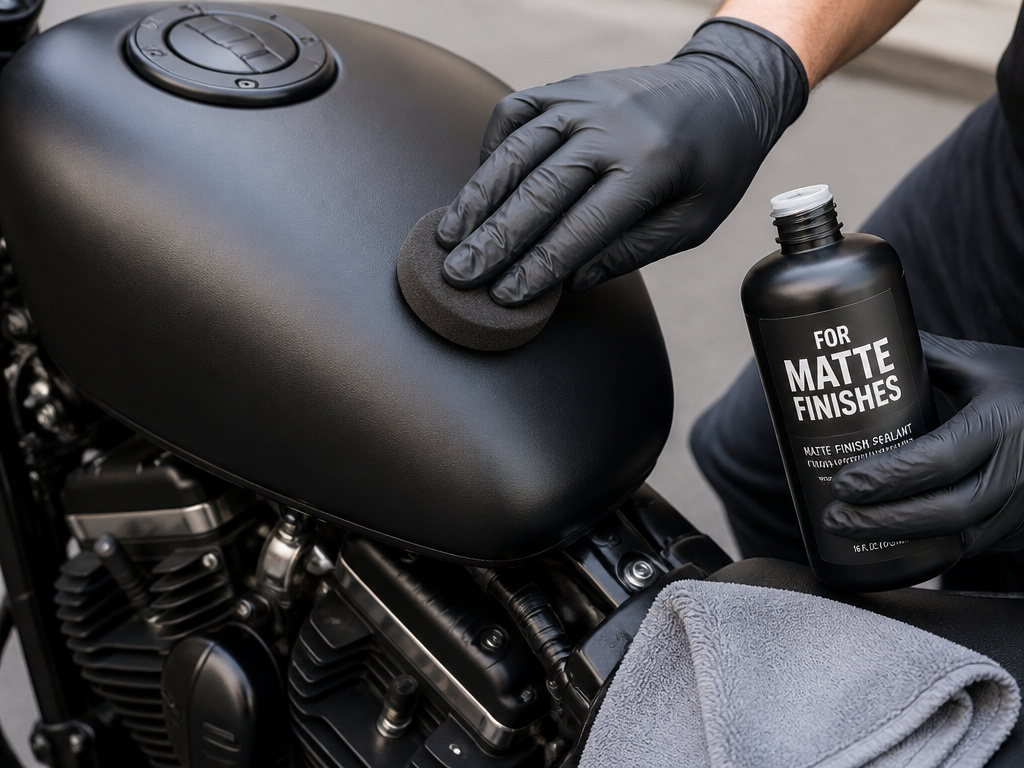
Matte paint has a clear coat without gloss additives. Standard wax, polish, or even aggressive washing introduces fillers or oils that create shiny, uneven patches. This damage is usually permanent.
Only use products labeled “for matte finishes” or “matte paint safe.” This applies to wash soap, quick detailers, and any protectant. Wash with even more care, using plenty of lubricity to prevent wash-induced marring. Dry gently—matte paint shows every swipe mark. A dedicated matte paint sealant is the best form of protection, as it guards against stains without altering the finish.
Frequently Asked Questions
What is the best way to detail a motorcycle?
The best way is the complete five-phase process: decontaminate, contact wash with the two-bucket method, dry thoroughly, polish as needed, and finally apply a protective wax or sealant. Using bike-specific products for each surface and treating the process as an inspection yields the best, longest-lasting results.
What is the 12 second rule on a motorcycle?
The “12-second rule” is a riding safety concept for maintaining a safe following distance, not a detailing term. In detailing, a more relevant rule is the “touch test” for heat: if you cannot hold your hand on the exhaust or engine case comfortably, it is too hot to clean or polish.
What does 2 fingers up mean on a motorcycle?
This is a rider-to-rider wave, a casual greeting often used among motorcyclists. It has no relation to the detailing process.
How long does it take to detail a motorcycle?
Basic wash and dry takes some time, while a full detail with polishing and waxing can take significantly longer for a thorough job. A deep clean after winter storage or a long trip will be at the longer end of that range. Breaking it into phases over a weekend is a practical approach for many.
Before You Go
Detailing is not about achieving a concours-ready shine unless that is your goal. It is about knowing your machine. The 30 minutes you spend carefully drying the bike is 30 minutes you might spot a loose bolt or a small oil leak. That is the real value.
Invest in a few core quality products—a good wash, a polish, a sealant, and a chain cleaner. Store them with your tools. Make the wash your motorcycle ritual a regular part of your riding season, and the bike will not only look better but will also tell you its secrets before they turn into failures.
