
How to Clean Motorcycle Chrome: Step-by-Step
This post contains affiliate links. As an Amazon Associate, we earn from qualifying purchases.
Cleaning motorcycle chrome requires using the right products on a cool surface, avoiding abrasives, and drying thoroughly. Use a dedicated motorcycle wash soap or a spray cleaner/polish for light grime, followed by a high-quality chrome-specific polish on a non-abrasive cloth. Never let polish dry before buffing. Note that manufacturers disagree on silicone-containing products: Triumph advises avoiding them to prevent discoloration, while Harley-Davidson’s tested polish and sealant for chrome may contain them.
It is a straightforward process, but three specific mistakes wreck chrome plating faster than road salt. The difference between a lasting shine and a scratched, cloudy mess comes down to the cloth in your hand and the chemical formula in the bottle, which is why learning how to clean motorcycle chrome correctly is essential.
What follows: the seven-step cleaning sequence, a breakdown of what each major manufacturer actually says to use, the one material you must never touch chrome with, and how to handle the special case of unlacquered aluminium.
Key Takeaways
- Use a non-abrasive, chrome-specific polish like Harley-Davidson Chrome and Shine or a generic high-quality equivalent; never let it dry on the surface before buffing.
- Avoid all abrasives, including steel wool, aluminum pads, and cloths with nylon fibers like paper towels or terry cloth, as they create fine scratches that damage the plating.
- For unlacquered aluminium (common on high-end bikes like the Triumph Daytona), use a dedicated, non-caustic aluminium cleaner and dry immediately after wet rides. The Triumph manual states warranty claims due to inadequate maintenance of unlacquered aluminium will not be allowed.
- Manufacturers disagree on silicone; Triumph prohibits products containing silicone on chrome, while Harley-Davidson markets a polish and sealant for chrome as part of its tested product suite.
- Always clean a cooled motorcycle, especially the exhaust system, to avoid product baking on and causing stains or damage.
The 7-Step Chrome Cleaning Process
Follow this sequence every time. Skipping the prep or using the wrong drying technique leaves behind water spots and micro-scratches.
- Cool the Bike Completely. Work on a cool, shaded motorcycle. A warm exhaust pipe or engine case will cause any cleaner or water to evaporate instantly, leaving residue and potentially baking polish into the surface. The Honda owner’s manual explicitly warns to let the engine and exhaust cool before cleaning.
- Rinse with Plain Water. Use a gentle hose or bucket of water to rinse off loose dirt, dust, and road grime. This prevents you from grinding particles into the chrome during washing. > Common mistake: Using a pressure washer. Harley-Davidson’s service manual states this can force water into bearings, electrical connectors, and seals, causing equipment damage. The high pressure can also chip thin chrome plating.
- Wash with a Dedicated Cleaner. Apply a motorcycle-specific wash soap like Harley-Davidson Sunwash Bike Soap or a mild spray cleaner/polish. Use a soft wash mitt, not a sponge or brush. The goal is to lift grime, not scrub it.
- Rinse and Dry Thoroughly. Rinse all soap off completely. Then, dry every chrome surface with a clean, soft Microfiber Detailing cloth. Harley-Davidson specifies a cloth “containing no nylon fibers” to prevent fine scratches. Leaving water to air-dry is how water spots and mineral deposits form.
- Apply Chrome Polish. Use a non-abrasive chrome polish. Apply a thin layer to a small section of cool chrome in a circular motion with a clean applicator pad. For heavy grime, let it sit for a minute—but do not let it dry. > Do not let chrome cleaner dry on the motorcycle before buffing. Buffing a dried polish is like sanding the surface; it removes the shine and can haze the chrome.
- Buff to a Shine. Using a fresh, clean microfiber cloth, buff the polish off with a circular motion until the chrome shines. Turn the cloth frequently to avoid reapplying removed residue.
- Inspect Under Light. As you clean each part, inspect the chrome under a flashlight or good light. Look for early signs of pitting, cracks in the plating, or rust bubbles. Cleaning is your best chance to catch problems before they need a costly re-chrome.
| Step | Key Action | Tool/Product | Risk If Skipped |
|---|---|---|---|
| 1. Cool Down | Wait for exhaust/engine to cool | None | Cleaner bakes on, causes stains |
| 2. Pre-Rinse | Rinse loose dirt | Hose/bucket, low pressure | Grinding dirt causes scratches |
| 3. Wash | Apply soap & gently clean | Motorcycle wash soap, wash mitt | Ineffective cleaning, swirl marks |
| 4. Dry | Dry completely | Microfiber Drying Towel | Water spots, mineral deposits |
| 5. Polish | Apply thin layer of polish | Chrome polish, applicator pad | Dulled finish, no protection |
| 6. Buff | Remove polish completely | Clean Microfiber Detailing cloth | Hazy, streaked appearance |
| 7. Inspect | Check for damage | Flashlight | Miss early pitting or rust |
What Not to Use on Chrome (The Damage Shortlist)
Using the wrong product once can ruin chrome. The damage is often cumulative—tiny scratches build up until the finish looks permanently foggy.
- Abrasive Pads & Wools: Steel wool, aluminum foil, Scotch-Brite pads, or any abrasive cleaner. All manufacturers prohibit these. They scour through the thin chrome plating down to the base metal. Once the chrome is scratched, it cannot be polished out.
- Household Dish Soap: It’s designed to cut grease on dishes, not protect motorcycle finishes. Many contain salts and degreasers that can strip protective layers and accelerate oxidation.
- Generic Glass Cleaners or All-Purpose Sprays: These often contain ammonia or solvents that can dull chrome and damage surrounding paint or rubber.
- Cloths That Scratch: Paper towels, terry cloth towels, shop rags, or any material with nylon fibers. Harley-Davidson’s service info warns these “can create fine scratches to surfaces.” The Microfiber Detailing cloth (part 94663-02) is specified because it lacks these fibers.
- Pressure Washers: Already mentioned, but it’s worth repeating. The force can peel back chrome edges, especially on older or lower-quality plating.
Where this goes sideways: Using a dab of metal polish or wheel cleaner on chrome. These are formulated for different metals and often contain abrasives or acids that will etch the chrome surface. The cloudiness appears after the first wipe.
Picking Your Polish: OEM vs. Generic Advice
Manufacturer manuals reveal a clear split. Some tell you exactly what to buy; others only tell you what to avoid.
Harley-Davidson is prescriptive. Their guides specify proprietary products: Sunwash Bike Soap or Quick Wash Cleaner for washing, and Chrome and Shine for polishing. Their service portal states these products are “tested extensively for use on vehicle surfaces and are formulated to be compatible with one another.” If you own a Harley, this is the safest path.
Honda and Triumph use generic language. The Honda CB1000R manual advises a “spray cleaner/polish” for light grime and a “high quality chrome/aluminum polish” for dull chrome. The Triumph manual warns against “abrasive cleaning products” and “products containing silicone” but doesn’t name brands.
So, which should you use? If you want guaranteed compatibility, your bike’s OEM brand polish is the zero-risk choice. For other bikes, any high-quality, non-abrasive, chrome-specific polish from a reputable automotive brand will work. The key is the label: it must say “chrome polish” and “non-abrasive.”
The Silicone Disagreement
This is a critical divergence. The Triumph Daytona Moto2 765 manual explicitly states: “Do not use products containing silicone on chrome and stainless steel, as they will cause discolouration.” However, Harley-Davidson’s Harley Glaze Polish & Sealant (a product they say is for chrome) likely contains silicone-based polymers, as do many sealants. Their stance is that their tested product suite is compatible.
The practical take: If you have a Triumph or are paranoid about discoloration, seek out a silicone-free chrome polish. For other bikes, using a well-regarded, brand-name chrome polish mitigates the risk.
The Special Case: Unlacquered Aluminium
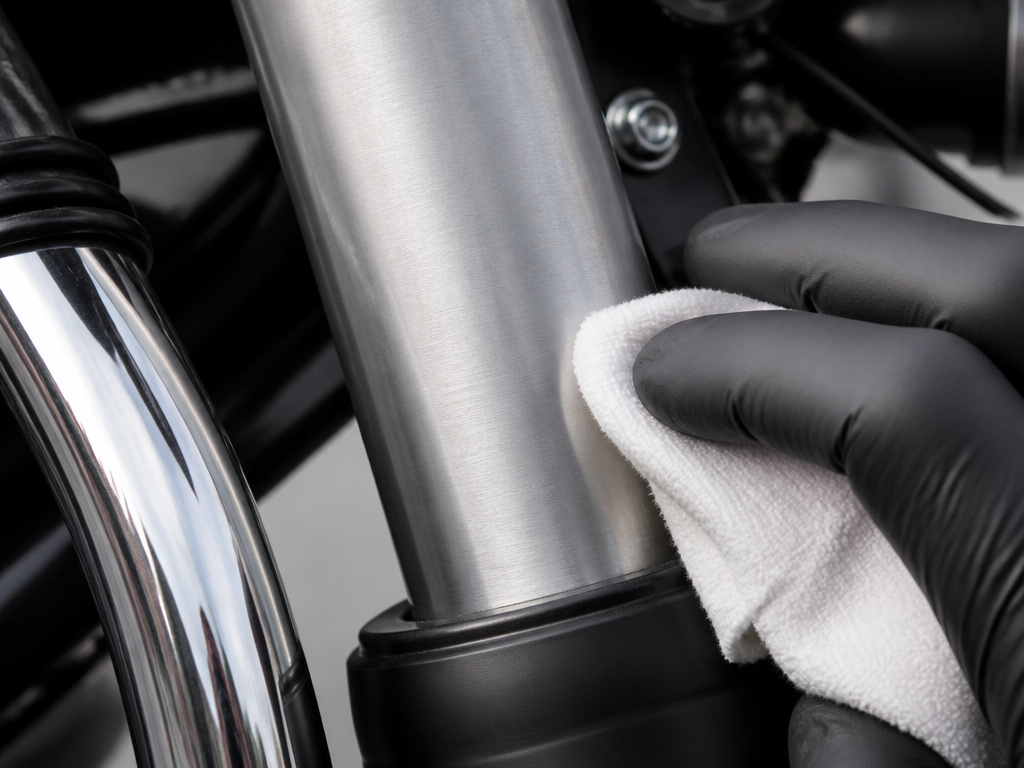
Some high-performance components, like those on a Triumph Daytona, are bare, unlacquered aluminium. This is not chrome. It requires a different protocol.
- Use a Dedicated Aluminium Cleaner: The Triumph manual specifies a cleaner “which does not contain abrasive or caustic elements.” Standard chrome polish or metal polish is often too abrasive.
- Dry Immediately After Wet Rides: Unlacquered aluminium stains and corrodes quickly. The manual ties maintenance directly to the warranty: “Warranty claims due to inadequate maintenance will not be allowed.”
- Feel the Surface: Properly cleaned, unlacquered aluminium has a smooth, matte-satin feel. If it feels gritty or chalky, corrosion has started, and you need a specific aluminium cleaner to restore it.
Treating unlacquered aluminium like chrome will ruin its finish and void that portion of your warranty. It’s the one bike part where using the wrong cleaner has direct financial consequences.
How to Remove Rust and Light Pitting
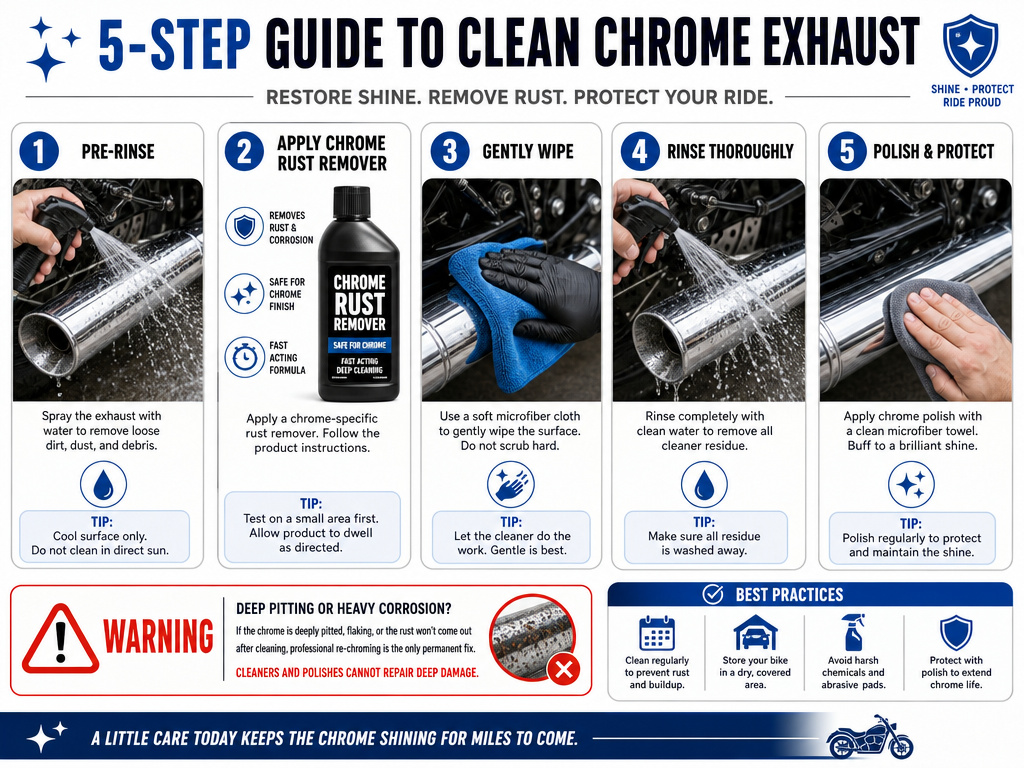
- Clean the Area: Wash and dry the chrome thoroughly first.
- Use a Dedicated Chrome Rust Remover: Apply a product designed for chrome rust removal. These products are designed for chrome rust removal. Never use a general-purpose rust remover—it’s too aggressive.
- Rub Gently with a Cloth: Use a soft cloth to apply the remover with light pressure. Do not scrub.
- Rinse and Neutralize: Rinse the area completely with water. Rinse the area completely with water as directed by the product.
- Polish and Protect: Once the rust is gone, polish the area with your regular chrome polish and apply a protectant.
For deep pitting or rust that has bubbled the chrome, no cleaner will fix it. The plating has been compromised, and the part needs to be professionally stripped and re-chromed.
Protecting Chrome After Cleaning
A polish alone is not a long-term protectant. For extended defense against road salt, brake dust, and UV rays, add a layer of protection.
- Chrome Sealant/Wax: After polishing, apply a thin layer of a synthetic chrome sealant or a chrome sealant or wax.
- Spray Detailer for Maintenance: Between full cleans, use a quick detailer spray safe for chrome to remove light dust and fingerprints. This prevents buildup that requires aggressive cleaning later.
- Storage: Keep the bike covered in a dry garage.
The goal is to create a barrier so that next time, a simple rinse and wipe-down is all you need.
Can You Use Aluminum Foil to Clean Chrome?
Avoid using aluminum foil or any other abrasive material on chrome. Major manufacturers explicitly warn against abrasives like steel wool or aluminum, as they can scratch and permanently damage the thin chrome plating. For proper cleaning, use a dedicated, non-abrasive chrome cleaner. Apply the polish to a completely cooled surface and buff it off with a soft cloth before the product dries. Using the wrong material can ruin the finish, so stick with soft, non-abrasive cloths and approved cleaners.
Cleaning Exhaust Pipes and Forks
Exhaust pipes and fork tubes are high-visibility chrome parts that require careful handling. Always let the exhaust cool completely before applying any cleaner. For general road grime, a spray cleaner or polish wiped with a non-abrasive cloth works well. For dull or corroded chrome, use a high-quality chrome polish. Be sure to avoid any products containing silicone, as they can cause discoloration on chrome and stainless steel. Never use a pressure washer, and take care not to get cleaners containing chlorine or silicone on nearby brake discs.
Frequently Asked Questions
What’s the best thing to clean chrome on a motorcycle?
The best practice is a two-step process: clean with a dedicated motorcycle wash soap, then polish with a non-abrasive, chrome-specific polish. Brands like Harley-Davidson’s Chrome and Shine are formulated for this, but any high-quality, non-abrasive chrome polish will work.
Is WD-40 good for cleaning chrome?
WD-40 is a water-displacing penetrant and light lubricant, not a cleaner or protectant. It can temporarily displace moisture and add a slight shine, but it attracts dust and provides no lasting protection. It will not remove oxidation or grime. Using it as a primary cleaner is a shortcut that leads to faster re-soiling.
What should you not clean chrome with?
Do not use abrasive pads (steel wool, aluminum foil), abrasive powders, household dish soap, ammonia-based cleaners, all-purpose degreasers, or cloths that can scratch (paper towels, terry cloth). Also, avoid pressure washers.
What cleans chrome really well?
For routine cleaning in the how to clean motorcycle chrome process, a motorcycle wash soap and water. For polishing and restoring shine, a dedicated chrome polish applied to a cool, clean surface and buffed off before it dries works best. For stubborn stains or light rust, a chrome-specific rust remover is necessary.
Can I use vinegar to clean motorcycle chrome?
White vinegar is a mild acid. It can help dissolve water spots and mineral deposits, but it offers no protective qualities and can dull the finish if left on or used frequently. It’s a risky home remedy when a chrome polish is designed for the job.
Before You Go
Stick to the soft cloths and the cool surface rule. That’s the whole game. The moment you reach for a paper towel because the microfiber is dirty, or spray polish on a warm pipe because you’re in a hurry, you start adding micro-scratches that dull the finish for good.
When you choose a polish, pick one lane: either your manufacturer’s specified product for guaranteed safety, or a reputable, non-abrasive automotive chrome polish. The worst choice is a generic “metal polish” from the hardware store—that’s how you get a haze that won’t buff out.
Finally, treat cleaning as an inspection. Run your fingers over the chrome as you dry it. You’ll feel the early grit of pitting long before you see it, giving you a chance to treat it. A clean bike is a bike you know.
