
How to Change Motorcycle Coolant: The 7-Step Process
This post contains affiliate links. As an Amazon Associate, we earn from qualifying purchases.
To change motorcycle coolant, drain the old fluid from the radiator and engine block, flush the system with water if needed, then refill with a fresh 50/50 mix of ethylene glycol antifreeze and distilled water. The critical step is bleeding trapped air by running the engine with the radiator cap off until the thermostat opens and coolant circulates.
The process is straightforward, but the specs are not. Your manual’s exact capacity matters more than a generic tutorial, and the type of water you mix is a direct argument between manufacturers. Honda says distilled water only. Yamaha allows soft tap water in a pinch. Getting the concentration wrong, below 40% or above 60% antifreeze, trades corrosion protection for cooling performance. For a reliable guide, you must learn how to change motorcycle coolant correctly.
What follows: the tools you actually need, the seven physical steps for how to change motorcycle coolant, and how to navigate the disagreements on water, concentration, and flushing that most guides smooth over. By the end, you’ll know your bike’s capacity, how to get the air out, and what to do if you’re headed to a track day.
Key Takeaways
- Always work on a cold engine, removing the radiator cap on a hot system can cause severe burns from erupting coolant.
- Match the coolant to your manual’s spec, using an ethylene glycol formula safe for aluminum engines and avoiding products with silicate inhibitors.
- The system must be bled of air after refilling by running the engine with the cap off until the thermostat opens and the coolant level drops.
- Normal coolant loss through the overflow tube is between 0.7 and 2.0 US oz (20–60 cm³); losing more indicates a leak that needs inspection.
- If you must use straight water in an emergency, you must correct it later with proper antifreeze to restore freeze and corrosion protection.
Why Coolant Needs Changing
Coolant doesn’t just prevent freezing. It’s a corrosion inhibitor and lubricant for the water pump. Over its two-year service life, the additives that protect your aluminum engine and radiator degrade. The fluid turns acidic and starts eating the components it’s meant to protect. You’ll see this as silt in the drained fluid or, in advanced cases, as a milky residue that signals oil contamination from a failing head gasket.
The cooling system’s job is to keep the engine around 185°F. Straight water boils at 212°F, which is too close for comfort under load. A 50/50 mix of antifreeze and water raises the boiling point significantly. More importantly, it prevents internal scale and corrosion that can clog narrow radiator passages. A single clogged tube can reduce cooling efficiency enough to cause overheating on a hot day.
Common mistake: Assuming coolant is just winter antifreeze. By year three, it’s actively damaging the system it’s supposed to protect, leading to expensive repairs like water pump failure or radiator core blockage.
Gather Your Tools and Coolant
You don’t need specialty tools. A basic socket set, a funnel, and a drain pan will do it. The investment is in the fluid and your time to get the air out. Here’s the full list:
- Socket wrench set (for fairing bolts and the drain plug)
- Large drain pan (capacity of at least 2.5 liters/2.6 US qt)
- Funnel that fits your radiator neck
- New coolant (check your manual for type and quantity)
- Distilled water (if mixing yourself)
- Rubber gloves and safety glasses
- Shop towels or rags
- A length of clear vinyl tubing (for bleeding, optional but helpful)
Choosing the right coolant is the most important purchase. Your manual will specify a type, usually an ethylene glycol formula with corrosion inhibitors for aluminum engines. Pro Honda HP Coolant is the OEM example. The critical phrase is “silicate-free.” Coolants with silicate inhibitors can cause premature water pump seal wear and clog radiators.
You can use a standard automotive ethylene glycol coolant if it meets all the specifications in your manual, is safe for aluminum engines, and lacks silicates. For track use, some organizations may require draining coolant and replacing it with distilled water, and may allow additives like Water Wetter or propylene glycol coolant.
For a deeper dive on formulations, see our guide on choosing antifreeze for motorcycles.
The 7-Step Drain and Fill Process
Follow these steps in order. Rushing the bleeding process is how air locks happen, leading to immediate overheating.
Step 1: Cool the engine completely. Park the bike on a level surface and let it sit for several hours. Touch the radiator, it should be cold. Removing the cap on a hot, pressurized system is dangerous.
Step 2: Access the drain point. You may need to remove lower fairings or body panels. Consult your manual. Place the drain pan underneath the water pump or radiator drain bolt.
Step 3: Drain the system. Loosen the radiator drain bolt and the engine block drain plug if your bike has one. Let it flow until it stops dripping. On a Honda CRF250R, expect about 1.09 US qt (1.03L) from a standard drain.
Step 4: Flush (if needed). If the old coolant was dirty or contaminated, flush with clean water. Connect a garden hose to the radiator neck (no nozzle, just gentle pressure) and run water through until it runs clear from the drain. This is where sources disagree: Yamaha’s manual says to use “clean tap water,” while a professional tutorial from Bennetts BikeSocial warns against using a pressurized spray nozzle to avoid radiator damage. The safe method is low-pressure flow.
Step 5: Close drains and refill. Tighten all drain plugs. The Yamaha TZR50 manual specifies a torque of 9 Nm (6.5 ft·lbf) for its drain bolt, your manual may have a similar spec. Using your funnel, slowly pour the fresh 50/50 coolant mix into the radiator until it reaches the bottom of the filler neck. Fill the coolant reservoir to the “Full” line.
Step 6: Bleed the air. This is the step you cannot skip. Leave the radiator cap off. Start the engine and let it idle. You’ll see air bubbles rising. After a few minutes, the thermostat will open (you’ll feel the radiator get hot and the coolant level will suddenly drop). Top it up immediately. Rev the engine gently a few times to jostle any trapped air. Once the level stabilizes with no more bubbles, install the radiator cap.
Step 7: Verify and clean up. Run the engine for another few minutes, then shut it off and check for leaks. Let the bike cool completely, then re-check the radiator and reservoir levels, topping up if needed. Properly dispose of the old coolant at a recycling center, it’s toxic.
| Step | Key Action | What Happens If You Skip It |
|---|---|---|
| 1. Cool Down | Wait for cold engine | Hot coolant erupts, causing severe burns. |
| 2. Access | Remove fairings/panels | You cannot reach the drain plug. |
| 3. Drain | Open radiator & engine plugs | Old, acidic coolant remains, mixing with new. |
| 4. Flush | Run clean water through | Contaminants cause new coolant to degrade faster. |
| 5. Refill | Pour new 50/50 mix | System operates with air, leading to instant overheating. |
| 6. Bleed | Idle with cap off | Air lock prevents circulation, engine overheats. |
| 7. Verify | Check for leaks & levels | A small leak drains the system on your next ride. |
Coolant Types and Mix Ratios Demystified
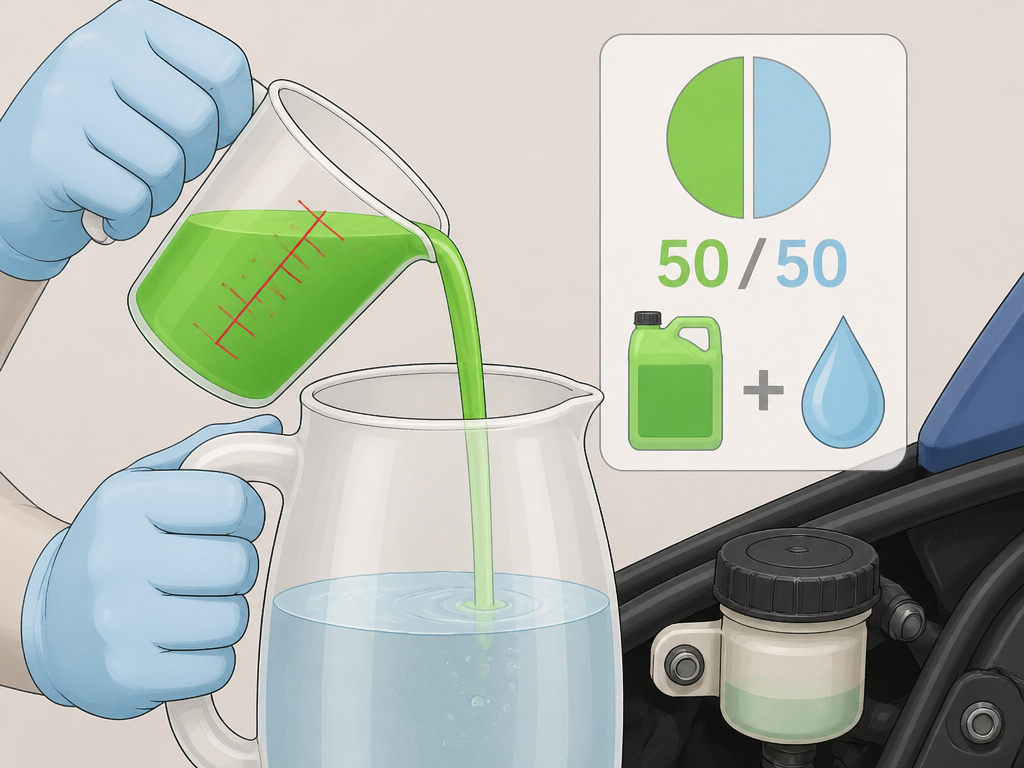
Not all coolant is the same, and the ratio is a tightrope walk. A 50/50 mix of antifreeze and water is common and is recommended for most operating temperatures for bikes like the Honda CRF250R.
A 50/50 ethylene glycol/water solution is recommended for most operating temperatures and provides a balance of freeze protection, boil-over resistance, and corrosion inhibition. Decreasing the antifreeze concentration below 40% compromises corrosion protection. Increasing it above 60% actively reduces the coolant’s ability to transfer heat.
For additional freeze protection, you can use a higher concentration of antifreeze (up to 60%), but this reduces cooling efficiency. Never run straight antifreeze, it doesn’t transfer heat well at all. Conversely, running straight water, even in an emergency, strips away all corrosion and freeze protection. The Yamaha manual is clear: if you use water alone, you must correct the mixture later.
The safe choice for how to change motorcycle coolant depends on the manufacturer: Honda’s manual for the CRF250R states to use only distilled water, while Yamaha’s manual for the TZR50 allows soft tap water as an emergency alternative. If you need to understand how the cooling system itself works, our article on liquid cooled engines explains the full circuit.
What to Do After the Change
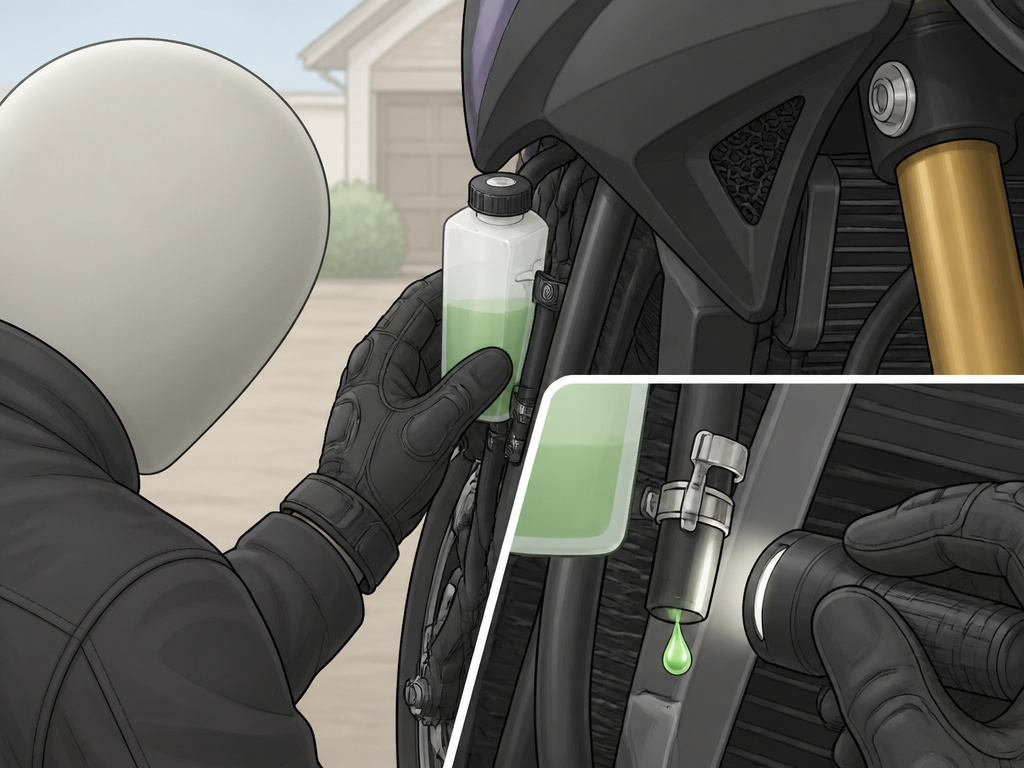
Your job isn’t done when the cap is on. A verification run catches problems before they strand you.
First, take a short, gentle ride around the neighborhood. Keep an eye on the temperature gauge. Come back and, with the engine cool, check the radiator level again. It will often take a small top-up as remaining air pockets work their way out. This is normal.
Second, inspect for leaks. Look under the bike for drips and feel around the drain plugs and hose connections for dampness. A leak means a loose clamp or a compromised washer.
Finally, understand what normal looks like. The Honda manual notes that losing 0.7–2.0 US oz (20–60 cm³) of coolant through the overflow tube over time is normal. If you’re consistently adding more than that between changes, you have a leak or a deeper issue like a failing head gasket. If you suspect overheating from a botched job, our guide on how to fix a motorcycle engine overheating walks through the diagnostics. And if you ride off-road or in debris-heavy areas, installing radiator guards is cheap insurance against a punctured core.
Do I Need to Remove Bodywork or the Fuel Tank?
Accessing your motorcycle’s radiator or coolant drain bolt often requires removing bodywork. On many sport bikes and modern machines, fairings and side panels cover the radiator cap and hoses. Some models, particularly dirt bikes or those with tight engine bays, may require you to remove the fuel tank to reach the radiator cap for proper filling and bleeding. Always consult your owner’s manual for the specific procedure for your bike. Working with the bodywork off gives you a clear view of the entire cooling system, making the job safer and helping you spot any leaks or worn hoses you might otherwise miss.
Frequently Asked Questions
How often should I change my motorcycle coolant?
The general rule is every two years or 24,000 miles, whichever comes first. Some manufacturers, like Kawasaki for a 1999 ZX-6R, specify 16,000 miles or two years. Always check your owner’s manual for the exact interval. Coolant degrades over time, losing its corrosion inhibitors and becoming acidic.
Can I use car coolant in my motorcycle?
You can, but you must verify it meets your motorcycle’s specifications. It must be an ethylene glycol formula safe for aluminum engines and should not contain silicate inhibitors. The color is not a reliable indicator. When in doubt, use a motorcycle-specific product or one your manual explicitly recommends.
Do I need to flush the system every time?
Not necessarily. If the drained coolant is clean and the correct color, a flush isn’t mandatory. However, if you’re switching coolant types (e.g., from a green IAT to an orange OAT), if the fluid is contaminated, or if it’s been many years since the last change, a flush is required to prevent chemical sludge from forming.
My bike is overheating after the change. What did I do wrong?
You almost certainly have an air lock in the system. The bleeding process was incomplete. Let the bike cool completely, then reopen the radiator cap (when cold!) and repeat the bleeding procedure: idle with the cap off until the thermostat opens and the level stabilizes. Ensure your coolant reservoir is also at the proper level.
Before You Go
The one spec you must look up is your bike’s coolant capacity. It’s not universal. A Honda CRF250R holds 1.09 quarts after a drain; a ’99 Kawasaki ZX-6R takes 2.3 liters. Guessing usually leads to buying too much coolant or, worse, underfilling the system.
If you’re comfortable with a basic DIY oil change for motorcycles, you have all the mechanical skill needed for this job. The added complexity is just patience, waiting for the engine to cool, and waiting for the air to bleed out. Rushing either one turns a simple maintenance task into a roadside breakdown. Change the coolant on schedule, use a 50/50 solution of antifreeze and distilled water, and your bike’s temperature gauge will stay where it belongs for years.
