
How to Check Motorcycle Chain Wear: Step-by-Step
This post contains affiliate links. As an Amazon Associate, we earn from qualifying purchases.
Check motorcycle chain wear by measuring its stretch against manufacturer limits, visually inspecting for cracks or damaged O-rings, and examining sprocket teeth for a hooked shape. Ducati’s official tool measures over 16 pins; Triumph’s manual says to measure 20 links under tension. A chain at or beyond 1.2% stretch needs immediate replacement.
That 1.2% figure is a hard stop, not a suggestion. It’s the point where the kinematic mechanism becomes unreliable. Your chain can jump a sprocket tooth, and when that happens at speed, the chain can snap or lock the rear wheel. This is why it’s critical to know how to check motorcycle chain wear.
What follows: the three tests that actually matter, the brand-specific numbers you need for how to check motorcycle chain wear, and the one visual check that catches problems before the calipers come out. We’ll also cover why the most common quick-check trick is often wrong.
Key Takeaways
- The pull-away test is unreliable for modern O-ring chains; measure stretch with a ruler or the official tool.
- Chains require replacement at ≥1.2% stretch (red on the Ducati tool) or if visual inspection finds cracks, spinning pins, or damaged O-rings.
- Sprocket teeth worn into a hook shape mean you must replace the chain and sprockets as a set, installing a new chain on worn sprockets ruins it fast.
- Manufacturers disagree on procedure: Ducati says measure 16 pins on the bike; Triumph says measure 20 links under a 10-20 kg weight.
- Lubricate every 400 km with SAE 80W-90 mineral oil or specific O-ring-safe lubricant, and always inspect after riding in dirt or at high ambient temperatures.
The Pull-Away Test and How It Lies
You have seen this advice everywhere: lift the chain off the rear sprocket. If you can see light between the chain and the sprocket tooth, it is worn. This test is fast, easy, and often wrong for modern motorcycles.
Common mistake: Relying solely on the pull-away test. On a new, tight O-ring chain, the rollers sit deep in the sprocket. As the chain wears and the pitch elongates, the rollers ride higher. But a dirty or dry O-ring chain can also stick and resist pulling away, giving you a false pass. You will miss the stretch until it is past 1.5%.
The test has a place, as a red-flag check in a parking lot. If the chain pulls a quarter-inch off the sprocket, it is deeply worn. But for a definitive go/no-go decision, you need a ruler.
Measuring Chain Stretch: The Numbers Game
This is the only method for how to check motorcycle chain wear that gives you a number you can compare against a factory service limit. The principle is simple: you measure a specific length of chain under tension and see how much it has grown. The disagreement is in the details.
Ducati and Triumph specify different pin counts and tensioning methods. Here is the breakdown from their official service bulletins.
| Manufacturer | Links/Pins to Measure | Tension Method | Maximum Length (O-Ring Chain) |
|---|---|---|---|
| Ducati | 16 pins | On bike: low gear, turn rear wheel. Off bike: 20 kg weight. | 25.6500 cm |
| Triumph | 20 links | Hang a 10-20 kg (20-40 lb) weight on the chain. | 319 mm |
The Ducati procedure for 520-532 chains, documented in an NHTSA technical service bulletin, is precise. You tension the chain on the bike by putting it in a low gear and turning the rear wheel. Then you measure the distance between the centers of two inner pins, 16 pins apart. The magic number is 25.6500 cm. Anything longer means replacement.
Triumph’s manual tells you to remove the chain guard, hang a weight, and measure 20 links. Their service limit is 319 mm.
Why the difference? Sample size. Measuring more links averages out any single tight spot. Measuring fewer pins is faster and works with a dedicated tool. Both methods work if you follow the manufacturer’s own limit.
For 520-532 chains, measure over 16 pins. Ensure that the measured value does not exceed the maximum acceptable length of 25.6500 cm for a chain with O-Rings. The chain must be changed if the measurement is greater.
Using the Ducati Chain Wear Tool (Part No. 889450134)
This tool turns measurement into a simple go/no-go. You insert the fork end into a roller on a tensioned chain section. The tool has three colored sections representing stretch percentage.
- Green: Chain is within acceptable wear.
- Yellow: Chain is approaching the limit. Start planning a replacement.
- Red: Chain is at or beyond 1.2% stretch. Replace immediately.
There is an edge case. The tool was recently updated from 7mm thick to 5mm thick to work with 520 chains. If you have the old 7mm version, it will not fit a 520 chain. You will need to manually file it down or get the updated tool.
The Visual Inspection: Cracks, Pins, and O-Rings
Numbers do not catch everything. Before you measure, clean and lubricate the chain. Then get a flashlight and look closely. According to Ducati’s NHTSA final drive chain bulletin, if you see any of the following, the chain is done:
- Cracks on the plates. Look near the pin holes. These are fatigue cracks.
- Cracks on the pins. Hard to see, but a sign of imminent failure.
- Spinning pins. The pin should be fixed in the outer plate. If it rotates, the press-fit is gone.
- Damaged O-Rings. Missing, cut, or swollen O-rings mean dirt has entered the pin-bushing interface. The chain will wear rapidly.
- Scratched rollers. Deep scratches on the roller surface indicate contamination and abnormal wear.
A stiff or kinked link is another death sentence. It means internal corrosion or a damaged bushing. You will feel it as a clunk when the chain runs over the sprocket.
This visual check is your weekly ritual. It takes 30 seconds and catches what a quarterly measurement might miss.
Sprocket Inspection: The Hook That Costs You Money

You cannot check the chain in isolation. Worn sprockets accelerate new chain wear dramatically. The tell is the tooth profile.
New sprocket teeth are symmetrical with a slight curve. A worn tooth is shaped like a hook, the leading edge is sharp and curved over. Run your finger over the teeth. If they feel like little metal talons grabbing at your skin, the sprocket is shot.
Where this goes sideways: Replacing just the chain. A new chain on hooked sprockets will try to seat into the wrong pitch. It will wear or become damaged quickly. The motorcycle chain and sprocket replacement guide on this site walks through doing the job right as a set.
Also check for a wear pattern called “cursing.” If the teeth are leaning to one side, your front and rear sprockets are misaligned. This creates lateral thrust and wears the sides of the chain’s inner links.
How Riding Conditions Shorten Inspection Intervals
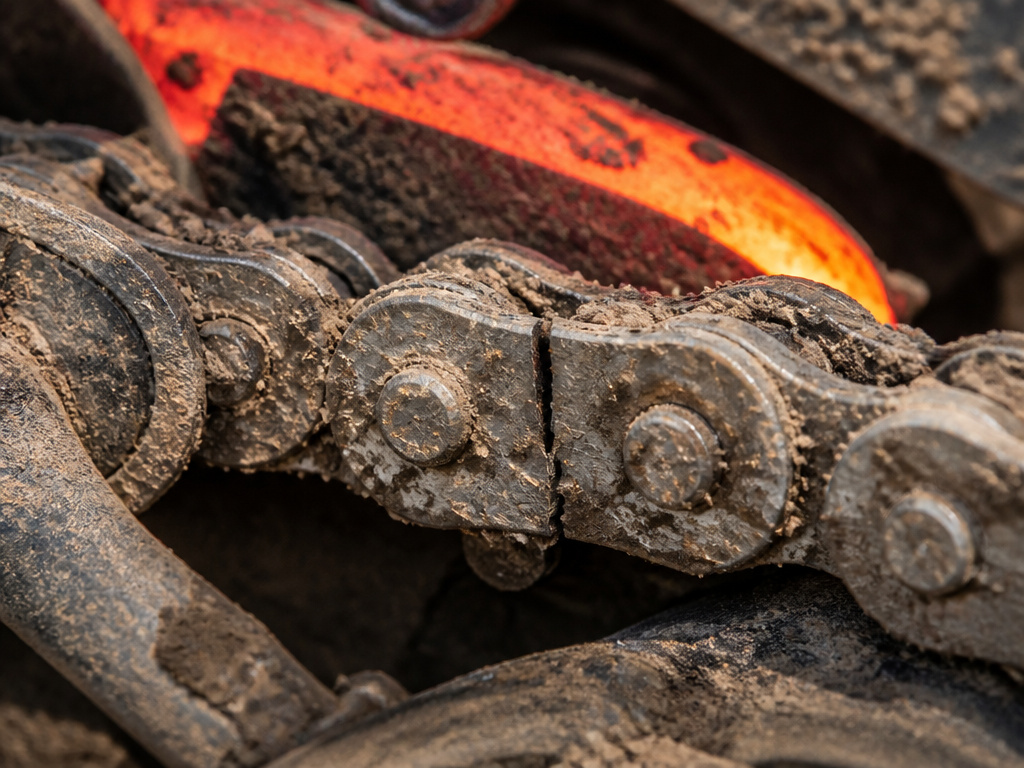
Ducati states the average service life of a final drive chain is about 20,000 km, but only with periodic maintenance. Two factors can significantly shorten that life.
Off-road riding: Friction from the chain guide shoe can overheat the links. This alters the heat treatment, making the metal brittle. In extreme cases, links fail with vertical cracks. If you ride dirt, inspect the chain for unusual wear after every outing.
High ambient temperature and highway speeds: Ducati recommends lubricating at least every 400 km. If you are riding in 40°C heat or doing long highway trips, lubricate more frequently. The pin-bushing area sees high loads and temperatures that break down the lubricant faster.
The cleaning method matters, too. Use a jet of water to remove mud, then dry immediately with compressed air from at least 30 cm away. Letting a wet chain sit invites rust in the rollers.
For the actual chain lubrication and cleaning process, we have detailed guides. The product choice matters: use mineral oil SAE 80W-90 or specific chain lubricants that do not contain additives damaging to O-rings.
Consequences of Running a Worn Chain
This is not scare talk. It is documented failure progression. A chain stretches because the pins and bushings wear. This elongates the pitch.
When the chain pitch no longer matches the sprocket pitch, the roller does not seat properly. It rides high on the tooth. Under load, it can jump the tooth. At best, this causes a jarring snatch. At worst, the chain snaps or jams between the sprocket and the swingarm.
A snapped chain can whip forward and crack your engine case. A jammed chain can lock the rear wheel instantly. Both outcomes will ruin your day and your wallet. This is why the guide to the best motorcycle sprockets emphasizes quality and correct alignment, it is a safety system.
Overtightening a worn chain to reduce slack is another destructive move. It increases the load between pins and bushings, causing overheating and rapid wear of the lubricant film. You are essentially grinding the parts together.
How to Check for Stiff Links
A chain should flex smoothly at every joint. To check, slowly rotate the rear wheel by hand and watch each link as it bends around the rear sprocket. Any link that resists moving or appears to kink instead of pivoting freely is a stiff joint. You can also feel for them by manually flexing sections of the chain side-to-side off the bike. Frequent inspection for stiff joints is recommended. A stiff link indicates internal damage, often from dirt, lack of lubrication, or a damaged O-ring, and it creates uneven wear and stress on the entire drivetrain.
How to Find Tight Spots in a Chain
Chains rarely wear evenly. A tight spot is a section that has less play than the rest when the chain is under tension. To check, put the bike on a stand and rotate the rear wheel to find the point where the chain feels tightest. Mark that spot. Then, rotate the wheel to find the loosest section. A significant difference in slack between these points means the chain has worn unevenly. This uneven wear, or tight spot, causes a pulsating feel during acceleration and puts extra strain on the transmission and sprockets.
Chain Noise and Snatchiness While Riding
Your ears and throttle hand are good diagnostic tools. Listen for a repetitive clicking, whirring, or grinding noise from the chain area, especially under power. More telling is a snatchy or jerky feel during steady, low-throttle cruising or when rolling on and off the power. This snatchiness means the chain is not engaging the sprockets smoothly, often due to worn, stiff, or kinked links. Any new, rhythmic noise or drivetrain lash felt through the bike is a direct signal to stop and perform a detailed visual and measurement inspection.
Frequently Asked Questions
How do I tell if my motorcycle chain is worn without tools?
Perform the visual inspection. Look for cracked plates, damaged O-rings, and stiff links. Check the sprockets for hooked teeth. While not as precise as measurement, these signs clearly indicate a chain that is past its service life.
Does WD-40 clean motorcycle chains?
WD-40 is a water-displacing solvent and a light lubricant. It can help loosen grime but is not a dedicated cleaner or a proper O-ring-safe chain lubricant. It may also penetrate and damage O-rings over time. For a thorough job, use dedicated motorcycle chain cleaners and follow with an O-ring-safe chain lubricant.
What is the typical lifespan of a motorcycle chain?
With proper maintenance, an O-ring chain can last 20,000 km. This assumes regular cleaning, correct lubrication every 400 km, proper tension, and compatible sprockets. Neglect, off-road use, or high-temperature riding can cut this lifespan to 10,000 km or less.
What are the signs of a worn-out sprocket?
The primary sign is hooked teeth. Visually, the teeth will look pointed and curved like a falcon’s beak. You may also see uneven wear (teeth leaning), excessive sharpness on the edges, or a noticeable ridge worn into the side of the teeth.
The Bottom Line
The chain should be frequently inspected. Make the visual inspection for cracks and O-rings a habit. Measure stretch with a ruler at least once a season, following your manufacturer’s specific pin-count and tension method.
If your measurement hits the service limit or you see any visual red flags, replace the chain. And always replace both sprockets at the same time, the $150 for new sprockets is cheaper than a new chain ruined in 5,000 miles.
Ride it before you trust it. A quiet, smooth drivetrain is a safe one.
