
How to Clean Motorcycle Wheels: Tools and Method
This post contains affiliate links. As an Amazon Associate, we earn from qualifying purchases.
To clean motorcycle wheels correctly, you match the cleaner to the wheel finish, avoid all pressure near bearings and brakes, and seal the clean surface. For most Harley-Davidson chrome wheels, that means Harley-Davidson Wheel and Tire Cleaner (part 94658-98) applied with their Wheel and Spoke Brush (43078-99), followed by a sealant like Glaze Polish & Sealant (99701-84). The factory service manual explicitly prohibits pressure washers and warns that common cloths with nylon fibers will scratch finishes.
That factory warning about cloths isn’t marketing. Paper towels and terry cloths leave fine, circular scratches in chrome that catch the light differently, a haze you only see after you’ve already caused it. A proper wash is an inspection ritual. You find the small stone chip in the paint, the beginning of corrosion on a spoke nipple, the slight weep from a axle seal, while everything is wet and under a light. Knowing how to clean motorcycle wheels correctly is part of this preventative care.
What follows: the exact OEM part numbers for the job, the one tool you must never use, how to clean brake components without damaging them, and the model-specific exception that overrides the standard cleaner recommendation.
Key Takeaways
- The Harley-Davidson service manual explicitly prohibits pressure washers for cleaning its motorcycles, stating use “can result in equipment damage.”
- Use only microfiber cloths labeled as nylon-free, like the Harley Microfiber Detailing cloth (94663-02); paper towels and terry cloths contain nylon fibers that scratch surfaces.
- Match the cleaner to the wheel finish. Harley’s Wheel and Tire Cleaner (94658-98) is for wheels, tires, and black-coated exhausts only, not for frames or anodized parts.
- Never use cleaners containing chlorine or silicone on brake discs. The manual warns this “can impair brake function.”
- After cleaning, seal chrome and painted wheels with a product like Harley Glaze Polish & Sealant (99701-84) or Glaze Poly Sealant, as different Harley-Davidson sources recommend different sealant products.
The Tools That Actually Work (and the One That Doesn’t)
Grab the wrong brush and you’ll etch the finish. Use the wrong cloth and you’ll haze it. This isn’t about having a garage full of specialty products; it’s about having the three that do the job without creating a new one when you compare a how to clean motorcycle wheels.
The Harley-Davidson Cosmetic Care procedure is blunt. It states: “Use recommended surface care products. Paper towels, terry cloths, cloth diapers or other materials with nylon fibers can create fine scratches to surfaces.” That’s why they sell their own Microfiber Detailing cloth (part number 94663-02), specifying it contains no nylon fibers. The difference is tactile. A nylon-free microfiber glides; a terry cloth or cheap towel drags and grinds grit into the chrome.
For the cleaner, the manual is equally specific. For general washing, it lists H-D Sunwash Cleaner Concentrate (94659-98). For wheels, tires, whitewalls, and black-coated exhaust pipes, it specifies Wheel and Tire Cleaner (94658-98). It then adds a crucial limitation: “Do not use on frames or anodized parts.” These instructions are the mandatory results of compatibility testing.
Now for the tool you must skip.
Do not use a pressure washer to clean motorcycle. Using a pressure washer can result in equipment damage. (00489c)
That’s a direct “NOTICE” from the factory manual. The high-pressure stream forces water past fork seals, wheel bearings, electrical connectors, and into places it cannot drain from. The damage often shows up months later as a corroded bearing or a gremlin in the wiring, long after the “clean” bike is put away.
| Tool | OEM Part Number (Harley-Davidson) | Purpose & Limitation |
|---|---|---|
| Wheel & Tire Cleaner | 94658-98 | Cleans wheels, tires, whitewalls, black pipes. NOT for frames or anodized parts. |
| Wheel & Spoke Brush | 43078-99 | Cone-shaped brush for scrubbing heavily soiled wheel surfaces. |
| Microfiber Detailing Cloth | 94663-02 | Polish/sealing cloth; contains no nylon fibers to prevent scratches. |
| Sunwash Cleaner Concentrate | 94659-98 | General cleaner for all surfaces; prevents water spots. |
The Step-by-Step Wheel Wash (and the One Step Nobody Skips)
A clean wheel is a byproduct. The goal is an inspected wheel. Follow this sequence for how to clean motorcycle wheels and you won’t miss a crack, a leak, or a spot of corrosion.
Before you start: Park the bike on a level surface, out of direct sunlight. The engine and brakes must be completely cold. Have all your tools and cleaners laid out. This is a slow job. Rushing it is how cleaner dries on the finish and stains it.
Step 1: Pre-Rinse with Plain Water.
Use a gentle hose flow or a bucket of water to sluice off loose dirt and grit. The goal is to remove the abrasive layer before you touch it with a brush. Direct the stream at the wheel, not at axle hubs, brake calipers, or electrical components.
Step 2: Apply the Dedicated Wheel Cleaner.
Spray Harley Wheel and Tire Cleaner (94658-98) onto the wheel surface. Let it dwell for the time specified on the label. This gives the surfactants time to break down brake dust and road grime.
Where this goes sideways: Applying cleaner to a hot rim or brake disc. The heat can bake the cleaner onto the finish, creating a stain that requires aggressive polishing to remove. Wait until you can comfortably place your hand on the wheel.
Step 3: Scrub with the Correct Brush.
Use the Harley Wheel and Spoke Brush (43078-99). Its conical shape gets into the corners of cast wheels and between spokes. Scrub in a circular motion, applying moderate pressure. For the rear wheel, pay extra attention to the area around the sprocket and brake caliper, where chain lube and grease fling off.
Step 4: Rinse Thoroughly.
Rinse the entire wheel with low-pressure water until all suds and residue are gone. Incomplete rinsing leaves a film that attracts more dirt and can corrode aluminum over time.
Step 5: Dry with a Nylon-Free Cloth.
Use the Harley microfiber cloth (94663-02) or another verified nylon-free cloth to dry the wheel completely. Drying prevents water spots on chrome and polished aluminum. This is the inspection step. As you dry, look for:
- Stone chips in the paint or powdercoat.
- Corrosion starting on spoke nipples or around the valve stem.
- Any grease or fluid leaks from the axle or brake caliper.
Step 6: Seal the Clean Surface.
Once completely dry, apply a thin, even coat of a sealant like Harley Glaze Polish & Sealant (99701-84) with a clean microfiber cloth. This adds a sacrificial barrier that makes the next cleanup far easier. Buff it to a shine with a second clean section of the cloth.
Cleaning Brake Discs and Calipers Safely
This is the most hazardous part of the process. Get it wrong and you compromise the one system that must work every time.
The factory warning is unambiguous: “Do not wash brake discs with cleaners containing chlorine or silicone. Cleaners containing chlorine and silicone can impair brake function.” These chemicals can leave a residue on the rotor surface that drastically reduces initial bite, a heart-stopping discovery on your first stop after a wash.
The safe method is mechanical, not chemical.
- After rinsing the wheel but before applying wheel cleaner, cover the brake discs and calipers with a plastic bag or cling film. This prevents overspray.
- Proceed with cleaning the rest of the wheel as described.
- After rinsing and drying the wheel, remove the covering.
- Clean the brake discs using only a cleaner that does not contain chlorine or silicone, as specified in the manual. Wipe the rotor surface thoroughly. The alcohol evaporates completely, leaving no residue.
- Wipe down the external surfaces of the caliper with a damp, soapy cloth (using the Sunwash cleaner), then dry immediately.
This method keeps harsh chemicals away from the friction surface and is a perfect time to inspect brake pad material and look for fluid leaks from the caliper seals. For a deep clean of the caliper itself, including the piston and bracket, our guide on how to clean your motorcycle’s brake calipers walks through the disassembly process.
Chrome vs. Aluminum vs. Painted: The Cleaner Changes
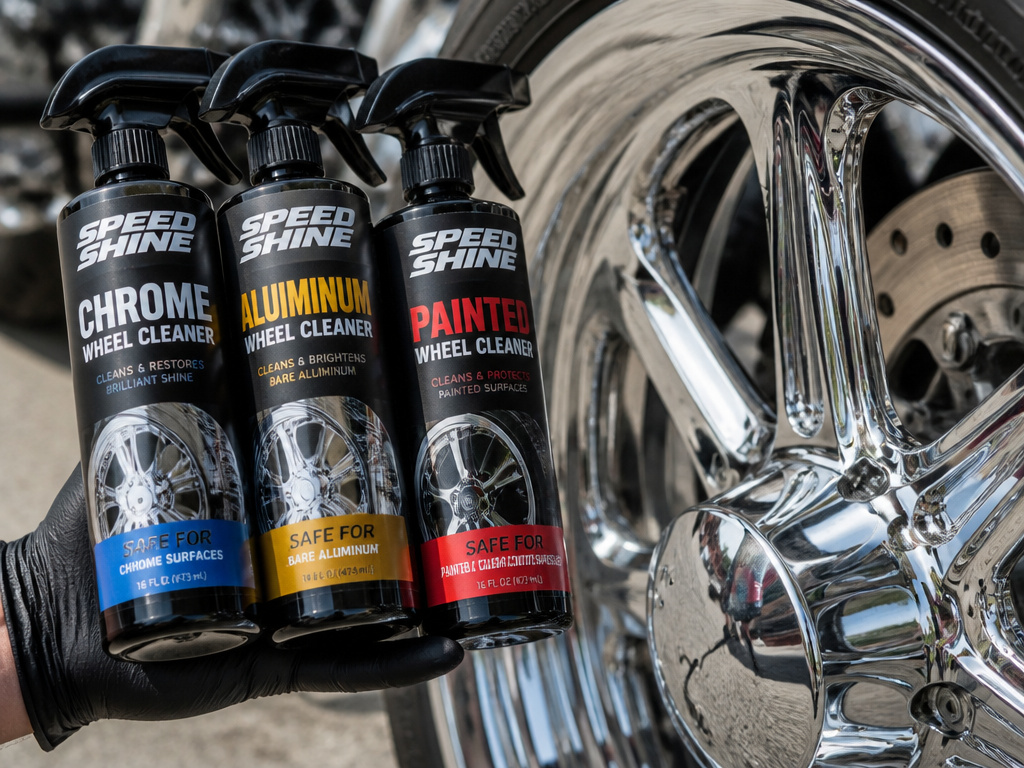
Not all wheels are the same, and the factory manuals show the distinction matters. Using a chrome cleaner on a specific aluminum finish can strip its protective coating.
Harley often specifies Bright Chrome Cleaner (94683-99) for chrome-plated or polished stainless steel wheels, though some custom wheel kit instructions prohibit its use. This cleaner is designed to shine those surfaces without being overly abrasive.
For non-clear coated polished aluminum or polished stainless steel, the manual calls for Bright Metal Polish (99725-89). This polish is for non-clear coated polished aluminum or polished stainless steel surfaces.
For painted or clear-coated wheels, the all-purpose Sunwash Cleaner (94659-98) or the Glaze Polish & Sealant (99701-84) is the correct choice. Using a metal-specific polish here is wasteful and can gum up.
The model-specific exception: For Harley’s “Road Winder” custom front wheel kit, the manual says to use Bright Chrome Cleaner (94683-99). However, for a different custom wheel kit (43300115), the same source explicitly states that Bright Chrome Cleaner is “Not for use.” This proves you must check your own bike’s documentation, the standard rule has exceptions.
The Yamaha WR250F owner’s manual adds another critical warning, especially for riders with spoked wheels: “Do not use strong acidic wheel cleaners, especially on spoked wheels.” Acidic cleaners aggressively attack the aluminum alloy of the rim and can weaken the spoke nipples over time. When choosing aftermarket wheel cleaners, look for pH-neutral formulas.
| Wheel Finish | Recommended Harley-Davidson Product | Key Caution |
|---|---|---|
| Chrome / Brushed Stainless | Bright Chrome Cleaner (94683-99) | Check for model-specific exceptions (e.g., kit 43300115). |
| Bare Polished Aluminum | Bright Metal Polish (99725-89) | Requires more frequent sealing with a protectant like Preserve Bare Aluminum Protectant (99845-07). |
| Painted / Clear-Coated | Sunwash Cleaner (94659-98) or Glaze Polish & Sealant | Avoid abrasive polishes; they will dull the clear coat. |
Dealing with Stubborn Grime and Environmental Fallout
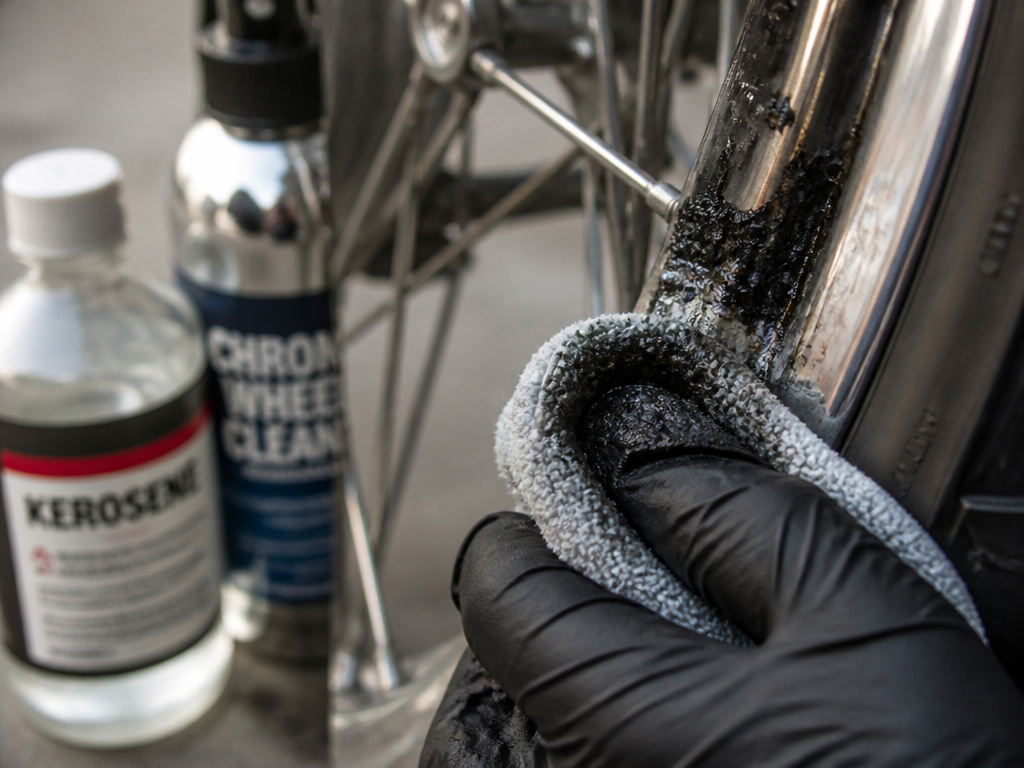
Road tar, caked-on chain lube, and the white haze of oxidized aluminum need a different approach. Force isn’t the answer; chemistry and patience are.
For road tar or sap, apply a dedicated tar remover or a small amount of kerosene to a cloth and dab it onto the spot. Let it soften the deposit for a minute, then wipe away. Follow immediately with your standard wheel cleaner and rinse thoroughly to remove any petroleum residue.
Oxidized aluminum (that dull, chalky white film) requires a dedicated aluminum polish, not just a cleaner. Products like Harley’s Bright Metal Polish (99725-89) or other quality pastes contain mild abrasives that cut through the oxidation. Apply with a foam applicator, working in small sections, then buff off with a clean microfiber. This is labor-intensive but effective.
The Yamaha manual highlights a specific environmental hazard: “After riding in the rain, near the sea or on salt sprayed roads.” Salt residue is highly corrosive and can remain on roads “well into spring.” In these conditions, a simple rinse with plain water immediately after the ride is the most important step. It prevents the salt from having days or weeks to attack the metal.
Using a Paddock Stand to Spin the Wheel
Lifting the bike onto a paddock or rear stand is the professional move for a thorough wheel cleaning. This allows you to spin the wheel freely, providing full access to every spoke, the inner rim, and the entire tire sidewall. This rotation is crucial for applying cleaner evenly and for rinsing it all off completely, preventing any residue from drying in hidden spots. With the wheel elevated, you can also safely and effectively use a dedicated wheel and spoke brush to scrub heavily soiled surfaces without the bike rolling away. Just remember to avoid using a pressure washer during this process, as it can force water into bearings and electrical components, causing damage.
Frequently Asked Questions
What is the best thing to clean motorcycle wheels with?
For factory-correct results on a Harley-Davidson, use Harley-Davidson Wheel and Tire Cleaner (part 94658-98). For other brands, choose a dedicated, pH-neutral wheel cleaner. Never use household cleaners like dish soap regularly, as they strip protective sealants.
Can I use WD-40 to clean motorcycle wheels?
Do not use WD-40 as a wheel cleaner. It is a water-displacing lubricant and penetrant, not a cleaner. It will leave an oily film that attracts dust and brake dust, making the wheel dirtier faster, and can contaminate brake rotors if overspray occurs.
Is it okay to use a pressure washer on my motorcycle wheels?
No. The Harley-Davidson service manual contains a formal notice: “Do not use a pressure washer to clean motorcycle. Using a pressure washer can result in equipment damage.” The high pressure forces water into bearings, past seals, and into electrical connectors.
How do I clean spoked wheels without scratching them?
Use a soft bristle brush like the Harley Wheel and Spoke Brush (43078-99) and a nylon-free microfiber cloth. Avoid stiff wire brushes. For deep cleaning between spokes, some owners use a shoelace dipped in cleaner, pull it back and forth like dental floss to clean the spoke itself.
How often should I clean my motorcycle wheels?
Clean them as part of your regular full bike wash routine, which for most riders is every few weeks or after riding in bad weather. The more frequently you clean them, the easier the job is, as grime and brake dust won’t have time to bond and corrode the surface.
Before You Go
Wheel cleaning is a structured inspection performed with soap and water. The moment you feel a gritty drag under your cloth, you’ve found the sand that would otherwise sit there grinding away. The factory’s specific part numbers and prohibitions are the documented way to avoid the fine scratches, the water in the bearings, and the brake contamination that generic advice glosses over.
One rule to walk away with: if your cleaner doesn’t list a specific part number or standard for use on motorcycle wheels, it’s a gamble. The price of a dedicated bottle is less than the cost of a ruined finish. Keep the brake discs covered, the pressure washer in the shed, and the nylon-laden cloths in the house. Your wheels will last longer, and you’ll spot the small problems before they ride with you.
