
How to Change a Motorcycle Air Filter: Step-by-Step Guide
This post contains affiliate links. As an Amazon Associate, we earn from qualifying purchases.
To change a motorcycle air filter, you must depressurize the fuel system, locate the airbox, remove the cover, and install a new filter with the correct torque. For the 2025 Indian Scout, that’s 14 in-lbs (1.6 Nm) on the four fasteners. The core decision is whether your filter is a disposable paper type you must replace or a reusable oiled-cotton style you can clean, a point where manufacturer instructions disagree.
The 14 in-lbs spec isn’t a suggestion. It marks the difference between a sealed intake and a vacuum leak that allows unfiltered dirt into your engine. A loose cover rattles and leaks. An overtightened one strips the threads in the airbox, which is a plastic or aluminum casting that costs more than a filter to replace. Knowing how to change a motorcycle air filter correctly prevents these expensive mistakes.
What follows: the universal seven-step process for how to change a motorcycle air filter, the exact tools called out by factory service bulletins, the cleaning-versus-replacement standoff with official sources, and the two mistakes that cause backfiring after the job is done.
Key Takeaways
- Always depressurize the fuel system before removing a tank-mounted airbox by pulling the fuel pump fuse and cranking for 5 seconds.
- Torque filter cover screws to the manufacturer’s exact spec, which ranges from 14 in-lbs (Indian) to 55–60 in-lbs (Harley), using a guess strips threads.
- Replace disposable paper filters; Indian Motorcycle explicitly states “Do not attempt to clean.” For reusable K&N filters, follow the 10-minute soak, low-pressure rinse, and 20-minute oil-absorption rule.
- An improper seal allows dirt to enter, which then acts as a grinding compound on cylinder walls; a faint whistling at certain RPMs indicates the cover isn’t seated.
- Log the service in a maintenance book or app; the factory 8,000 km (5,000 mi) inspection interval is a baseline that shortens in dusty conditions.
The 7-Step Universal Process
Every guide on how to change a motorcycle air filter follows the same mechanical sequence, whether the airbox is under the seat or behind the fuel tank. The differences are in the disassembly steps to reach it.
A proper filter change requires depressurizing the fuel system, removing any bodywork or the fuel tank to access the airbox, unbolting the cover, removing the old element, cleaning the airbox cavity, installing the new filter in the correct orientation, and torquing the fasteners to the specified value with a calibrated wrench.
Start with the bike on a level surface, engine off and cool. Pull the main fuse if your manual calls for it. Harley-Davidson procedures list this as step one. This prevents any accidental start-up while you’re working near the throttle body and electrical connectors.
Now, locate your airbox. On cruisers like the Indian Scout, it’s under the fuel tank. On many sportbikes and standards, it’s under the seat. You’ll need to remove either the seat or the tank to get to it. If it’s the tank, you must depressurize the fuel system first. The Indian procedure is specific: locate the fuel pump fuse, pull it, then crank the engine over for 5 seconds. That releases pressure in the line so you can disconnect the fuel quick-connector without spraying gasoline.
With access cleared, unbolt the airbox cover. Most use several small screws. Lay them out in order on a clean rag or a magnetic tray. Lift the cover straight off, if it’s stuck, a light tap with a rubber mallet can break the gasket seal. Do not pry against the airbox itself; that cracks the plastic. Reach in and pull the old filter out. This is the point where grit can fall into the intake throat. Have a shop vacuum or a clean, lint-free rag ready to catch any debris.
Before the new filter goes in, wipe the inside of the airbox with a damp rag. Do not spray cleaner directly into the intake boot. Any leftover dirt gets sucked straight into the engine. Set the new filter in exactly as the old one came out. There’s usually a marked top side or a specific lip that seats into a groove. Push it down evenly until it sits flush.
Reinstall the cover and its screws. This is where you need a torque wrench. Finger-tighten all screws first in a crisscross pattern to align the cover, then take them to spec. For the 2025 Indian Scout, that’s 14 in-lbs (1.6 Nm) on the four T25 TORX® fasteners. For a Harley-Davidson Screamin’ Eagle Extreme Circle Air Cleaner Kit, the captive screws and socket head screw get 6.2–6.8 N·m (55–60 in-lbs). The difference is massive, and using the wrong value damages the parts.
Finally, reassemble the bike in reverse order, reconnect the battery or install the main fuse, and start the engine. Listen for any new whistling or sucking noises from the airbox area, that’s the sound of an air leak.
Tools and Safety: What the Manuals Actually Say
You need more than a screwdriver. Factory service bulletins list exact tool sizes and mandatory personal protective equipment. Ignoring these turns a simple swap into a messy, risky job.
For the 2025 Indian Scout, the required tools are a T25 TORX®, a T40 TORX®, and a 6mm Allen socket. You also need a torque wrench that reads in inch-pounds for the final step. The same document states you must always wear safety glasses and nitrile gloves when servicing. The glasses protect your eyes from falling debris when you’re under the tank; the gloves keep fuel and grime off your skin.
Harley-Davidson’s instructions for its Screamin’ Eagle kit add another item: LOCTITE 243 MEDIUM STRENGTH THREADLOCKER AND SEALANT (BLUE) (99642-97). You apply it to the threads of all fasteners during assembly. This keeps vibration from backing out the cover screws, which on an exposed air cleaner could lead to the cover detaching while riding.
Before you start: Fuel system work requires depressurization. Skip the 5-second crank after pulling the fuse, and the quick-connect fitting can spray gasoline under pressure. Also, an exposed air filter element on oval air cleaners can ingest water in rain, causing immediate misfires. Harley advises installing a rain sock in wet conditions.
Your workspace matters. A flat, level surface stops parts from rolling away and prevents fuel spills. Have a fire extinguisher rated for flammable liquids within reach. This isn’t scare talk. Gasoline vapor is heavier than air and pools in low spots; a single spark from a disconnected battery terminal can ignite it.
The right tool prevents collateral damage. Using a standard screwdriver on a TORX head strips the star pattern, making the screw impossible to remove without drilling. A 6mm Allen key in a 5mm socket rounds out the soft aluminum. Buy the tools listed, or take the bike to a shop that has them. A stripped airbox cover screw turns a 30-minute job into a half-day ordeal of extraction and re-threading.
Cleaning vs. Replacement: The Manufacturer Split
Here is where official factory advice diverges completely. One brand says never clean; another provides a detailed cleaning protocol. The type of filter in your bike decides the rule.
Indian Motorcycle is absolute. For the 2025 Scout, the service bulletin states: “Do not attempt to clean the air filter. Replace a soiled or damaged filter.” This applies to their OEM paper-and-mesh disposable filters. Cleaning these with compressed air or solvent can rupture the paper media, creating a microscopic hole that passes dirt. Even tapping them to dislodge debris can damage the internal structure. The only safe move is to swap in a new one, like part number 2211506 for that model.
Harley-Davidson, for its Screamin’ Eagle Extreme-Flow Air Filter kits that use K&N-style oiled cotton, provides a full cleaning and re-oiling procedure. The filter is designed to be serviced. The steps are precise:
- For Harley-Davidson K&N oiled cotton filters, the procedure is to tap the element to dislodge loose dirt and brush gently with a soft bristle brush. However, another Harley-Davidson procedure advises against striking the filter element on a hard surface.
- Spray K&N Air Filter Cleaner (Part No. 99883-88T or 99850-92T) liberally and let it soak for 10 minutes.
- Rinse with low-pressure tap water, flowing from the clean side to the dirty side.
- Shake off water and let the filter air dry completely. DO NOT use compressed air or a heat gun.
- Once dry, spray K&N Air Filter Oil (Part No. 99882-88T) along each pleat from about 76 mm (3 in) away.
- Let the oil absorb for 20 minutes. If oil still drips after 20 minutes, you over-applied and must clean and start over.
| Filter Type | Manufacturer Stance | Key Instruction | Consequence of Wrong Choice |
|---|---|---|---|
| Disposable Paper (Indian) | Replace only | “Do not attempt to clean” | Cleaning ruptures media; dirt enters engine, scoring cylinders. |
| Reusable Oiled Cotton (Harley/K&N) | Clean and re-oil | 10-minute soak, air dry, 20-minute oil absorption | Over-oiling fouls sensors; under-oiling lets dirt pass; compressed air damages cotton. |
The disagreement on technique goes deeper. One Harley general procedure says you can use low-pressure compressed air from the inside to dry a filter. The specific K&N document for the same brand’s performance kits says “DO NOT use compressed air.” When sources conflict, follow the instructions for your specific filter type. If it’s a K&N, air dry only.
How do you know which you have? A disposable filter is usually pale yellow or white, made of a stiff paper-like material sandwiched in a wire mesh. A reusable filter is a deep red or orange cotton gauze, visibly oily to the touch, and much more flexible. When in doubt, check your owner’s manual or the parts listing for your bike. Using the wrong maintenance method voids warranties and can cause engine damage.
Torque Specs and Why They’re Not Guesses
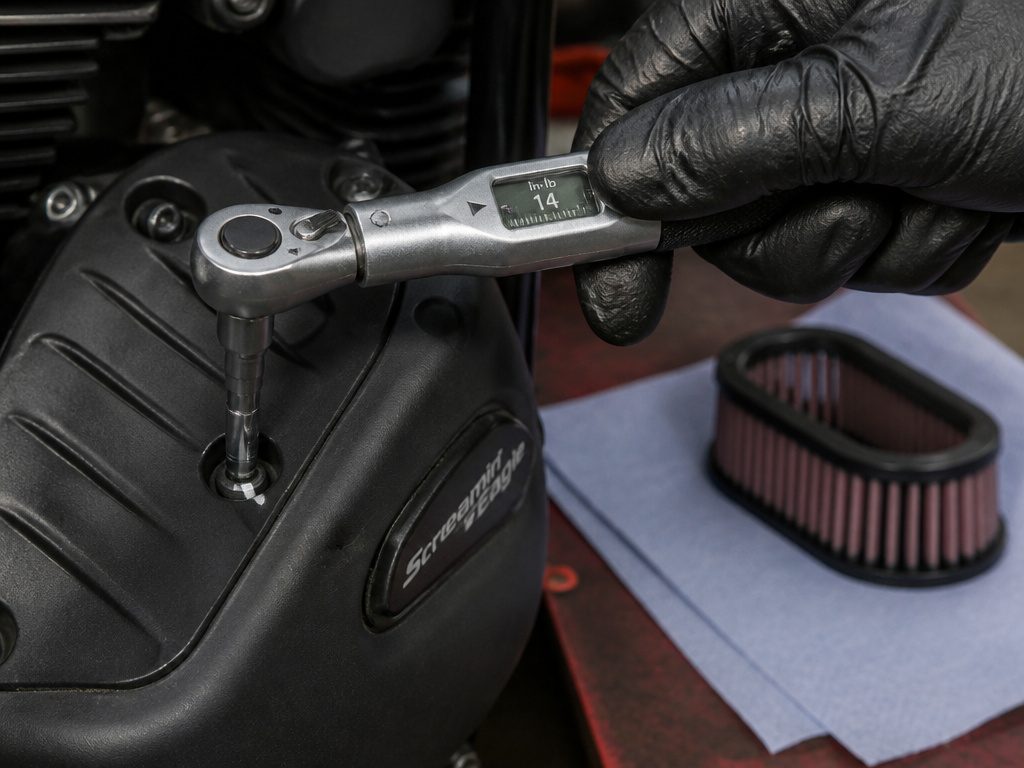
A fastener’s job is to clamp two parts together with just enough force to seal the joint without damaging the threads. The torque specification is the number that achieves that. On air filter covers, the range is surprisingly wide.
For the Indian Scout’s four fasteners, the spec is 14 in-lbs (1.6 Nm). That’s barely more than finger-tight. The airbox is plastic, and the screws thread into plastic clips. Overtightening pulls the threads straight out, leaving a useless hole. You’d then need a helicoil insert or a new airbox assembly.
For the Harley-Davidson Screamin’ Eagle Extreme Circle Air Cleaner Kit, the captive screws and socket head screw require 6.2–6.8 N·m (55–60 in-lbs). That’s over four times the Indian’s torque. The backplate is metal, threading into a metal throttle body adapter. If you don’t tighten it enough, the cover can vibrate loose and possibly come off while riding.
| Application | Torque Spec | Fastener Type | Material | Risk if Ignored |
|---|---|---|---|---|
| 2025 Indian Scout Filter to Airbox | 14 in-lbs (1.6 Nm) | T25 TORX® | Plastic → Plastic Clip | Stripped threads, air leak, need new airbox. |
| Harley Screamin’ Eagle Extreme Circle Kit | 6.2–6.8 N·m (55–60 in-lbs) | Captive & Socket Head Screws | Metal → Metal | Cover vibration, potential detachment, major safety hazard. |
| Harley OE Flange Screws to Cylinder Heads | 30–32.5 N·m (22–24 ft-lbs) | Flange Screws | Metal → Aluminum Head | Loose intake, massive vacuum leak, severe backfiring and poor running. |
You need a torque wrench that covers the required range. A large 1/2-inch drive wrench won’t accurately measure 14 in-lbs. Use a small 1/4-inch drive or a beam-type inch-pound wrench. Click-type wrenches are reliable if they’ve been calibrated recently. The investment is less than the cost of repairing a stripped airbox.
Apply torque in two stages. Snug all screws in a star pattern until the cover is just seated. Then, make a second pass at the full torque value in the same pattern. This ensures an even seal around the entire gasket. If you just crank down one screw after another, you can warp the cover or create a gap on the opposite side.
After installation, mark one of the screw heads with a paint pen. A visual check during your next pre-ride inspection will instantly show if the fastener has started to back out.
Post-Installation Checks and Troubleshooting
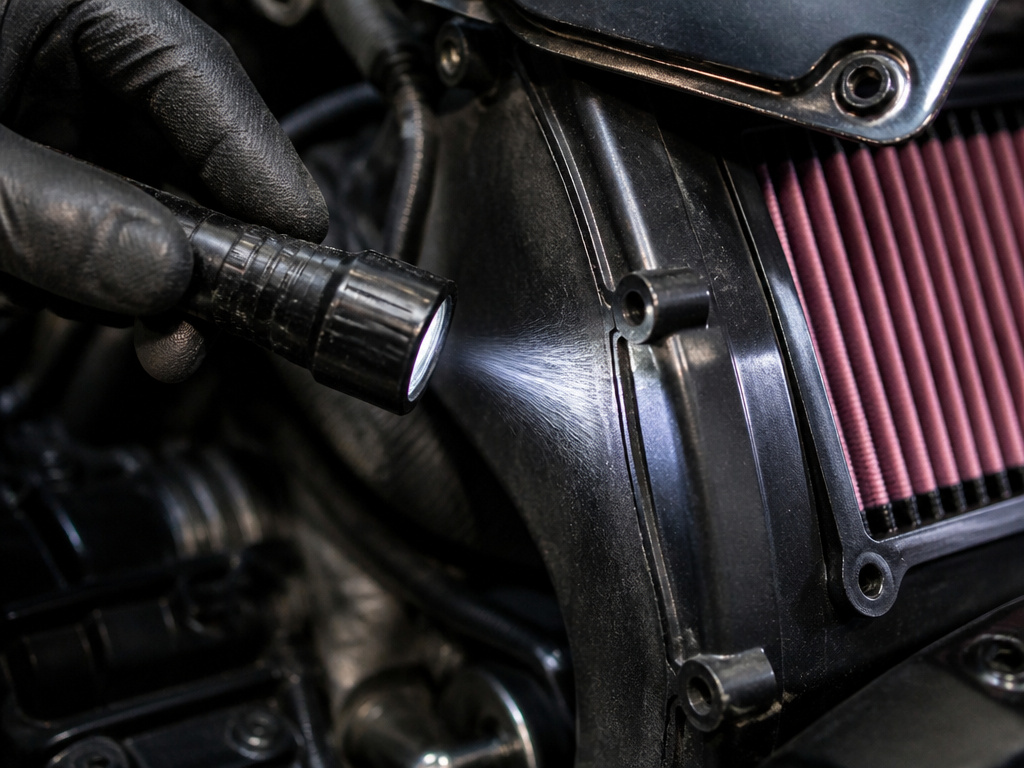
The job isn’t done when the last bolt is tightened. A quick test ride and a visual inspection catch problems before they cause damage. Most issues appear within the first few miles.
Start the engine and let it idle. Listen for a new, high-pitched whistling or sucking sound from the airbox area. That’s the sound of an air leak, the cover isn’t sealed. Turn the bike off and re-check the cover seating and fastener torque. A common culprit is the filter itself not being fully seated in its tray, preventing the cover from closing flush.
Take a short, cautious ride. Pay attention to throttle response. A massive vacuum leak from a disconnected hose or unsealed intake will cause the engine to run very lean. You’ll feel a flat spot or hesitation when you roll on the throttle, and the bike may backfire loudly on deceleration. If this happens, stop and check all intake connections you disturbed. For a Harley with an oval air cleaner, also verify the rain sock is installed if you ride in wet conditions; water ingestion causes immediate misfiring.
Where this goes sideways: Reusing an old gasket or not cleaning the sealing surface. A tiny piece of grit trapped under the gasket creates a leak path. The engine runs lean for weeks, raising combustion temperatures and gradually burning exhaust valves. The repair can be extensive and costly.
Visually inspect the area after the ride. Look for any fresh dust or dirt streaks radiating from the airbox cover seam. This is evidence of unfiltered air being pulled in. Wipe the area clean and check again after another ride. If the streaks return, the seal has failed.
If performance is perfect, log the service. Note the date, mileage, and the part number of the filter you installed. Adhere to the factory service intervals, for Harley-Davidson, that’s inspection every 8,000 km (5,000 mi) and replacement at the same interval. In dusty or off-road conditions, inspect and replace the filter more often. A clogged filter restricts airflow, which can negatively affect engine performance and fuel mixture.
The final check is for loose items. Did you leave a tool on the engine? Is the fuel line connector fully clicked into place? A quick, methodical look-over prevents the one mistake that ruins an otherwise perfect job.
Where is the motorcycle air filter located?
The air filter lives inside the airbox, but its placement changes with the bike’s design. On many cruisers, you’ll find a round or oval air cleaner cover on the side of the engine, between the fuel tank and the front cylinder. Sport bikes and standards often have a more rectangular airbox tucked under the fuel tank or seat. To access it, you typically remove a cover held by screws or clips. Always consult your owner’s manual for the exact location and any specific safety steps, like depressurizing the fuel system, before you begin disassembly.
How to clean the airbox when changing the filter
Once the old filter is out, take a moment to clean the empty airbox chamber. Use a clean, lint-free rag to wipe away any loose debris or dust from the interior surfaces. A vacuum with a soft brush attachment can help remove finer particles. Be thorough, as any dirt left behind will be sucked directly into your engine when you start the bike. Avoid using compressed air, as it can force grit deeper into small passages or past seals. Ensure the sealing surface where the new filter sits is completely clean and dry for a proper, airtight fit.
Frequently Asked Questions
How often should I change the air filter on my motorcycle?
Follow the interval in your owner’s manual. For Harley-Davidson Screamin’ Eagle Extreme Circle and Extreme-Flow Air Filter kits, the inspection and replacement interval is every 8,000 km (5,000 mi). That’s a baseline for street riding. If you ride in dusty, sandy, or wet conditions, inspect it more often. A visibly dirty filter or one that’s been soaked needs attention sooner. A soiled filter should be replaced or cleaned to prevent dirt from entering the engine.
Can I clean a paper motorcycle air filter?
No. Manufacturers like Indian Motorcycle explicitly warn against it. Disposable paper filters have a delicate media designed to trap microscopic particles. Cleaning with compressed air, tapping, or solvents tears this media, creating holes that allow dirt to pass. This dirt acts as an abrasive inside your engine. Always replace paper filters.
Why is my motorcycle backfiring after I changed the air filter?
Backfiring after a filter change almost always signals a vacuum leak. You likely left a hose disconnected, didn’t seat the airbox cover properly, or tore the intake boot gasket. Unmetered air entering the engine makes the fuel mixture lean, causing popping and banging in the exhaust. Turn the engine off and carefully retrace your steps, checking every connection between the airbox and the engine’s intake ports.
Do I need to remap the ECU after changing the air filter?
For a simple like-for-like replacement of a stock filter, no. The engine’s airflow characteristics don’t change enough to require a new tune. However, if you install a high-flow performance air cleaner, like a Stage 1 air cleaner, the increased airflow can lean out the mixture. For performance air cleaner upgrades, consult your manufacturer’s instructions or a qualified tuner regarding any necessary ECU adjustments. Consult a dealer or a qualified tuner.
What’s the difference between an air filter and an air cleaner?
The terms are often used interchangeably, but technically, the “air filter” is the disposable or cleanable element (the paper or cotton part). The “air cleaner” is the entire assembly, the housing, cover, and filter element together. When you buy a performance air cleaner upgrade, you’re usually getting a new housing and a high-flow filter.
Is it okay to use aftermarket air filters?
Yes, if they are high-quality, correctly sized replacements. Brands like K&N make specific, reusable filters for many models. The critical point is to follow that specific brand’s maintenance instructions, not the OEM manual for a disposable filter. Never use a filter that doesn’t seal perfectly in your airbox; even a 1mm gap is a dirt highway.
Before You Go
One rule cuts through all the specs and procedures: the filter only works if it’s sealed. A perfect, clean filter in a leaking airbox is worse than a dirty one that’s sealed tight. Your final step before riding should be running a finger around the seam where the cover meets the airbox, feeling for any uneven gaps.
If your bike’s manual demands tank removal to reach the airbox, and that feels beyond your comfort zone, pay a professional. The cost of the service is fixed. The cost of repairing a stripped fuel line quick-connect or a scratched tank is not. This is especially true for modern bikes with layered bodywork and complex fuel systems documented in an NHTSA technical service bulletin.
For the vast majority of riders doing a simple replacement, the process is straightforward. Depressurize, access, unbolt, swap, torque, reassemble. The depth comes from respecting the numbers, the 5-second crank, the 14 in-lbs, the 8,000-km interval. Those numbers are the difference between a job that lasts for years and one that causes a problem by next weekend.
