
How to Jump a Dirt Bike: Step-by-Step
This post contains affiliate links. As an Amazon Associate, we earn from qualifying purchases.
To jump a dirt bike, you match three things: a forgiving jump, a steady throttle up the ramp, and your body positioned to let the bike fly under you. Start with a tabletop jump where you can land 10 to 20 feet short or long without crashing. Approach in a standing position, squeeze the bike with your knees, and roll on a steady throttle up the face. Let the bike come up to you; do not yank on the bars. For beginners, aim to land with both wheels down as evenly as possible, absorbing the impact through your legs, though sources disagree on whether this is always the ideal technique.
That last sentence is the goal. The real work happens in the ten seconds before you leave the ground. Most riders fixate on the air and miss the setup, which is why understanding how to jump a dirt bike is crucial.
What follows is the progression coaches actually use for the how to jump a dirt bike question: how to pick your first jump, the exact body mechanics for takeoff, what to do when the bike goes nose-high or nose-low, and the one piece of gear that isn’t optional. By the end, you’ll know how to go from rolling over a bump to clearing a 50-foot gap, and why rushing that timeline is how you get hurt.
Key Takeaways
- Start with forgiving tabletop jumps where a misjudged landing won’t send you over the bars.
- Your throttle must be steady and increasing up the face of the jump; chopping it causes a nosedive.
- In the air, squeeze the bike with your knees and keep your elbows up, this is how you stay connected to the machine.
- If the front end goes too high, one corrective technique, noted by Bosuer, is to gently tap the rear brake to bring it down. If the front drops, give a little throttle to level out.
- Land with both wheels as evenly as possible, shifting your weight forward as you touch down to stabilize the bike.
Before You Start: The Non-Negotiables
This isn’t a casual trail ride. The forces involved will find any weakness in your gear or your bike’s maintenance. Skip this and you’re asking for a hospital visit.
Before you start: A full-face motocross helmet, boots, chest protector, knee pads, and gloves are the absolute minimum. On the bike, check that all bolts are tight, tire pressure is set for the terrain, and your suspension is in good working order. Loose hardware fails catastrophically under the vibration of a landing.
Your first sessions should be short, 5 to 10 minutes of light cardio and dynamic stretches off the bike to get warm. On the bike, start with slow-speed balance drills and small bunny hops over rollers. This isn’t filler. It wakes up the muscle memory for throttle control and teaches your body to absorb impact through your legs, not your spine.
Choosing Your First Jump (This Isn’t About Size)
The biggest beginner mistake is picking a jump based on how impressive it looks. That’s a shortcut to a broken collarbone. The right first jump is chosen for its landing, not its takeoff ramp.
According to The Moto Academy, you need a forgiving jump, one where you can safely land even if you come up 10 to 20 feet short or long. This explicitly rules out jumps with “peaky” or sharply angled landings. A tabletop jump, with its long, flat top, is the ideal training tool. It gives you a massive margin for error.
Think of it like learning to brake. You don’t start by practicing panic stops in the rain. You start in an empty lot. A tabletop is your empty lot.
| Jump Type | Best For | Risk If Chosen Too Early |
|---|---|---|
| Tabletop | Absolute beginners. Flat top allows safe landings short or long. | Almost none, if sized appropriately. |
| Roller / Whoop | Learning rhythm and throttle control. A series of small bumps. | Getting out of rhythm and swapping front-to-rear. |
| Double | Intermediate riders. Requires precise speed to clear the gap. | “Casing” (hitting the middle) can launch you over bars. |
| Triple | Advanced riders. Demands absolute commitment and perfect speed. | Under-shooting leads to a massive, likely injurious impact. |
The goal for your first day isn’t distance. It’s to roll over the jump smoothly, feeling the bike leave the ground and settle back down as you learn how to jump a dirt bike. If you can do that ten times in a row without a twitch of panic, you’re ready to add a little throttle.
The 5-Step Jump Sequence (and the Step Everyone Gets Wrong)
This is the core technique. It looks like one fluid motion, but it breaks down into five distinct phases. Most riders merge steps 2 and 3, which is where control gets lost.
1. The Approach: Stand and Squeeze
As you enter the straight leading to the jump, get into the attack position. Stand on the balls of your feet, knees bent, elbows up. Your back should be straight, not hunched. Now, squeeze the bike with your knees. This connection is your primary control point once you’re airborne. Your hands should have a firm but relaxed grip; white knuckles mean you’re fighting the bike.
2. Throttle Control: Steady Increase
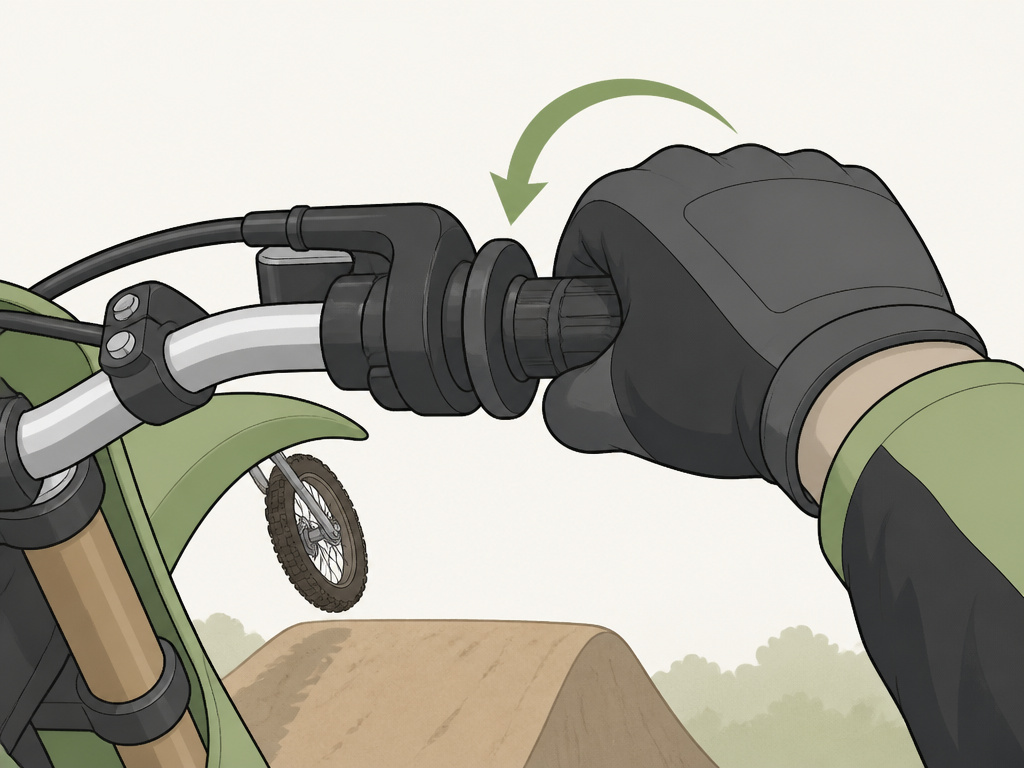
This is the step that decides everything. As you hit the face of the jump, you must be rolling on the throttle. A steady, increasing input keeps the bike balanced and drives the rear wheel into the ramp. The two fatal errors here are:
- Chopping the throttle: This unweights the rear, causing the front to drop. You’ll nosedive.
- Over-accelerating: This pitches the bike back, leading to a wild, rear-high panic.
The sound you want is a constant, building engine note, not a sudden shriek or a dead silence.
3. The Takeoff: Let It Happen
At the lip of the jump, stay loose. Do not pull up on the handlebars. The bike will launch itself. Your job is to maintain your body position: centered, knees bent, elbows up. Let the bike come up to you. If you’ve done steps 1 and 2 correctly, the takeoff feels effortless. If you’re fighting it, you messed up three seconds ago.
4. In-Flight: Corrections and Body Position
You’re airborne. Stay squeezed with your knees. Look at your landing zone, not straight down. The bike can be corrected:
- Front end too high (panic rev): Gently tap the rear brake. The gyroscopic force will bring the front down.
- Front end too low (nosedive): Give a small, smooth burst of throttle to bring the front up.
These corrections are subtle. Jerky movements will make things worse.
5. The Landing: Prepare to Absorb
As you descend, prepare your legs. For beginners, the goal is to land with both wheels down as close to simultaneously as possible, though sources note a rear-wheel-first touch can be natural and controlled. Just before impact, shift your weight slightly forward. As the wheels touch, absorb the impact through your bent knees and ankles, allowing them to compress like shocks. A stiff-legged landing transfers all that force into your joints and the bike’s frame.
A proper takeoff feels like the ground just fell away from the bike. You hear the throttle, feel the suspension compress and rebound, and then there’s a moment of quiet weightlessness. That’s the sign you did it right. A bad takeoff is all noise and fight.
Landing: The Debate You Need to Understand
Here’s where sources from the FACT SHEET disagree, and you need to know both sides to stay safe.
Some instructors, like those from Colorado Dirt Bike Info and Bert’s Mega Mall, advocate for landing on both wheels simultaneously. The logic is solid: it distributes impact force evenly, minimizes chassis stress, and gives the most stable platform for exiting the jump.
Another perspective, noted by Bosuer, teaches that using the rear brake to correct a nose-high attitude implies a controlled rear-wheel-first landing is a valid, sometimes necessary, technique. In practice, on flat ground, the rear often touches a split-second before the front.
So which is right?
- For beginners on tabletop jumps, aim for both wheels. It’s the safest, most repeatable method.
- As you progress to jumps with declining landings, a rear-wheel-first touch is natural and safe. The key is control, you’re letting the rear touch first, not slamming it down.
The wrong answer is landing front-wheel-first on flat ground. That’s a guaranteed way to transfer massive force to your arms and send you into a dangerous “endo” (over the handlebars).
Building Distance: From Rolling to 50 Feet
You don’t just decide to hit a big jump. You build up to it with a structured progression, exactly like the one documented in the YouTube coaching video. Trying to skip steps is the fastest way to get hurt and destroy your confidence.
Phase 1: Rolling and Feeling (Day 1)
- Goal: Roll over a small tabletop at a constant, slow speed. Don’t try to jump.
- Focus: Feeling the bike’s suspension work and maintaining your body position over the crest.
- Success Metric: Ten passes with zero panic, a relaxed grip, and consistent body posture.
Phase 2: The First Hop (Next Session)
- Goal: Add just enough throttle to get both wheels a few inches off the ground.
- Focus: That steady throttle application up the face and the feeling of letting the bike launch.
- Common Mistake: Yanking on the bars as you leave the lip. If you’re doing this, go back to Phase 1.
Phase 3: Adding 5-10 Feet at a Time
Once you’re comfortable with the hop, increase your approach speed incrementally. Increase your approach speed incrementally. This isn’t about bravery; it’s about letting your brain and body calibrate to the new flight time and landing force. The Moto Academy calls moving from a 25-foot double to a 50-foot double a “calculated decision,” not a leap of faith.
Phase 4: The Mental Hurdle
As you progress to longer jumps, fear often creeps back in. The flight time is longer, the landing looks harder. This is where you must trust your technique. Go back and hit your proven 25-foot jump perfectly three times in a row. Then, commit to the same throttle input and body position on the bigger jump. The bike knows what to do if you let it.
When Conditions Change: Wet Dirt and Other Variables
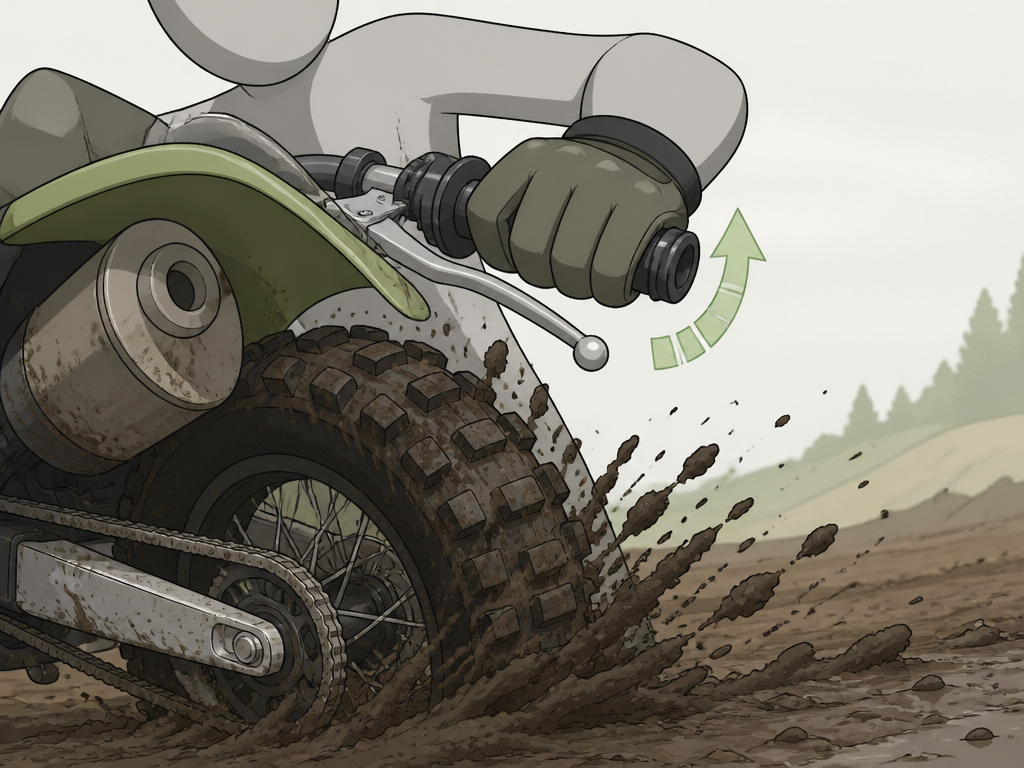
The standard advice flips when the terrain gets slippery. In wet or muddy conditions, traction is your limiting factor, not courage.
Bosuer’s advice is specific: “Enter the jump with a bit less speed than usual, and keep your throttle smooth to avoid wheel spin.” A sudden burst of throttle on the face will spin the rear wheel, causing you to lose drive and likely land short. Smoothness is everything. Your body position also becomes more critical, stay centered and let the bike move beneath you without sudden inputs.
Other variables:
- Headwind: Adds lift. You may need slightly less speed.
- Tailwind: Reduces lift. You may need slightly more speed or risk landing short.
- Ruts on the face: These can grab your front wheel and throw off your line. If you can’t avoid them, hit them straight on and keep the throttle steady.
Gear and Bike Considerations
Your equipment needs to be up to the task. This isn’t the place for street gear or a clapped-out trail bike.
The Bike: You need decent suspension. The FACT SHEET notes that KTM’s SX series has advanced suspension geared toward performing jumps, while the Honda CRF series is forgiving and durable. For entry-level riders on a budget, BSEMotors and SSR Motorsports offer jump-ready options. Before any jumping session, perform a bolt check. Every nut and bolt should be tight.
The Gear:
- Helmet: A full-face, dirt-specific motocross helmet. It’s designed for the impacts and ventilation of this sport.
- Boots: Motocross boots with stiff ankle support and a sole that grips the peg. Your ankles are incredibly vulnerable on a bad landing.
- Chest Protector & Roost Guard: Protects your torso from impacts and flying debris.
- Knee/Elbow Pads: Simple plastic caps can prevent debilitating joint injuries from a simple tip-over.
- Gloves: They protect your hands in a fall and improve grip.
You can learn the basic techniques on any bike, but practicing jumps on one that’s undersprung or worn out teaches you bad habits and increases your risk.
Jumping for Height and Distance vs. Speed
Jumping for height or distance is a different skill than jumping for speed. When aiming for height or a longer gap, your approach is more deliberate. You focus on hitting the takeoff ramp with precise speed to match the landing. This is a calculated decision, like moving from a smaller double to a larger one. For speed, the goal is to maintain momentum over a series of jumps with minimal airtime to keep your lap times fast. Your body position and throttle control change to keep the bike low and planted. Always practice on forgiving jumps where a mistake in timing won’t result in a harsh landing.
Frequently Asked Questions
How do you jump a dirt bike for beginners?
Start by rolling over a small, forgiving tabletop jump. Focus on maintaining a standing position with your knees bent and elbows up. Once comfortable, add a tiny amount of steady throttle as you go up the face to get a small hop. Practice this for entire sessions before even thinking about adding speed or distance.
Is jumping a dirt bike hard?
The mechanics are simple. The mental commitment is the hard part. Your brain will scream at you to shut the throttle or stiffen up. Learning to override that panic and trust the technique, steady throttle, loose arms, letting the bike fly, is what takes practice. It’s a skill, not a talent.
What is the most common beginner jumping mistake?
Chopping the throttle at the lip of the jump. It feels instinctive, like you’re trying to slow down for the landing. What it actually does is unweight the rear tire, causing the front to dive sharply. This leads to a hard, front-wheel-low landing or a crash. Commit to a steady or slightly increasing throttle all the way up the ramp.
How do you land a dirt bike jump safely?
Prepare to absorb the impact with your legs. As you descend, shift your weight slightly forward. Aim to land with both wheels down as evenly as possible on the downside of the landing. As you touch down, let your knees and ankles compress to soak up the force. Stay on the throttle slightly to keep the bike settled and drive forward.
Can any dirt bike handle jumps?
Not all are built for it. Modern motocross bikes (like the KTM SX or Honda CRF250R) have suspension and frames designed for repeated impacts. Trail bikes and dual-sports can handle small jumps, but their softer suspension and different geometry aren’t meant for frequent or large landings. Always inspect your bike and tighten all hardware first.
How do you correct a nose-high jump?
If the front end is too high in the air, gently tap the rear brake lever. The gyroscopic force from the spinning rear wheel will cause the front of the bike to drop. Do not panic and slam the brake, a light, quick tap is all you need. This is a core skill for moving beyond small jumps.
The Bottom Line
Here’s the honest take. Jumping isn’t about sending it. It’s about the ten seconds of setup: picking the right jump, warming up your body, checking your bike, and committing to a steady throttle. The airtime is just the reward for getting the prep work right.
If you take one thing from this, let it be this: master the 5-step sequence on a tabletop you can roll over. Distance comes from adding 1 mph at a time, not from a moment of courage. When you finally clear that 50-foot gap, it won’t feel like a wild leap. It’ll feel like the next logical step, because you built the foundation for it, one controlled hop at a time. Now go practice your standing position on the pegs and throttle control for techniques like the wheelie; everything else builds from there.
