
How to Replace Motorcycle Fork Seals: Step-by-Step
This post contains affiliate links. As an Amazon Associate, we earn from qualifying purchases.
To replace motorcycle fork seals, you need the right tools, the correct oil, and a methodical approach that follows your bike’s OEM service manual. The core procedure involves removing the fork from the bike, disassembling the slider, inspecting and replacing worn components, and reassembling with precise oil levels and torque specs. Skipping the bleed step or getting the oil level wrong by a few millimeters changes the fork’s damping feel and can affect handling.
That last point about oil level isn’t a guess. Harley-Davidson’s service manuals specify oil heights to the millimeter, with different measurements for each fork leg in some kits. Getting it right requires a specific tool and a procedure that most quick guides gloss over. This is a key step when learning how to replace motorcycle fork seals.
What follows is the stripped-down sequence for how to replace motorcycle fork seals, grounded in actual OEM service documents. The list includes the mandatory tools and consumables you can’t substitute, the model-specific quirks that change the job, and the post-assembly steps that guarantee a leak-free, properly damped result.
Key Takeaways
- The official Harley-Davidson fork seal driver is HD-36583 for 49mm forks and B-42571 for 43mm forks; using a makeshift driver often damages the new seal.
- Mandatory consumables are Harley-Davidson Seal Grease (Part No. 11300005) and Loctite 243 threadlocker; skipping the grease accelerates wear.
- Fork oil level is measured in millimeters from the top of the compressed tube, with specs varying by model (e.g., 135mm right, 142mm left for one kit).
- You must pump the fork or damper rod 8-10 times after filling to bleed air; an unbled fork feels spongy and can leak.
- Inspect the slider bushing coating; replace it if worn through to the metallic substrate, or the new seal will fail quickly.
Before You Start: The Non-Negotiables
This job involves spring tension, hydraulic pressure, and critical fasteners. Getting it wrong doesn’t just mean a leaky fork.
Before you start: Wear safety glasses. The fork cap is under spring pressure and can launch if removed incorrectly. Fork oil level directly affects handling, an incorrect amount can lead to a loss of vehicle control. Support the motorcycle securely so it cannot fall.
You need a clean, organized workspace. Separate all kit components by left and right side before beginning. The right and left damper cartridges, springs, or sliders are often different. Mixing them up means taking everything apart again.
The single biggest time-saver is having the factory service manual for your specific model. This guide synthesizes the procedures, but your bike’s manual has the exact torque sequence and any unique disassembly steps.
The Tools and Parts You Actually Need
A standard socket set isn’t enough. The job hinges on a few special tools you either buy, rent, or fabricate carefully. The OEMs specify them for a reason.
The paramount tool is a proper fork seal driver. For common 49mm Harley-Davidson forks, the official tool is HD-36583. For 43mm forks, the official seal installation tool is B-42571. This tool is a slide-hammer with a collar that fits the seal’s outer diameter. Beating a seal in with a piece of PVC pipe often cocks it in the bore, creating a leak path from day one.
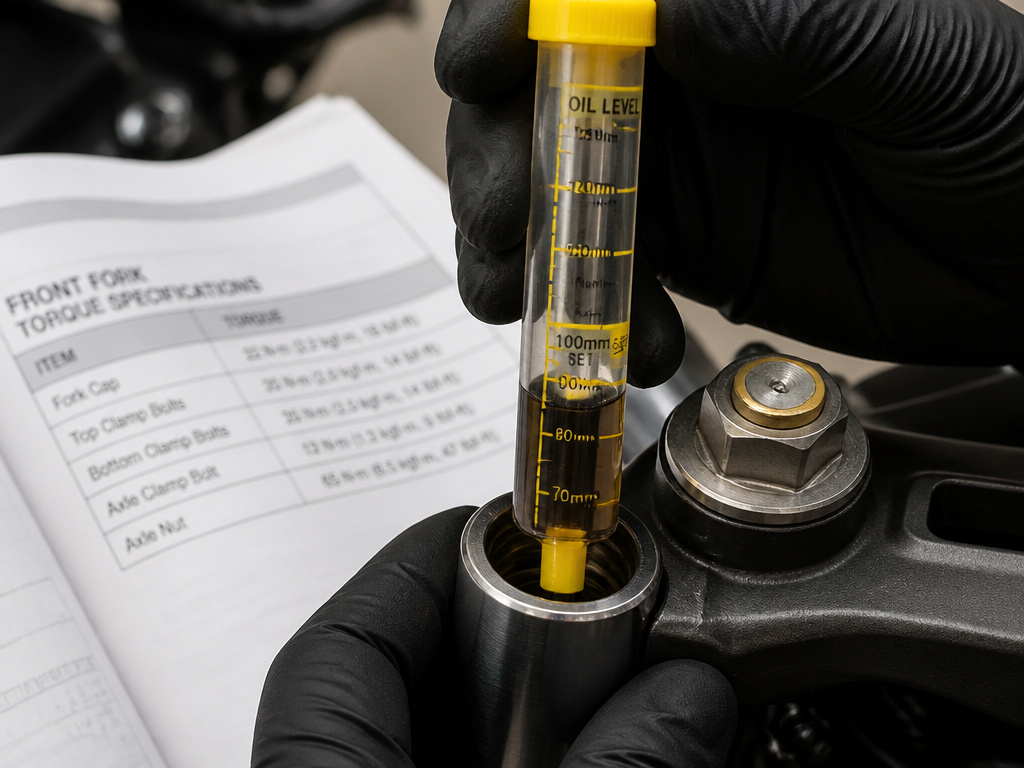
For measuring oil, you need a fork oil level gauge. This graduated syringe removes oil until the level is exactly a set distance from the top of the compressed tube. Using a measuring cup and hoping is how you end up with one fork leg stiffer than the other.
Your parts list should include:
- Fork seal & dust seal kit (model-specific)
- Slider bushings (inspect and replace if worn)
- Correct fork oil (Harley-Davidson Type E Fork Oil, Part No. 99884-80, for models using the chrome slider kit)
- Harley-Davidson Seal Grease (Part No. 11300005)
- Loctite 243 (Blue) threadlocker for damper screws
- New O-rings for the fork tube cap
A quick note on bushings: The OEM manual says to replace the slider bushing if its coating is worn through, showing the metallic substrate. A shiny, polished coating is fine. If you see raw metal, the bushing is shot and will destroy your new seal.
The 7-Step Core Procedure
This is the universal sequence, from bike to bench and back. The specifics, like torque values and oil levels, come next.
- Remove the Fork Leg. Secure the bike, remove the front wheel, calipers, and fender. Loosen the fork tube pinch bolts at the triple tree and slide the fork leg out. Protect the tube from scratches with tape.
- Relieve Spring Pressure & Disassemble. Clamp the fork tube (not the slider) in a holder. Slowly unscrew the fork tube cap. Let it rise gradually to release pressure. Remove the cap, spring, and any spacers.
- Drain the Oil. Invert the fork over a drain pan and pump the tube 10 times. This gets most of the old oil out. Let it drip.
- Remove the Damper Bolt. This is the bolt in the bottom of the slider. This bolt may be secured with Loctite 243 as specified for certain models. Remove it and let the damper rod and spring come out.
- Separate the Tube from the Slider. Pull the dust seal down. Use a pick to remove the internal retaining clip (circlip) in the slider’s groove. The tube should now pull out of the slider. If it’s stuck, use it as a slide hammer: push in firmly, then pull out sharply. Repeat.
- Replace the Seal and Bushing. Slide the old dust seal, oil seal, slider washer, and bushing off the tube. Inspect the bushing per the rule above. Lubricate the new bushing and seal lips with seal grease. Slide the new bushing, washer, and seal onto the tube.
- Reassemble the Slider. Insert the tube back into the slider. Using the seal driver, drive the seal/bushing/washer stack down until the retaining clip groove is fully exposed. Install the new retaining clip. Seat the dust seal.
This is where owners get impatient. Driving the seal without the proper tool feels like it works until the first ride, when oil seeps past a crooked seal lip. The HD-36583 tool aligns the force.
The fork is now sealed. The next steps, refilling with oil and bleeding, are what transform a sealed fork into a functioning one.
Oil Levels, Torque, and The Bleed That Matters
A fork is a hydraulic damper. Air is the enemy. The correct oil volume is set by height, not by a fluid ounce count, because the internal volume changes with wear components.
After sliding the tube and slider together (but before installing the spring and cap), you fill it. The OEM procedure is exact:
- With the fork fully compressed, pour oil into the tube until it’s near the top.
- Pump the fork tube ten times to bleed air from the main chamber.
- For cartridge forks, you must also slowly pump the damper rod until resistance is felt, then pump it 10 more times. This bleeds the cartridge.
- Compress the fork fully again. Now, use the oil level gauge to suck out oil until the surface is precisely the specified distance from the top of the tube.
Here are the critical specs from the service documents. These aren’t recommendations; they are the engineering parameters for that kit.
| Fork Model / Kit | Oil Level Spec (from top of compressed tube) | Oil Type |
|---|---|---|
| XL Mid Cartridge Kit (Right) | 135 mm (5.32 in) | Type E Fork Oil |
| XL Mid Cartridge Kit (Left) | 142 mm (5.59 in) | Type E Fork Oil |
| Screamin’ Eagle Adjustable Kit | 170 mm (6.69 in) | Type E Fork Oil |
| 43mm Fork | 99 mm (3.90 in) | (See specific service manual for oil type) |
Getting these heights wrong by 5mm is noticeable. Wrong by 10mm and the fork will either top out harshly or use up all its travel too easily.
Next, torque. This isn’t a lawnmower.
| Fastener | Torque Spec | Notes |
|---|---|---|
| Bottom Damper Screw (49mm) | 20 ± 5 N·m (15 ± 4 ft-lbs) | Use Loctite 243 |
| Damper Screw (43mm) | 15–25 N·m (133–221 in-lbs) | Use Loctite 243 |
| Fork Tube Bolt / Cap | 55 ± 25 N·m (40.5 ± 18.5 ft-lbs) | |
| Damper Rod Jamnut | 20 ± 2.5 N·m (15 ± 2 ft-lbs) | Prevents fork bolt from loosening |
Finally, the bleed check. After final assembly but before riding, cycle the fork through its full travel several times by hand. Listen for a sucking or gurgling sound, that’s trapped air. If you hear it, you may need to slightly loosen the fork cap (with the bike secured!) to burp the system and retorque.
Where the Manuals Disagree: Seal Direction

Sometimes, the primary sources conflict. This is when you must decide which authority to follow.
Easy to miss: Two official Harley-Davidson documents give opposite instructions for fork seal orientation. One says install with the lettering facing up; another says install with the lettering facing down.
This isn’t a typo. It highlights a real-world complication: seal design can change between part numbers or model years. The sealing lip is what matters, and its orientation is usually fixed by the seal’s shape.
Official sources disagree: one says install with lettering facing up, another says facing down. The safe rule is to follow the instruction sheet in your specific seal kit or match the orientation of the old seal if it was functioning correctly. If the old seal isn’t available, examine the new seal. The sealing lip typically faces the oil (down into the slider). If the lettering is on the same side as a rigid metal casing, that casing usually goes up. When in doubt, the instruction sheet included in your specific seal kit overrides general guides.
Inspection Points That Prevent a Comeback
Replacing seals for a leaking bushing is a waste of a weekend. Before assembly, inspect everything.
- Fork Tubes: Look for pits, scratches, or rust. A vertical scratch can leak. Light polishing with ultra-fine (2000+ grit) wet sandpaper can sometimes save a tube, but deep damage means replacement. For Harley-Davidson forks, the maximum allowable fork tube runout is 0.2 mm (0.008 in).
- Slider Internals: Feel the inside of the slider where the bushing rides. Any grooves or score marks? A rough surface will wear out a new bushing fast.
- Damper Rod: Check for straightness by rolling it on a flat surface. A bent rod causes friction and weird damping.
- Springs: A sagged spring changes your preload and ride height.
If you’re installing a chrome slider kit, the manual has a specific warning: check the bores of the new sliders for dirt or debris before assembly. Grit left from manufacturing will act like sandpaper on your new bushing.
Post-Installation: The Test Ride Checklist
You’ve torqued, bled, and installed the forks back on the bike. Don’t just go for a rip.
- Set Sag: With the bike fully assembled and on the ground, set your rider sag. This settles the bushings and ensures the fork is operating in its intended stroke range.
- Pump the Brakes: You removed the calipers. Pump the front brake lever firmly until you have solid pressure before moving the bike.
- The Initial Ride: Take a short, slow ride on a smooth road. Feel for binding or stiffness. Listen for hydraulic noises.
- The Function Test: Find a safe, bumpy road or driveway. Use the front brake firmly over a few bumps. The fork should compress and rebound smoothly without noise. Any knocking or binding means internal misassembly.
- The Leak Check: After the ride, wipe the fork tube clean with a white paper towel. Look for any new oil film above the dust seal. A tiny smear is normal break-in; a wet ring is a problem.
This process confirms your work. It’s the difference between knowing the fork is sealed and knowing it works.
Removing the front wheel and calipers
Support the motorcycle securely under the frame so the front wheel is off the ground. Loosen the axle pinch bolts on the fork sliders before removing the axle nut. Slide the axle out and carefully lower the wheel. Remove the brake caliper mounting bolts and hang the calipers from the frame with wire or zip ties to avoid straining the hydraulic lines. Do not let them dangle by the hoses. With the wheel and calipers out of the way, you have clear access to the fork tubes and the lower triple tree clamp bolts.
Removing forks from triple tree/clamps
With the front wheel and calipers removed, loosen the pinch bolts on both the upper and lower triple tree clamps. These bolts hold the fork tubes in place. Gently twist and pull each fork tube downward and out of the clamps. Exercise caution to avoid scratching or nicking the fork tubes during removal, as damage can result in oil leaks. Once free, handle the forks carefully and keep them upright to prevent oil spillage. Mark the left and right forks if they are not identical to ensure correct reinstallation.
Frequently Asked Questions
Is it hard to replace motorcycle fork seals?
The difficulty is moderate, but it’s detail-oriented. The physical work of removing the forks and disassembling them is straightforward for anyone comfortable with basic mechanics. The challenge of how to replace motorcycle fork seals lies in having the specific tools (seal driver, holder, level gauge), following the exact bleeding procedure, and adhering to precise torque and oil level specs. Missing those details leads to a leak or poor performance.
How much does it cost to get fork seals replaced professionally?
The high end reflects the time required for proper disassembly, cleaning, inspection, and the critical bleeding/measuring steps.
Can I change fork seals without removing the forks?
There are “quick change” methods that claim to let you replace seals with the forks on the bike. These involve prying out the old seal and trying to drive in the new one with a makeshift tool. I don’t recommend it. You cannot properly inspect the bushings or fork tubes, you can’t fully drain and replace the oil correctly, and the risk of damaging the new seal or tube is high. The full removal method is the only reliable way.
How long does it take to do fork seals on a motorcycle?
This includes bike prep, disassembly, careful cleaning and inspection, assembly, and the meticulous bleeding/filling process. Rushing causes mistakes.
What causes fork seals to fail prematurely?
The most common cause is a dirty or damaged fork tube. A tiny nick in the chrome drags dirt past the dust seal, which then acts as lapping compound on the oil seal’s lip. Other causes include using the wrong oil (or old, degraded oil), incorrect oil level, worn slider bushings that allow tube wobble, and improper installation (like forgetting the seal grease or cocking the seal during installation).
Should I replace the bushings every time?
No, but you must inspect them every time. The rule from the service manual is clear: replace the slider bushing if its coating is worn through, showing the metallic substrate. If the coating is intact but polished, it’s usually fine. Replacing them prophylactically when the forks are apart is cheap insurance, as the bushing is often the root cause of a recurring leak.
The Bottom Line
Replacing fork seals is a satisfying job that saves significant money and teaches you the inner workings of your bike’s suspension. The barrier isn’t complexity, it’s precision.
Skip the shortcuts. Get the factory service manual, the proper seal driver (HD-36583 or B-42571), and a fork oil level gauge. Follow the bleeding procedure to the letter, and torque every fastener to its spec. The result is a fork that doesn’t just stay clean, but feels better than it did before the leak started.
That final feel is the real test. A correctly serviced fork is taut, silent, and controlled. If your first ride after this job feels vague or harsh, the issue is almost always oil level or trapped air. Go back, check your work against the specs, and bleed it again. The difference is in the millimeters.
