
How to Fix Motorcycle Paint Scratches: The 3-Tier System
This post contains affiliate links. As an Amazon Associate, we earn from qualifying purchases.
Fix motorcycle paint scratches by matching the repair method to the scratch depth. For light clear-coat marks, polish them out. For chips into the color layer, use touch-up paint. For deep gashes to bare metal, seal with primer first, then paint. The process is about patience and thin layers, not speed.
That depth distinction is the whole game. A polish won’t fill a chip, and paint slopped over a deep scratch will crack and peel within a month. Getting it wrong costs you time, makes the damage more visible, and can even start rust. This is why understanding how to fix motorcycle paint scratches correctly is critical.
What follows: how to read a scratch, the exact tools for each tier, and the manufacturer-specified timelines for paint to set, all central to how to fix motorcycle paint scratches. You’ll also see where the official advice from brands like Trek and Honda diverges on a key step, and why matte paint is a completely different animal.
Key Takeaways
- Diagnose first. Run your fingernail across the scratch. If it catches, you need touch-up paint, not polish.
- Temperature matters. Apply paint only when the air and surface are at or above 60°F (15.5°C), per Trek’s spec.
- Thin coats win. Multiple thin layers of paint dry better and look more factory than one thick coat.
- Matte paint is fragile. Never use standard polishing compound or wax on it; you’ll permanently damage the finish.
- Curing isn’t drying. Paint is dry to the touch in 20 minutes but takes about 2 weeks to fully cure and handle abrasion.
The 3-Tier Scratch Repair System
Your fingernail is the best diagnostic tool you have when learning how to fix motorcycle paint scratches. Drag it across the scratch. If it glides over without catching, the damage is likely only in the clear coat. If it catches, you’ve hit the color layer or primer. That simple test decides your entire repair path.
A repair works when you replace only the missing layers, not the whole stack.
For light scratches that don’t catch your fingernail, a polishing compound can often restore the finish by leveling the surrounding clear coat. Deeper damage requires filling the void with matching paint, applied in precise, thin layers.
Tier 1: Clear-Coat Scratches (The Polish-Out)
These are swirl marks, light scuffs from a brush with foliage, or fine lines. The color underneath is intact. You’re not adding material; you’re removing a tiny amount of surrounding clear coat to level the surface.
You need a cleaner and polish and a soft microfiber pad. Apply a dime-sized amount to the pad and work it in small, overlapping circles with light pressure. The polish contains mild abrasives that cut down the high edges of the scratch. Stop and wipe clean with a separate microfiber cloth to check your progress every 30 seconds.
Over-polishing is the mistake here. You can only remove so much clear coat before you hit color. If the scratch isn’t gone after three or four passes, it’s too deep for this method. Move to Tier 2.
Tier 2: Paint-Layer Chips (The Touch-Up)
This is where your nail catches. You see a distinct chip, scratch, or gouge where the color is missing, but the underlying primer or metal isn’t exposed. This requires touch-up paint.
The goal is to fill the void flush with the surrounding surface. This isn’t about painting over the area; it’s about depositing paint into the depression. That’s why the applicator matters more than the paint itself. The brush in the bottle cap is often too big. A toothpick or a fine artist’s brush gives you surgical control.
Before you open the paint, prep is essential. Clean the area thoroughly to remove every trace of wax, grease, and road film. Paint won’t stick to contamination.
Tier 3: Deep Damage to Bare Metal (The Corrosion Stop)
If you see silver (aluminum) or black/grey (steel) at the bottom of the scratch, you have a corrosion emergency. Moisture will start attacking that spot immediately. Honda’s manual is explicit here: “If the frame has a chip that exposes the metal, first apply primer (to prevent corrosion) and then apply the touch-up paint.”
This is a two-step job. After cleaning, apply a small dab of automotive primer specifically designed for bare metal. Let it dry completely according to its instructions. Only then should you proceed with your color-matched touch-up paint. Skipping the primer is how you get a bubbled, rusty mess six months later, even if the top looks fine now.
Touch-Up Paint: The Pro’s Method for Chips
The bottle says “shake well.” That’s an understatement. Shake until the mixing ball inside rattles freely for a full minute. Paint settles and separates; proper mixing is the difference between a color match and a obvious blob.
Where this goes sideways: Applying paint when it’s too cold. Trek’s official guide states paint should only be applied when air and surface temperatures are at or above 60°F (15.5°C). Below that, the paint thickens, doesn’t flow, and takes forever to dry, almost guaranteeing a lumpy finish.
Dip just the very tip of your applicator (toothpick, fine brush) into the paint. Then, wipe most of it off on the lip of the bottle. You want a microscopic amount. Gently dab the paint into the center of the chip, letting capillary action pull it to the edges. Don’t brush or stroke it.
Wait. The paint will look wet and raised. That’s fine. According to Trek, it dries to the touch in 10-20 minutes. Let the first coat dry completely before even considering a second. The repair might need multiple thin layers to fill properly. This is the patience part.
If you mess up a layer, you have a brief window. Trek notes you can clean off the paint within a half-hour using acetone. Use a Q-tip and apply it only to the botched spot, not the surrounding good paint.
The Grit Disagreement: 1000-Grit vs. Trizact
When a chip has rough edges or you need to feather the repair area, a light sanding prepares the surface. Here, the manufacturer advice splits.
Trek’s touch-up guide recommends using “1000 grit or finer sandpaper” or a fine Scotch-Brite pad, while automotive/motorcycle refinishing procedures often start with a finer grit, like 3000, to avoid cutting through the clear coat.
However, in the automotive and motorcycle refinishing world, starting with 1000-grit on a modern clear coat is considered aggressive. Harley-Davidson’s dealer procedure for clear coat repair uses a 3M Finesse-it system with a Trizact abrasive disc, which typically starts at a much finer grit, like 3000. The goal is to minimally abrade the clear coat without cutting through it.
| Abrasive Approach | Best For | Risk If Too Aggressive |
|---|---|---|
| 1000-grit sandpaper (per Trek) | Small chips on bicycle finishes; a more forgiving substrate. | Can cut through the clear coat if pressed too hard, creating a larger, dull spot that requires a full repaint. |
| Trizact System (per Harley-Davidson) | Professional-level clear coat repair on motorcycle paint. | Less risk of over-cutting, but requires a specific kit and more skill to use effectively. |
The takeaway: if you sand, use 1000-grit with extreme caution, wet-sand with plenty of water, and use a light touch. Your goal is to scuff, not to grind.
The Matte Paint Exception
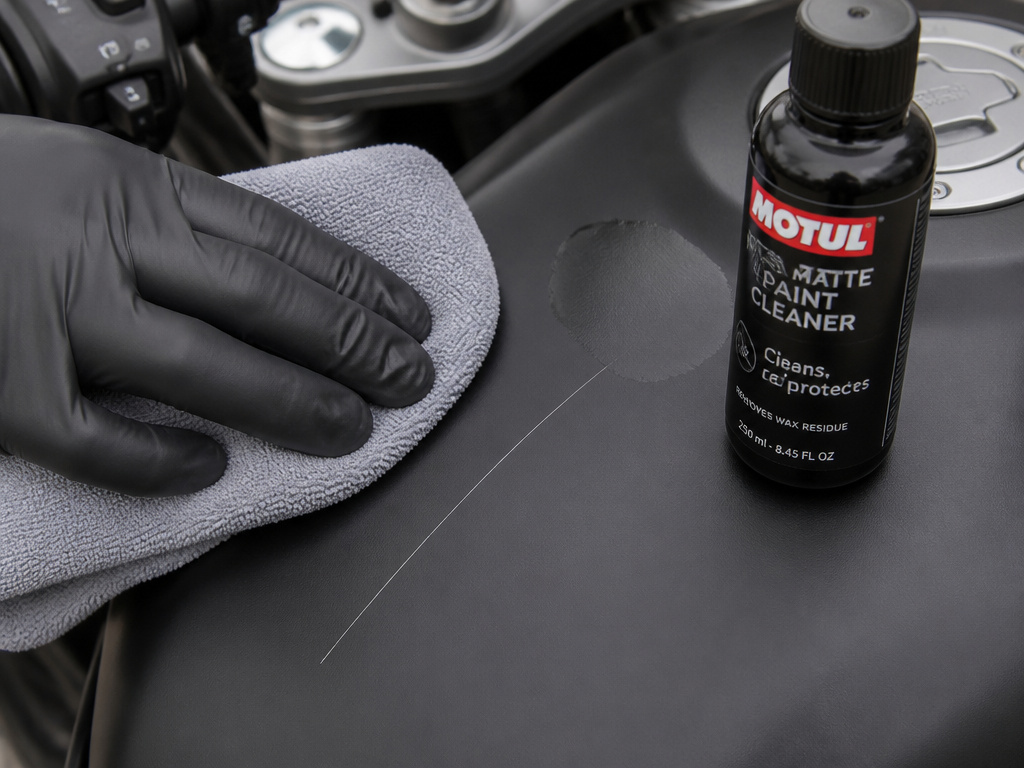
Matte, satin, or flat finishes are not just a different color; they are a different surface. The rough microstructure that gives them their non-reflective look is incredibly delicate.
Common mistake: Using any standard polish or wax on a matte surface. Honda’s manual explicitly states: “Do not use polishing compounds or wax containing polishing compounds on matte painted surfaces.” These products contain fillers and abrasives that will slick down the texture, creating a permanent, shiny spot.
Cleaning matte paint requires a gentle hand. Honda advises using “a soft cloth or sponge, plenty of water, and a mild detergent.” Dry it with a soft cloth. For protection, you must use products formulated specifically for matte paint—never a standard best motorcycle wax.
Scratches on matte paint often require a professional fix. For light scuffs on matte paint, clean gently as recommended by the manufacturer. If that doesn’t work, live with it or see a pro.
Applying Polish and Compound for Light Scratches

For Tier 1 clear-coat scratches, you’re not filling—you’re cutting. A polishing compound has finer abrasives than a rubbing compound. Start with the least aggressive option.
Apply the product to a clean foam applicator pad, not directly to the paint. By hand, use consistent, overlapping circular motions.
The moment the compound starts to dry and turn dusty, stop. That’s your cue to wipe it off with a fresh microfiber towel and inspect. You should see the scratch fading. If it’s gone, move on. If not, you might need a second pass or a slightly more aggressive compound.
After compounding, you must apply wax or a sealant. The polishing process removes a micro-layer of protection. A good protective wax will restore that shield and add depth to the finish. This final step is what makes a repaired scratch disappear for good, not just for a week.
When to Call a Professional Painter
DIY has limits. Call a pro when:
- The scratch is longer than your hand.
- The damage is on a complex curve or an edge.
- You have a multi-stage or pearl paint job. Color matching these is a dark art.
- The scratch is on a plastic fairing that’s also dented. Plastic repair requires heat and filler.
- You’ve attempted a repair and made it more noticeable.
They can wet-sand, cut, and polish with a margin of safety a hobbyist can’t match. For a perfect factory finish, especially on a new bike, their hourly rate is often cheaper than the cost of you buying all the supplies and potentially making it worse.
It won’t fix scratches, but it adds a rock-hard layer of protection that makes future scratches less likely and easier to clean.
How to use a machine polisher on motorcycle paint
Honda advises to use only a non-abrasive polish or wax made specifically for motorcycles or automobiles. Do not use polishing compounds on matte painted surfaces, as this process is not for matte finishes. After polishing, wipe the area clean with a soft cloth. This method blends the surrounding clear coat to hide shallow defects.
Quick temporary fixes for motorcycle paint scratches
These methods mask scratches but are not proper repairs. These are all short-term solutions that will wash or wear away.
Fixing scratches on multi-stage or pearlescent paint
Repairing complex paints requires careful layering. The process starts with preparing the scratch using very fine abrasives. Apply the base color coat in multiple thin layers, allowing each to dry. After the color, a clear coat must be applied to achieve the final depth and shine. The paint must be applied in a well-ventilated area.
Frequently Asked Questions
Does WD-40 remove scratches from motorcycle paint?
No. WD-40 is a water-displacing lubricant and light penetrant, not an abrasive polish. It might make a scratch look less visible for a few hours by filling it with oil, but it does not repair the paint. It can also degrade wax and sealant protection. Use proper products.
Can I use nail polish to touch up my motorcycle?
You can, but you shouldn’t. Nail polish is not formulated for automotive UV exposure or fuel spills. It will fade, discolor, and become brittle much faster than proper motorcycle paint. It’s a temporary, “get-me-through-the-season” fix at best.
How long does touch-up paint take to dry?
Drying and curing are different. It reaches its final sheen in about 24 hours. However, it takes about 2 weeks to fully cure and reach maximum hardness. Avoid washing, waxing, or putting any pressure on the repair during that time.
How do I fix a scratch on a plastic fairing?
The process is similar to metal, but plastic is more flexible. For deep scratches on plastic, follow procedures appropriate for the material. The bigger issue is often an accompanying dent, which requires a plastic welder or filler from the backside—a pro job.
Will polishing compound damage my paint?
Used correctly, no. Modern clear coats are designed to withstand light polishing. The damage comes from over-polishing (removing too much clear coat), using a compound that’s too aggressive for the job, or letting the product dry and buffing with grit. Start gentle, work clean, and know when to stop.
The Bottom Line
Match the method to the depth, and let the paint cure. A clear-coat scratch gets polish. A color chip gets layered touch-up paint. Bare metal gets primer, then paint. That’s the sequence.
If your garage is below 60°F, wait for a warmer day. If you have matte paint, put the polish away. And if the repair area is bigger than a coin, get a quote from a pro before you open the bottle—their blend of skill and spray gun often beats a DIY patch on a prominent tank or fender.
The goal isn’t perfection. It’s making the damage hard to spot at a glance and sealing the surface against the elements. A well-executed touch-up, even if you can see it up close, beats a rust spot or a peeling blob every time.
