
How to Clean Leather Motorcycle Gloves: Step-by-Step
This post contains affiliate links. As an Amazon Associate, we earn from qualifying purchases.
To clean leather motorcycle gloves, many manufacturers recommend hand-washing them in a solution of leather cleaner or diluted mild soap, rinse thoroughly, gently squeeze out water, and air-dry flat at room temperature, never in a machine, near a heater, or in direct sun. However, some brands like FIVE Gloves advise against washing with lots of water and recommend only a damp cloth for spot cleaning. Condition the dry leather a few times a year with a product like REV’IT! Leather Cleaner Conditioner, using less on the palms to preserve grip.
That method comes straight from the glove makers themselves. BMW Motorrad, REV’IT!, and Abel Brown all publish care guides, and while they agree on the big “don’ts,” they diverge on the small “dos”, like whether to use soap at all. SHIMA’s manual says to avoid detergents entirely, while Abel Brown says hand soap is fine. This isn’t about finding the one perfect cleaner. It’s about matching your gloves’ construction and your riding grime to the right routine from a short list of proven options. For example, the guides differ on how to clean leather motorcycle gloves.
What follows: the step-by-step hand-wash most brands prescribe, the spot-clean alternative one brand insists is safer, how to dry gloves so they keep their fit, and the conditioning schedule that actually works without making the palms slippery in your how to clean leather motorcycle gloves routine. By the end, you’ll know how to handle salt stains, chronic smells, and even what to do with those stiff knuckle protectors.
Key Takeaways
- Hand-wash only, never machine wash.
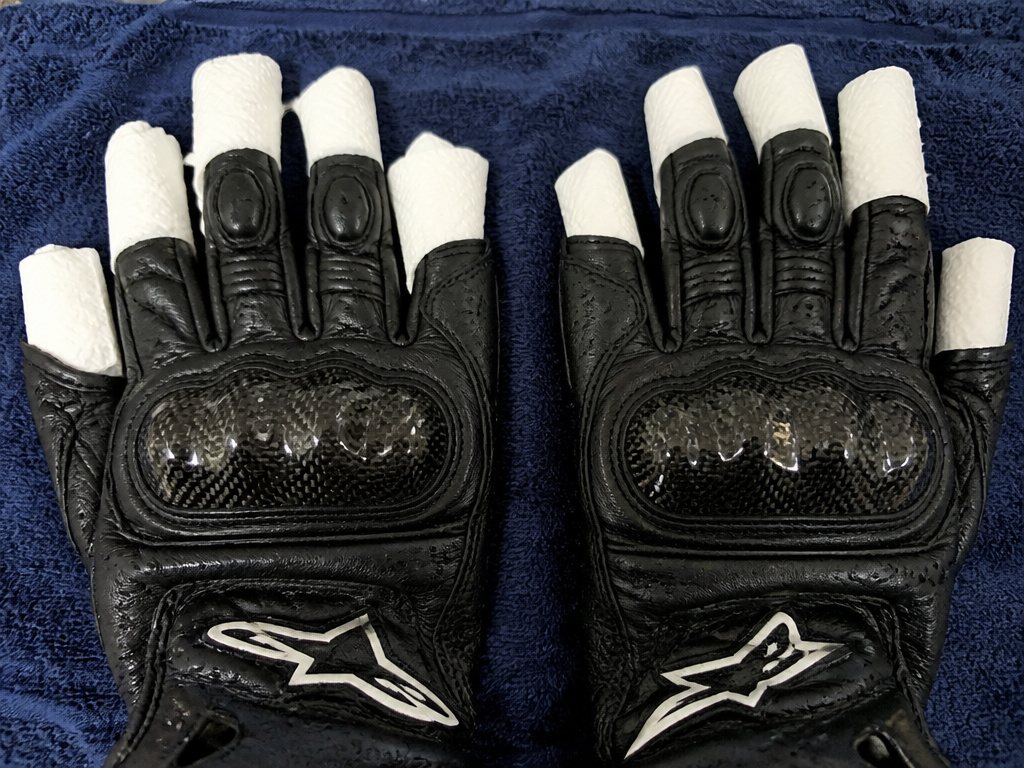
- Air-dry flat at room temperature. Abel Brown’s guide suggests letting them dry for 2–3 days for best comfort. Keep them away from radiators, direct sunlight, and any direct heat source. SHIMA specifically advises avoiding temperatures above 40°C (104°F). Stuffing the fingers with a dry washcloth helps gloves with hard knuckle molding retain their shape.
- Condition a few times a year, sparingly on the palms. Over-conditioning wears down the leather. Use a commercial leather conditioner like REV’IT! Leather Cleaner Conditioner, but apply less on the grip surfaces so you don’t lose control feel.
- Check the care label first. Some models are hand-washable, but the label is the final authority. Ignoring it can void warranties, as SHIMA excludes damage from “improper use or storage.”
- For odors, use a shoe insert, not powder. Rolling an odor-eliminating insert into each stored glove works. Avoid baking soda, it settles into the leather and is nearly impossible to rinse out completely.
The Hand-Washing Method (Step-by-Step)
Most manufacturers cited, like BMW Motorrad and Abel Brown, prescribe a full hand-wash. It’s for when sweat, salt, or general road grime has built up inside and out.
First, check the care label inside the cuff. If it says hand-washable, you’re clear. If there’s no label or it’s faded, the conservative move is to spot test any cleaner on an inconspicuous area like the inner wrist.
Before you start: Leather and water aren’t natural friends. Soaking can stiffen the hide if done wrong, and aggressive chemicals like petrol, solvents, or chlorine bleach will degrade the leather’s oils and protective treatments. Work in a well-ventilated area, and have a couple of dark-colored towels ready. Abel Brown notes color bleed is a real risk.
Here is the step-by-step process, compiled from BMW Motorrad, Abel Brown, and REV’IT! Guides.
| Step | Action | Key Detail / Why It Matters |
|---|---|---|
| 1. Mix Solution | Dissolve a leather cleaning agent or a small amount of diluted mild soap (like hand soap or neutral soap) in plenty of lukewarm water. | Abel Brown specifies “warm water,” REV’IT! Says “do not use hot water.” Hot water can cook the leather’s oils. |
| 2. Submerge & Agitate | Place gloves in the solution. Gently move them around to work the cleaner through the lining and over the leather. | Do not rub, pull, or wring. BMW Motorrad’s guide stresses “gently move them around.” Friction can damage stitching. |
| 3. Rinse Thoroughly | Rinse under cool, running water or in a basin of fresh water. | Abel Brown notes “it will take a few rinses to get all the suds out.” Leftover soap residue attracts dirt and can stiffen leather. |
| 4. Remove Water | Gently squeeze gloves, working from the fingertips down toward the cuff. | Squeezing from the tips down pushes water out naturally without distorting the finger shapes. Do not twist. |
| 5. Prep for Drying | Pull gloves back into their general shape. For models with hard knuckle protectors, consider stuffing each finger with a dry washcloth or paper towel. | Stuffing helps gloves like the Abel Brown Full X-Glove retain their molded form around rigid armor plates that can’t be flexed. |
This method gets the lining clean. If your gloves are just dusty or have a few grease spots, a full wash is overkill. That’s where the spot-clean debate begins.
The Spot-Clean Debate: Soap vs. No Soap
Not every brand agrees a full wash is wise. FIVE Gloves states plainly: “washing leather gloves with lots of water is clearly not recommended.” Their advice is to use only a damp cloth.
SHIMA’s guide is even stricter: “Do not use detergents or other chemicals on the leather surface.” They prescribe a sponge and soap designed for natural leather.
So who’s right in the how to clean leather motorcycle gloves debate? It depends on your gloves and the dirt.
Where this goes sideways: Using a household detergent or all-purpose cleaner on leather. These often contain alkalies or solvents that strip the leather’s natural oils, leaving it dry, cracked, and prone to color fading. SHIMA’s warning is for those chemicals, not necessarily for a true leather soap.
For light surface dirt, dust, or fresh bug splatter, a damp cloth is perfect. Dampen a soft cloth with water, wring it out completely, and wipe the leather down. Follow with a dry cloth. This is what REV’IT! Recommends for basic cleaning: “Clean the gloves by hand using a damp cloth.”
For grease, oil, or tougher stains, many sources recommend using a cleaning agent, though some brands advise caution with chemicals. Here’s where you choose your camp based on your manufacturer’s guidance:
| Cleaning Approach | Recommended For | Brand Guidance That Supports It |
|---|---|---|
| Damp Cloth Only | Dust, light soil, fresh stains | REV’IT! (initial clean), FIVE Gloves (primary method) |
| Leather-Specific Cleaner | General cleaning, unknown leather type | BMW Motorrad (“leather cleaning agent”), SHIMA (“soap designed for natural leather”) |
| Diluted Neutral Soap | Sweat, salt, ingrained grime | REV’IT! (“neutral soap”), Abel Brown (“hand soap is fine”) |
| Diluted Vinegar or Saddle Soap | Odor removal, disinfecting | Abel Brown (“diluted vinegar or saddle soap with water”) |
Brands like REV’IT! Leather Cleaner Conditioner are formulated to clean without harming the hide. If you go the soap route, make it mild and dilute it heavily.
Drying: The Shape is Everything
This is where gloves are won or lost. Heat is the enemy. Speed is a trap.
Every source, BMW Motorrad, REV’IT!, Abel Brown, SHIMA, agrees to avoid direct heat or sunlight when drying. BMW Motorrad specifies drying at room temperature. SHIMA gives a specific number: avoid temperatures above 40°C (104°F).
Why? Leather is skin. Apply heat and it tightens, shrinks, and becomes brittle. A glove dried on a radiator or in a sunny window will stiffen like cardboard. The palm may crack at the creases after a few wears.
The right way takes patience. After squeezing out water:
- Pull them back into shape. Smooth out the palm, straighten the fingers.
- Lay them flat on a dark-colored towel. Abel Brown advises a dark towel “in case of color bleed.” This absorbs moisture from the outside. 3.
For gloves with hard knuckle molding or armor, stuffing the fingers is a smart trick. Take a dry washcloth or a few paper towels, roll them, and insert one into each finger. This helps the leather dry around the rigid protector without collapsing.
Common mistake: Folding the gloves closed or tossing them in a gear bag while damp. Abel Brown warns this traps moisture, leading to mildew and a sour smell that’s hard to remove. Always let them lay open after a ride.
The best drying hack I’ve seen is Abel Brown’s wire hanger trick. Bend the wings of a wire hanger upward, and set the gloves on the ends. This props them open for maximum airflow around every surface.
Cleaning the Inside & Fighting Odors
The lining holds sweat, salt, and skin oils. If the outside looks fine but the inside smells like a gym locker, it’s time for a wash.
The hand-washing method described earlier cleans the lining. Submerging the glove and gently agitating the solution pulls sweat and salt out of the fabric or leather interior.
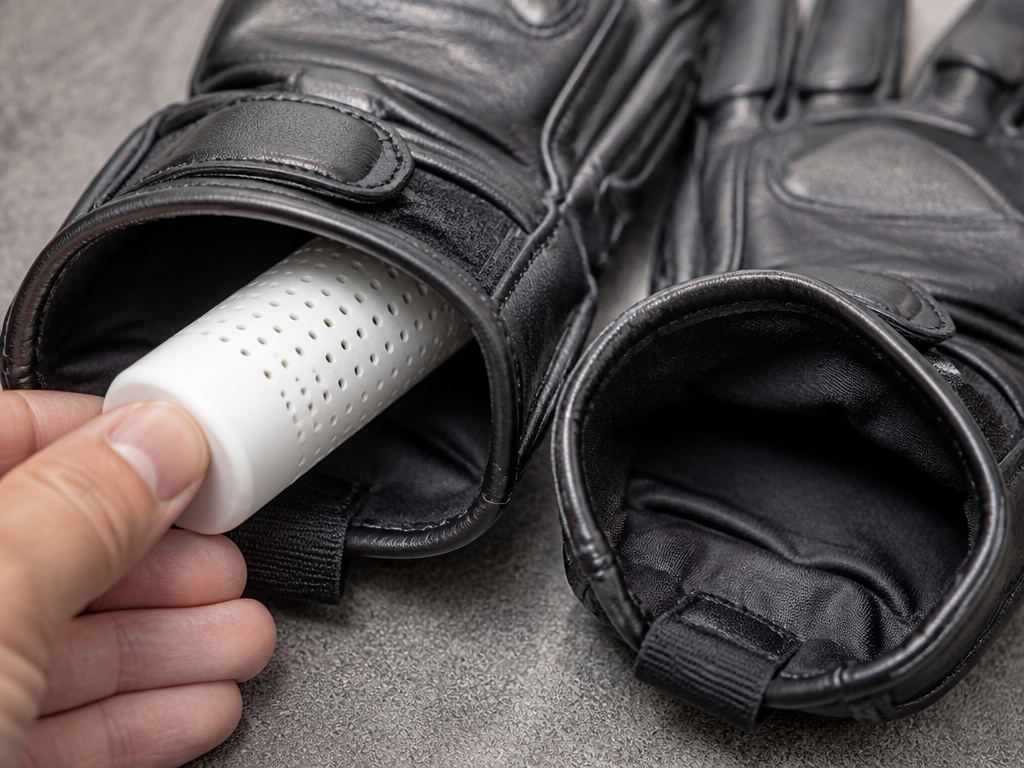
For chronic odors that linger after washing, Abel Brown has a clever fix: keep an odor-eliminating shoe insert rolled up inside each glove when you store them. These inserts absorb moisture and neutralize smells passively.
What most people get wrong: Reaching for baking soda. Abel Brown explicitly says not to. “Do not use powders like baking soda as they will settle into the leather and be difficult to completely rinse out.” You’ll end up with gritty, stiff leather and a lingering white residue.
After any wash or heavy rain ride, ensure gloves are completely dry before storage. REV’IT!’s guide stresses that storing them wet in a non-ventilated area “may cause deformations and damage.”
Conditioning: When, How, and Where
Leather loses its natural oils with exposure to sun, rain, and cleaning. Conditioning replaces those oils to keep the leather supple and resistant to cracking.
When? “A few times a year.” That’s the frequency from Abel Brown. For a rider who cleans gloves every couple of months, conditioning twice a year, perhaps at the start and end of the main riding season, is plenty. Over-conditioning, as Abel Brown notes, will wear down the leather.
With what? Use a commercial leather conditioner. Products like REV’IT! Leather Cleaner Conditioner are designed for this. They nourish without leaving a heavy, greasy film.
How? Apply a small amount to a soft cloth and work it into the leather in circular motions. Focus on the back of the hand, the fingers, and the cuff.
Easy to miss: The palms. Abel Brown’s rule is crucial: “Use less conditioner on the palms so they don’t lose grip.” The palm is your primary contact point with the grip and controls. A slick palm is a safety issue. If you condition the palms, use a fraction of the amount you use elsewhere, and buff it thoroughly until no residue remains.
For gloves that see frequent rain or washing, Abel Brown mentions you “may also use grease or oil.” This is a heavier, more waterproofing-focused treatment. If you go this route, use a product intended for leather (like neatsfoot oil or a dedicated leather grease) and, again, use extreme sparingly on the palms.
What About Gloves with Armor or Special Features?
Modern gloves aren’t just leather. They have hard knuckle protectors, palm sliders, waterproof membranes, and touchscreen fingertips.
- Hard Knuckle Protectors: You can’t turn these gloves inside out. The washing method is the same, submerge and agitate gently. The drying trick with stuffed fingers is key here to maintain form around the unyielding armor.
- Palm Sliders: These are typically plastic or composite panels stitched or bonded on. Avoid soaking the gloves for extended periods, as it can weaken the adhesive on bonded sliders. Stick to the recommended wash time (gentle agitation for a few minutes).
- Waterproof Membranes (e.g., Gore-Tex): Most membranes are inside the liner. The hand-wash method is still safe, but avoid harsh detergents which can clog the membrane’s pores. Use a cleaner recommended for technical fabrics if possible.
- Touchscreen Fingertips: These are often a conductive material coated on the leather. Aggressive rubbing or harsh chemicals can degrade this coating. Dab these areas gently during cleaning.
Always prioritize the leather’s care. The features are built to survive the manufacturer’s recommended cleaning process.
Storage and Ongoing Care
Cleaning isn’t a one-time fix. How you store gloves dictates how long they stay fresh.
SHIMA’s guide sums it up: “Store SHIMA gloves in a well-ventilated and dry place.” That means not a sealed plastic bin or the air-tight pocket of your tank bag.
After a ride, especially a sweaty or wet one, let gloves lay open to air out. If they’re damp, dry them fully before putting them away. A gear rack or a hook in a ventilated garage is ideal.
Worth knowing before you start: SHIMA’s warranty excludes damage from “improper use or storage.” Letting gloves fester wet in a backpack could technically void coverage. It’s a good incentive to build the drying habit.
For daily care, a quick wipe with a dry or slightly damp cloth removes road film and bug residue. This simple habit preserves the leather’s finish and delays the need for a full wash.
Frequently Asked Questions
Can I machine wash leather motorcycle gloves?
No. Every manufacturer source prohibits machine washing. REV’IT! States: “Do not use a washing machine.” The agitation, heat, and spin cycle will destroy the leather’s structure, shrink the gloves, and likely tear internal seams.
How do I clean the inside of leather motorcycle gloves?
Use the hand-washing method. Submerging the gloves in the cleaning solution and gently agitating them is the only effective way to flush sweat and salt from the lining. Rinsing thoroughly is critical to remove all soap residue from the interior fabric.
Can I use saddle soap on my motorcycle gloves?
Yes, but diluted. Abel Brown lists “diluted vinegar or saddle soap with water” as an acceptable cleaning alternative. Saddle soap is a traditional leather cleaner that cleans and conditions mildly. Always follow the product’s dilution instructions.
How often should I condition my gloves?
Few times a year. Conditioning is maintenance, not a weekly ritual. Abel Brown specifies this frequency, warning that “too much conditioning will wear down the leather.” For most riders, conditioning once or twice per riding season is sufficient.
My gloves got caught in the rain. What should I do?
Dry them naturally at room temperature. SHIMA’s guide says to dry them “in a well-ventilated area, protected from direct sunlight.” Do not apply heat. Stuff the fingers if needed to retain shape, and let them dry fully over 2-3 days before wearing or storing.
Before You Go
One rule cuts through all the manufacturer specifics: if your gloves are wet, dry them slow and dry them cold. Heat is the fastest way to turn a $200 pair into a stiff, cracked mess. Everything else, soap versus no soap, conditioner frequency, is a detail you can adjust once the no-heat habit is locked in.
For the lining, smell is your guide. If they’re starting to hold an odor, it’s time for a hand-wash. Use a leather cleaner or heavily diluted mild soap, rinse until the water runs absolutely clear, and then commit to the two-day dry.
Condition sparingly, and almost never on the palms. Your grip on the bars is essential.
Finally, check your labels. If your glove’s care tag says one thing and this guide says another, trust the tag. It’s your glove’s manual, and ignoring it is the one move that could leave you with a damaged pair and no recourse.
