
How to Replace Motorcycle Knee Sliders: The 5-Step Process
This post contains affiliate links. As an Amazon Associate, we earn from qualifying purchases.
Replacing motorcycle knee sliders requires matching three things: the Velcro panel on your suit, the shape of the new puck, and a clean, dry workspace. This is the basic process for how to replace motorcycle knee sliders.
This isn’t just a cosmetic swap. A worn slider transfers impact directly to the suit’s leather and your knee, and a poorly attached new one can peel off mid-corner. The difference between a clean replacement and a rushed one is how long the new puck stays put under pressure.
What follows: the visual cues that mean “replace now,” the five-step process that protects your suit’s Velcro, the tools that save you from a stripped panel, and the answer to how to replace motorcycle knee sliders so they wear evenly from the first session.
Key Takeaways
. Replace sliders when the wear indicator lines are gone or the puck is less than 3mm thick at its thinnest point. . Always clean the Velcro panel with isopropyl alcohol before installing a new slider; residual adhesive is the number one cause of weak bonds. . Use a plastic pry tool or guitar pick to remove old sliders, metal tools gouge the leather and ruin the Velcro hooks underneath. . Break in new sliders by taking a few easy laps first; a fresh, slick puck can be unpredictable until its surface scuffs slightly. . If the Velcro panel itself is damaged, the suit needs a professional repair before any new slider will hold securely.
When to Replace Your Sliders
You don’t need a calendar. You need your eyes and a fingertip. Look for three things: thickness, texture, and the wear lines.
When the thickest part wears down to less than 3mm, it’s done. That’s not a suggestion, at that thickness, the puck compresses fully on contact and the hard backing plate can grind directly on the suit. You’ll feel it as a sudden, harsh vibration through your knee the first time you touch down.
The second cue is surface texture. A fresh puck has a slightly rough, matte finish for consistent grip. A worn one turns glassy-smooth and shiny. That polished surface slides too easily, which can upset the bike’s balance as you lean off. It’s a subtle change you notice more by feel than sight.
Finally, most quality sliders have molded wear indicator lines, small grooves around the edge. When those grooves disappear, the puck is past its safe service life. I’ve seen riders ignore those lines and keep running a puck until it delaminates in a crash, taking a chunk of the suit’s leather with it. Don’t be that rider.
Common mistake: Waiting until the slider is completely flat. By then, the Velcro panel underneath has taken a beating from repeated metal-on-fabric contact, and its holding power is already compromised.
The 5-Step Replacement Process
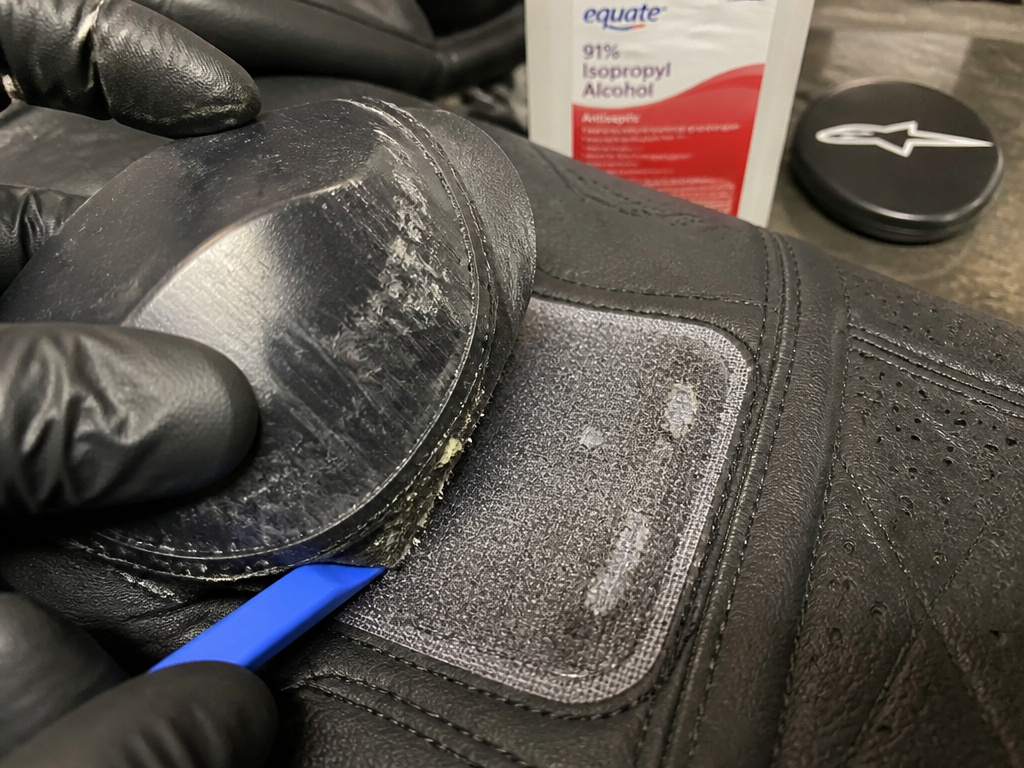
Do one side at a time. This keeps the other slider as a reference for positioning and prevents you from mixing up left and right pucks.
Step 1: Remove the old slider. Start at one corner. Slide a plastic pry tool, a stiff guitar pick, or even a thin plastic spatula under the edge. Work it slowly back and forth to peel the adhesive Velcro hook tape off the loop panel on the suit. Never use a screwdriver or metal blade, you will cut the loops. If the bond is stubborn, a hair dryer on low heat held 6 inches away for 30 seconds softens the adhesive without harming the leather.
Step 2: Clean the Velcro panel. This is the step everyone skips, and it’s why new sliders fall off. The old adhesive leaves a gummy residue that clogs the loops. Dab a cloth with isopropyl alcohol (90% or higher) and scrub the panel until it feels rough and dry to the touch again. Let it air dry for two minutes. A clean panel should catch on your fingernail.
Step 3: Test-fit the new slider. Hold the new puck against the panel. The shape should match the outline of the old one. If it’s a different brand or style, check for gaps at the edges. A significant gap means the puck won’t make full contact under load, and the bond will fail faster. Some riders find aftermarket sliders from brands like Dainese, Alpinestars, and Held can be cross-compatible if the size and shape are right, but a test fit is critical as shape variances exist.
Step 4: Peel and press. Remove the backing from the slider’s adhesive tape. Align it carefully, you get one shot. Once it touches the panel, you can’t reposition it without weakening the bond. Press firmly with the palm of your hand for 30 seconds, focusing on the edges. Some manuals recommend a rubber mallet tap for final seating; I use a rolling pin from the kitchen. It sounds silly, but it applies even pressure without shock.
Step 5: Let it cure. The adhesive reaches about 80% strength in an hour, but full bond takes longer. Don’t suit up and head straight to the track. Let the suit sit at room temperature for the full recommended cure time before you expect it to hold a slide. If your garage is cold (below 70°F), bring the suit inside. For some adhesives, like that on Honda CBR1000ST/SP frame sliders, installation should not be attempted below 21°C (70°F) without pre-heating surfaces.
The adhesive on the Honda CBR1000ST/SP frame sliders requires 72 hours to reach full strength. While knee slider adhesive sets faster, the principle is the same, rushing the cure time is how pucks detach.
Tools You Actually Need (And One to Avoid)
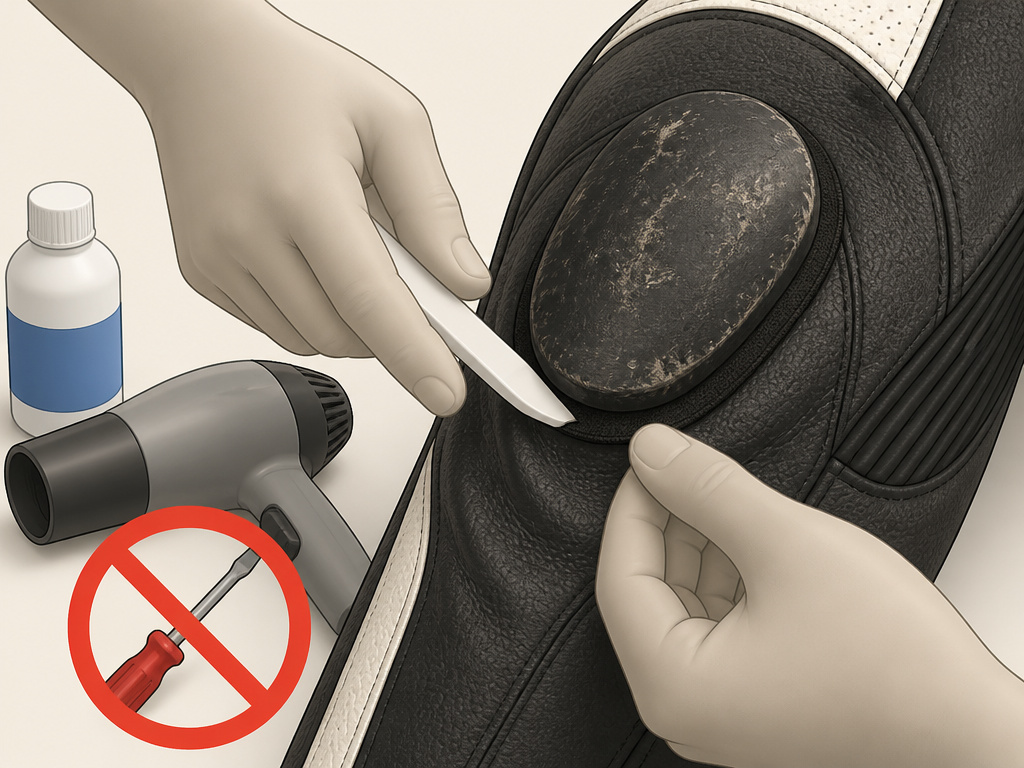
You can do this with stuff from around the house. A dedicated toolkit is overkill.
| Tool | Purpose | If You Skip It |
|---|---|---|
| Plastic pry tool / guitar pick | Peels old slider without damage | Metal tools strip the Velcro loops; a $200 suit repair follows. |
| Isopropyl alcohol (90%+) | Cleans adhesive residue from panel | New slider bonds to gunk, not loops; it fails within two sessions. |
| Hair dryer (low heat) | Softens stubborn adhesive for removal | You pry harder, tear the hook tape, and need a replacement slider. |
| Clean microfiber cloth | Dries the panel after cleaning | Water or solvent left under the puck delays curing. |
| Rolling pin / rubber mallet | Applies even pressure during installation | Hand pressure alone misses edges; the puck lifts after first use. |
The one tool to avoid: anything metal. No knives, no screwdrivers, no scrapers. The Velcro loop panel is woven fibers over leather. A metal edge slices through it like thread, and that damage is permanent. If your panel is cut, the suit needs a professional repair where a new loop section is stitched in. That costs more than a whole set of sliders.
Why Cleaning the Velcro Panel Is Non-Negotiable
The adhesive on the back of a slider isn’t glue. It’s a field of tiny plastic hooks that grab the loops on the suit. When you peel an old slider off, some of those hooks break and stay behind, embedded in a layer of old adhesive. That creates a smooth, gummy barrier.
A new slider pressed onto a dirty panel bonds to that barrier, not to the loops. The connection feels firm at first, but under the shear force of a slide, the barrier layer shears right off. The slider detaches in one piece, often taking a patch of the loop fibers with it.
Cleaning with isopropyl alcohol dissolves the old adhesive and floats the broken hooks away. What’s left is the raw, rough loop field. Press the new slider onto that, and thousands of fresh hooks engage thousands of intact loops. That’s the bond that survives a 60mph low-side.
I learned this the hard way with a set of Held sliders. I swapped them in a hurry at the track, skipped the cleaning, and the new right-side puck peeled off during my third session. It didn’t crash me, but it tore a quarter-sized patch of loops out of my Dainese suit. The repair bill was more than the sliders cost.
Dealing With Damaged or Worn-Out Velcro
Sometimes the problem isn’t the slider. It’s the panel on the suit. Look for these signs:
- Bald spots: Areas where the loops are worn flat and feel smooth.
- Cuts or tears: Visible damage from a previous removal gone wrong.
- Stiff, crusty texture: Old adhesive has hardened permanently into the weave.
If the panel is damaged, installing a new slider is a waste. It won’t hold. You have two paths:
Professional repair: A leather shop can sew a new Velcro loop panel over the damaged area. This is the permanent fix, but it requires matching the original panel’s color and stitch pattern. Expect to leave the suit for a week.
Temporary field fix: For a small bald spot, you can try a loop tape patch. Cut a piece of adhesive-backed Velcro loop tape slightly larger than the bald spot, clean the area with alcohol, and stick it down. Then install the slider onto the patch. This is a “get you through the weekend” solution, not a long-term one. The patch’s adhesive isn’t as strong as the original.
If a large portion of the panel is damaged, go straight to professional repair. A patchwork of tapes creates uneven thickness and a weak point that will fail under load.
Slider Positioning and Break-In
A new slider isn’t ready the moment you stick it on. The surface is too slick.
The first time you use a fresh puck, take it easy for a lap or two. Drag it lightly on clean pavement. You’re not trying to grind it down, you’re scuffing the surface to remove the manufacturing release agent and establish a consistent texture. A slick, virgin slider can feel grabby or unpredictable on its first real contact.
Position matters, too. The slider should sit so its leading edge is just above the knee armor cup when you’re in your riding crouch. If it’s too high, you’ll hit the suit’s leather first. If it’s too low, it won’t contact the ground when you need it. Sit on the bike in your gear and have a friend mark the spot with chalk or a piece of tape before you install.
Where this goes sideways: Installing sliders while standing upright. Your knee position changes completely when you’re tucked in a corner. A slider placed for a standing stance will miss the pavement in a tuck, rendering it useless.
OEM vs. Aftermarket Slider Compatibility
Most riders assume they must buy sliders from their suit’s manufacturer. That’s usually true for the best fit, but it’s not an absolute rule.
| Consideration | OEM Sliders | Aftermarket Sliders |
|---|---|---|
| Shape & Fit | Guaranteed to match suit’s knee contour. | May have slight shape variances; test fit is critical. |
| Adhesive Quality | Usually very high; formulated for their specific loop panel. | Can vary; some use aggressive hooks that may wear loops faster. |
| Cost | Typically more expensive. | Often less than OEM. |
| Availability | Must be ordered through dealer or parts site. | Widely available from motorcycle gear retailers. |
The key is the shape. An Alpinestars slider on a Dainese suit might work if the curvature is similar. A Held slider on an Alpinestars suit might not. Always test-fit before peeling the backing. If the aftermarket puck bridges a gap or rocks on the panel, it’s the wrong part.
For most riders, sticking with OEM is the simpler choice when considering how to replace motorcycle knee sliders. If you’re trying to save money or your OEM sliders are discontinued, aftermarket is a viable option, provided you verify the fit first.
How to fix slider fitment problems
A slider that’s loose or sits crooked won’t do its job. Never work on both the left and right sides simultaneously, as this can cause the engine to tilt and create alignment problems. Use only the proper tools and a recently calibrated torque wrench with the correct factory torque specifications. For some models, a specific thread locker is required on certain bolts. If the slider uses adhesive, the surfaces must be warm enough for it to bond properly, and you must allow the full cure time before riding.
Why one slider wears faster than the other
Uneven wear between your left and right knee sliders is almost always a riding style issue, not a product defect. Most tracks have more right-hand corners, which naturally wears the right slider faster. Consistent body position is key; if you’re hanging off more on one side, that slider will see more contact. To manage it, simply rotate the sliders on their mounts to present a fresh wear surface, which can help them wear down more evenly over time. This is a normal part of track riding and a useful indicator of which side of the bike you’re using most.
Frequently Asked Questions
What are the best motorcycle knee sliders?
The “best” slider is the one that fits your suit’s knee contour perfectly. For guaranteed fit, buy the sliders made by your suit’s manufacturer (e.g., Dainese sliders for a Dainese suit). For general quality and availability, Dainese, Alpinestars, and Held are the three brands I’ve seen hold up best across thousands of track miles.
Is knee dragging necessary?
For street riding, no, it’s a track technique. Knee sliders on a street suit are about having the protection available, not using it regularly. On the track, touching a knee down is a feedback tool for measuring lean angle. The slider itself is a consumable safety item designed to grind away instead of your suit or knee.
Are motorcycle knee pads worth it?
Knee pads (hard armor inside the suit) and knee sliders (external pucks) are different things. The CE-certified knee armor inside your suit is non-negotiable for impact protection. The external slider is for abrasion. You need both. A slider without armor underneath is just a plastic puck over your kneecap.
What is a slider knee pad?
This term usually refers to a dual-purpose system found in some adventure or street pants, where a hard knee protector has a removable, replaceable plastic slider puck attached to its exterior. It’s an all-in-one solution, but the pucks are often smaller and less durable than dedicated track sliders.
Before You Go
One rule most guides skip: if your suit’s Velcro panel is more than five years old, its holding power is diminished regardless of how clean it is. The nylon loops degrade with UV exposure, sweat, and repeated compression. On an older suit, plan on replacing the sliders more frequently, and inspect the bond before every track day.
When you’re done, the new slider should sit flush, the panel should be clean and rough, and you should have a spare set ready in your gear bag. Because they will wear out again. That’s the whole point.
