
How to Polish Motorcycle Aluminum: Tools and Steps
This post contains affiliate links. As an Amazon Associate, we earn from qualifying purchases.
While some aftermarket guides detail a three-stage abrasive process (sanding, cutting, polishing) for a mirror finish, OEM manuals like Honda’s advise only gentle cleaning with non-abrasive pads to preserve the finish and warranty. The goal is to flatten microscopic peaks into a smooth, reflective surface. The critical choice isn’t grit sequence—it’s deciding whether to polish at all, as aggressive work on structural frames or swingarms can weaken them and void factory warranties.
That last point is the line most how-to guides draw in pencil. They’ll give you the sandpaper grits and the wheel types, but they treat a finned engine cover and a load-bearing frame tube as the same job. They aren’t. A guide on how to polish motorcycle aluminum should distinguish between a finned engine cover and a load-bearing frame tube.
What follows: the real-world trade-off between a show-quality shine and your bike’s structural integrity, the tools that actually work, the safety gear you cannot skip, and how to tell if you’re cleaning or compromising your ride when you compare a how to polish motorcycle aluminum guide.
Key Takeaways
- Polishing is metal removal. Every pass with sandpaper or a cutting wheel takes off a tiny layer. On non-structural parts like covers or levers, this is fine. On a frame or swingarm, removing too much metal can compromise strength.
- Warranty claims hinge on maintenance. For bikes like the Triumph Daytona Moto2 765, the manual explicitly states that warranty claims for non-lacquered aluminum items “due to inadequate maintenance will not be allowed.” Aggressive polishing could be considered just that.
- Start with the right wheel and compound. A sisal sewn wheel with a black emery or brown Tripoli compound does the initial cutting. A loose cotton wheel with white rouge creates the final shine. Never use the same wheel for different compounds.
- Protection is essential. Wear gloves, eye protection, and a breathing mask. Inhaling aluminum oxide dust is a serious health hazard, and a part launched from a buffing wheel moves fast enough to cause real injury.
- Know your goal. A satin, factory-style finish on a frame requires only a non-abrasive cleaner and a pad like the Scotch Brite Hand Pad #7447. A mirror finish on an engine case requires the full abrasive progression.
The OEM vs. Aftermarket Polishing Dilemma
Your owner’s manual and a custom bike builder’s guide are talking about two different worlds. This isn’t a minor disagreement on technique; it’s a fundamental split in goals.
Honda’s service manual specifies using a wet Scotch Brite Hand Pad #7447 (or equivalent) with strokes parallel to the frame length to remove stains. It also warns against using stiff brushes, steel wool, or abrasive cleaners on aluminum parts. This is cleaning, not polishing.
The factory’s priority is preserving the original finish and the part’s integrity for the life of the warranty. They define “clean” as removing contaminants without damaging the surface. The Louis Moto guide details using an angle grinder with a grinding disk, wet/dry sandpaper from 80-600 grit, and sisal polishing mops for cutting. That’s metal shaping.
| Goal | OEM / Manual Approach | Aftermarket / Custom Approach |
|---|---|---|
| Preserve Warranty | Gentle cleaning with non-abrasive pads & cleaners. | Not a primary concern; focus is on aesthetics. |
| Finish Type | Maintain original satin or brushed finish. | Achieve a high-gloss, mirror-like shine. |
| Tool Aggression | Hand pads, soft cloths, mild soap. | Power sanders, bench buffers, abrasive compounds. |
| Risk Profile | Very low risk of damaging the part. | Risk of removing too much metal, overheating, or weakening structural parts. |
The Triumph Daytona Moto2 765 manual makes the warranty stakes explicit. It mandates regular cleaning of non-lacquered aluminum with a non-abrasive, non-caustic cleaner, especially after bad weather. Ignore that, and you own any corrosion or finish problem. Fair warning.
When Polishing Is a Bad Idea
Some parts of your bike should never see a buffing wheel. Knowing what to leave alone is more important than knowing how to start.
Frames and Swingarms. This is the big one. The Louis Moto guide cautions that “removing too much metal can weaken these parts.” It’s not scare talk. A frame is a calculated structure; its wall thickness is part of its strength. Polish away a few tenths of a millimeter, and you change the equation. They also note that in places like Germany, a polished frame may require a special engineering certificate for road legality, which is a headache you don’t need.
Welded Joints. Never sand or polish a welded joint on a frame or swingarm. The weld material is different from the base metal and can be softer. Sanding can create a weak point and a visible flaw you can’t buff out.
Painted, Lacquered, or Coated Surfaces. You cannot polish what’s under paint. As the Louis Moto guide states, you must first strip any coating and the corrosion underneath it completely. If a part is clear-coated for protection, polishing will just scratch the clear. You’re better off with a dedicated cleaner and polish designed for coated surfaces.
Tubular Steel Frames. Want a chrome look on a steel frame? The guide is clear: they must not be chromed due to hydrogen embrittlement risks, but they can be bright nickel-plated. The prep work is still meticulous polishing, but the final step happens in a plating tank, not your garage.
Tools of the Trade
You can do this with a drill attachment, but for anything more than a small cover, a dedicated bench buffer is the right tool. It’s about control and safety.
One community guide recommends a bench buffer of moderate power for beginners. It’s powerful enough to work efficiently but less likely to grab and throw a part than a 1 hp monster. You’ll also need a selection of buffing wheels of appropriate thickness to get into contours.
Buffing wheels aren’t interchangeable. You need at least two types, and you must dedicate each to a specific compound to avoid cross-contamination.
- Sisal or Spiral Sewn Wheel: This is your workhorse for cutting. Its dense, sewn cotton construction provides firm pressure to remove sanding marks and imperfections. Use it with a cutting compound like black emery or brown Tripoli.
- Loose Cotton Wheel: This is for finishing. The loose plies give and conform, providing a final polish without cutting. Use it with a fine compound like white rouge.
Where this goes sideways: Using the bottom quadrant of the spinning wheel. If you press a part into the top or side, the rotation can snatch it from your hands. The part becomes a projectile. Use only the bottom quarter of the wheel, where the rotation is pushing the part down into your grip.
Your other essential tools are for personal protection. Gloves, a full-face shield (safety glasses aren’t enough), and a NIOSH-rated breathing mask for particulates. Aluminum oxide dust is nasty stuff for your lungs. This isn’t optional dressing—it’s how you end the day healthy.
The Three-Stage Polish: From Dull to Mirror
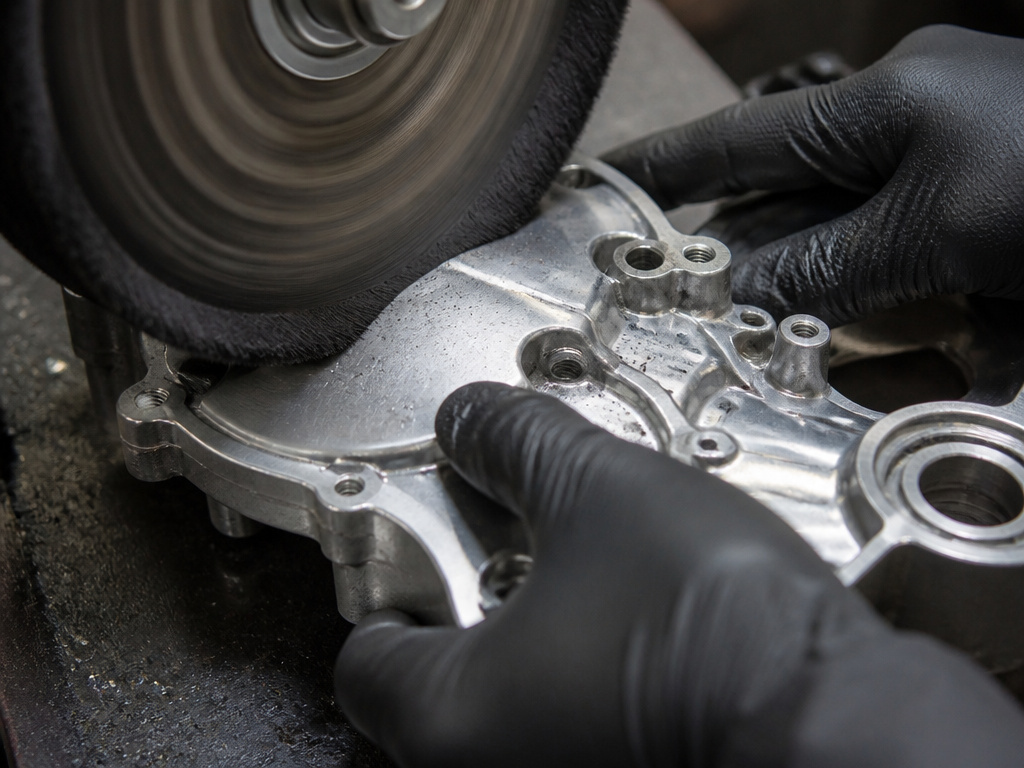
This is the core process every ranking page on how to polish motorcycle aluminum covers. It’s tedious, it’s messy, and rushing it guarantees a mediocre result. The goal is to replace coarse scratches with progressively finer ones until they reflect light evenly.
1. Sanding & Surface Prep. This stage removes deep oxidation, pitting, and old finish. You must start with a clean, grease-free part. If the part was painted or coated, it must be completely stripped first. * Start with the coarsest grit needed to level the surface. For heavy corrosion, that might be a coarse-grit wet/dry sandpaper used with water. * Work through progressively finer grits, such as moving from coarse to fine sandpaper. Each grit removes the scratches from the previous one. * Skipping grits is the most common mistake. If you jump from 220 to 600, the 600-grit scratches won’t be deep enough to erase the 220-grit valleys. You’ll see them forever under the polish.
2. Cutting with the Sisal Wheel. Mount your sisal wheel on the buffer and apply your cutting compound (black emery or brown Tripoli). Hold the part firmly and present it to the bottom quadrant of the spinning wheel. Move the part constantly to avoid overheating one spot—burned aluminum discolors. * The compound will blacken as it loads with removed metal. When the wheel looks “caked” or stops cutting effectively, you need to “rake” it. Hold a screwdriver or specialized rake against the spinning edge to clean off the spent compound. * This stage should erase all visible sanding marks, leaving a uniform, semi-shiny surface.
3. Polishing with the Cotton Wheel. Switch to a clean, dedicated loose cotton wheel and apply your finishing compound (white rouge). Repeat the same process. The loose cotton will deliver a brilliant, reflective shine. * After buffing, wash the part thoroughly with soap and water to remove all compound residue. Dry it completely.
4. Final Seal. To protect the fresh, bare metal from immediate oxidation, apply a dedicated metal polish like Autosol by hand with a microfiber cloth. This adds a thin protective layer. For long-term protection on parts that won’t get extremely hot, a quality motorcycle wax can be applied. For engine cases, the heat will burn off most waxes, so more frequent polishing is the trade-off.
Maintaining the Shine (And Your Warranty)
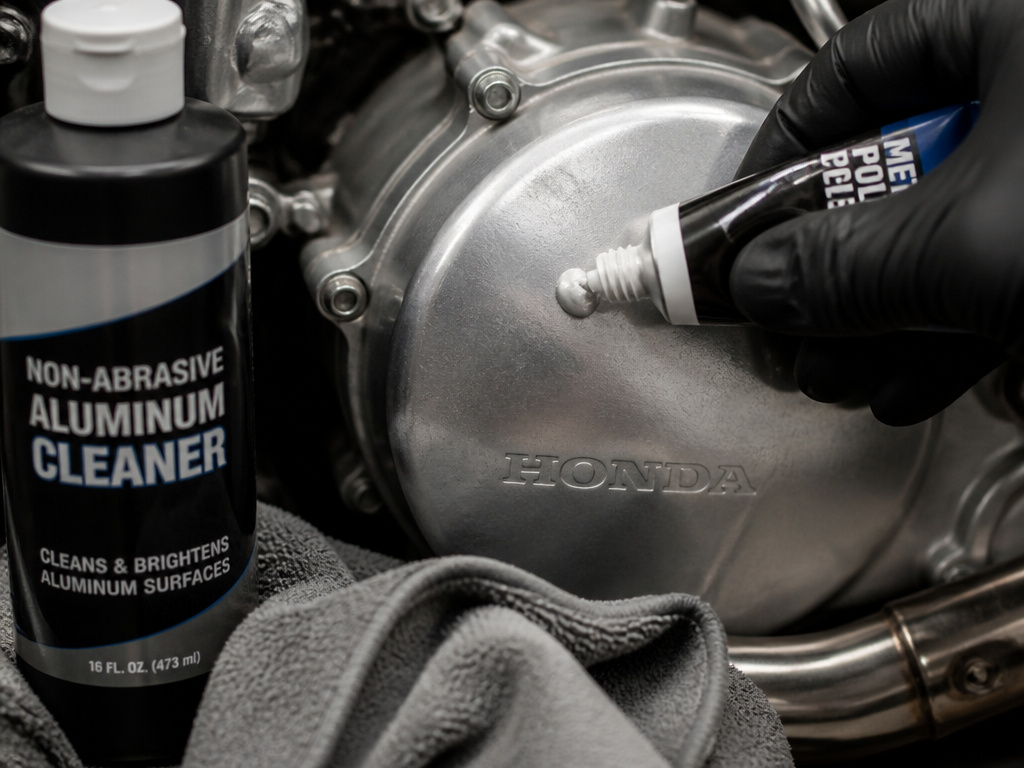
A mirror finish is a high-maintenance relationship. It will oxidize and stain from road grime, brake dust, and weather. How you maintain it depends on what you started with.
For a custom-polished part, regular washing with a mild soap and a soft cloth is key. Dry it immediately to prevent water spots. Reapply a hand polish like Autosol every few washes to maintain the protective layer. A full re-polish might be needed once a season if the bike sees regular use.
For factory non-lacquered aluminum under warranty, follow the book. Use a non-abrasive, non-caustic aluminum cleaner. The Honda method with the Scotch Brite pad is for stain removal only—use light pressure. The goal is to preserve the finish, not transform it. This routine is as much about detailing a motorcycle for inspection as it is for looks. It’s how you find the small leak or crack before a ride finds it for you.
When cleaning intricate parts like alloy wheel rims, use soft brushes to avoid scratching the finish. The principles are the same: gentle cleaners, no harsh abrasives, and thorough drying.
What Polishing Products to Use on Motorcycle Aluminum
Manufacturer guidance (e.g., Honda, Triumph) for maintaining warranty calls for gentle cleaning and warns against abrasives, while aftermarket polishing guides detail using abrasive sandpaper, grinding disks, and cutting compounds. For a final protective finish after polishing, community guides recommend applying a dedicated metal polish and buffing it out with a microfiber cloth. The goal is to protect the metal from oxidation without using aggressive compounds that could damage the surface or void a factory warranty. Always test any product on a small, hidden area first.
Frequently Asked Questions
What is the best way to polish an aluminum motorcycle engine?
The process is the same as for any other non-structural aluminum part: sand, cut, polish. The challenge with engines is the intricate fins and tight spaces. Use smaller wheels, even felt bobs on a drill, for the fins. Take extra care not to round over sharp fin edges, as this affects cooling. Always ensure the engine is cool and you have blocked off any open ports or intakes to prevent compound ingress.
Does WD-40 polish aluminum?
WD-40 is a water-displacing lubricant and light cleaner, not a polish. It can help remove light surface grime and add a slight sheen, but it will not cut oxidation or create a lasting shine. It leaves an oily film that attracts more dirt. For actual polishing, use dedicated compounds and a motorcycle polish for final protection.
What is the fastest way to polish aluminum?
The fastest way is also the riskiest: using a high-speed buffer with an aggressive compound. Speed leads to overheating, which burns and discolors the aluminum. It also increases the chance of the wheel grabbing the part. There is no safe shortcut. The “fast” method is using the correct tool progression and not skipping grits, which avoids rework.
How do you make oxidized aluminum look like new?
Heavy oxidation requires starting with coarse sandpaper (like 120-grit) to grind down past the corroded layer until you reach clean, solid metal underneath. Then follow the standard grit progression. If the oxidation is only surface-level, a cutting wheel and compound might suffice. Products labeled as engine brighteners that tackle oxidation often contain mild acids or abrasives.
Before You Go
Polishing isn’t a single skill. It’s two: the mechanical act of abrasion and the judgment to know when to stop. Buffing an old side cover to a mirror finish is a satisfying winter project. Doing the same to a modern aluminum frame is a gamble with structural integrity and your warranty.
The line is the part’s job. Cosmetic parts are fair game. Load-bearing parts are not. If your goal is a show-quality custom, accept the maintenance. If your goal is a clean, well-maintained bike that holds its value, follow the manual.
