
How to Pick up a Heavy Adventure Motorcycle: Step-by-Step
This post contains affiliate links. As an Amazon Associate, we earn from qualifying purchases.
To pick up a heavy adventure motorcycle using the manufacturer’s approved method, you use the center stand. For the KTM 1290 Super Adventure S, the manual states the components are designed only for the weight of the vehicle, and KTM advises that the standard parking procedure is invalid on anything other than a firm and level surface.
That “firm and level” clause is where the manual’s clean procedure meets the real world. Adventure riding happens off those surfaces, and a bike loaded with gear, fuel, and rider weight pushes past the stand’s design limit. The OEM method is your baseline for a firm and level surface, not trail recovery. Knowing how to pick up a heavy adventure motorcycle is a separate, essential skill.
What follows is the exact factory lift technique, the physics that make big bikes hard to right, and the field-proven methods, from body mechanics to a simple strap, that get a 500-pound machine back on its wheels when the textbook can’t help.
Key Takeaways
- The official KTM center stand procedure is for the bike’s dry weight only; adding luggage or attempting it on soft ground risks dropping the bike or damaging the stand.
- Before any lift, turning the handlebar all the way to the left and engaging the steering lock if possible (as specified in the KTM 790 Adventure manual) can prevent the front wheel from flopping and make the bike a single, liftable unit.
- For a fallen bike, the back-to-the-bike squat lift uses leg strength, not your back; the goal is to “walk” the bike upright using your legs, not a single heave.
- A simple motorcycle lift strap hooked to a handlebar or crash bar multiplies your force and is the single most effective tool for solo recovery on uneven terrain.
- If you’re working on the bike at home, a proper motorcycle lift table is safer and more ergonomic than wrestling it onto a center stand, especially for tire or chain work.
The Official KTM Center Stand Procedure
The factory knows how they built the bike to be lifted. For the KTM 1290 Super Adventure S, the service manual is unambiguous. This isn’t a suggestion; it’s the documented, repeatable method for raising the bike onto its stand in a controlled environment.
Here is the verbatim sequence from the KTM 1290 Super Adventure S service manual page:
Stand to the left of the vehicle. Hold the handlebar with your left hand and push the center stand onto the ground with your right foot. Put your entire weight on arm 1 of the center stand while pulling the vehicle up at the left grab handle.
Follow those steps in order. The grab handle is the anchor point for your pull, and your body weight on the stand’s arm provides the mechanical advantage. The stand clicks into place with a solid, metallic clunk you can feel through the footpeg. If you don’t hear and feel that, the stand isn’t fully engaged.
Where this goes sideways: Performing this lift on anything other than a “firm and level surface.” The KTM manual states this makes the standard procedure invalid and can cause the vehicle to roll away or fall over. Gravel, grass, or a slight incline turns a routine task into a drop.
This method has one critical, fixed limit. The same manual page states: “The components for parking the vehicle are designed only for the weight of the vehicle.” That’s the dry weight, printed on the spec sheet. It does not include a full tank of gas, luggage, panniers, or a top box. Exceed that design load, and you’re stressing the stand’s mounting points every time you use it. The risk isn’t immediate failure, but metal fatigue over time.
Why a 500-Pound Bike Feels Like 800
My loaded KTM? That was an ordeal of repositioning, deep breathing, and a sharp reminder that my core strength was not what I thought.
The difference isn’t just scale; it’s geometry and center of mass. An adventure bike is tall, with a high fuel tank and a lofty seat height. When it’s lying down, its weight is concentrated up high, wanting to roll onto its wheels. You’re not lifting dead weight straight up, you’re fighting a long lever that wants to pivot around the footpeg or crash bar. The engine cases and cylinder heads also protrude, creating awkward contact points that dig into soft ground and create suction, making the initial “breakaway” lift the hardest part.
This is the core challenge every lifting technique must solve: overcoming that initial friction and getting the bike high enough that gravity starts to help you pivot it upright. Your legs are the only tool strong enough to do it consistently without injury.
What to Do When the OEM Method Isn’t an Option
You’re on a forest service road, the ground is loose shale, and the bike is on its side. The center stand is useless here. This is where technique replaces equipment.
The universal method for how to pick up a heavy adventure motorcycle is the back-to-bike squat lift. It works because it turns your strongest muscles into a hydraulic jack.
- Kill the engine and secure the bike. Turn the fuel petcock to “OFF” if equipped. Turn the handlebar all the way to the left. If you have the key, insert it into the ignition and engage the steering lock (as specified in the KTM 790 Adventure manual). This locks the front end in place.
- Position yourself. Stand with your back to the bike, squat down, and grip the handlebar and a solid frame member or passenger grab rail. Your butt should be against the seat or side panel.
- Lift with your legs, walk backwards. Keep your back straight and head up. Push through your heels and extend your legs. You’re not standing up with the bike; you’re “walking” it upright by taking small, staggered steps backwards. The bike will pivot on its tires.
- Control the descent. As the bike passes the balance point, it will want to fall the other way. Shift your grip, ease it down onto the kickstand, and breathe.
For bikes that have fallen on the exhaust or crash bar side, you may need to combine this with the handlebar lift. Face the bike, grab the lower handlebar with both hands, and use a leg lunge to pop the bike up onto its tires before you get behind it for the final lift.
| Lift Technique | Best For | Critical Step Often Missed |
|---|---|---|
| Back-to-Bike Squat | Most solo recoveries on relatively flat ground | Engaging the steering lock before you start; a flopping front wheel steals all your leverage. |
| Handlebar & Leg Lunge | Bikes down on the exhaust side | A firm, committed lunge. Hesitation means you just exhaust yourself. |
| Two-Person Lift | Steep slopes, deep mud, or if you’re injured | Clear communication. A simple “1, 2, 3, lift” prevents jerking and dropped bikes. |
The Tool That Changes the Game: The Lift Strap

The best tool for answering how to pick up a heavy adventure motorcycle isn’t sold by KTM. It’s a simple, heavy-duty nylon strap. It changes a battle of strength into a lesson in mechanical advantage.
Here’s how you use it. Loop the strap around the base of the handlebar (on the side that’s facing up). Stand on the opposite side of the fallen bike, facing away from it, and pull the strap over your shoulder or hip. Now, instead of lifting, you’re leaning forward and using your body weight to pull the bike toward you. This does two things: it breaks the initial suction holding the bike down, and it gets the bike past the hardest part of the lift arc with minimal back strain. Once the bike is on its tires, you can complete the lift with the standard back-to-bike method.
Fair warning: practice this in your driveway first. The sensation of a 500-pound machine suddenly coming unstuck is dramatic, and you need to be braced and ready to walk it up smoothly.
Preparing the Bike and Yourself Before the Drop Happens
Recovery starts before you tip over. A few setup choices make the inevitable lift vastly easier.
- For the KTM 790 Adventure, the setup instructions specify a precise handlebar position where markings on the clamps face the rear and scale markings are centered, which can affect grip and mechanical advantage.
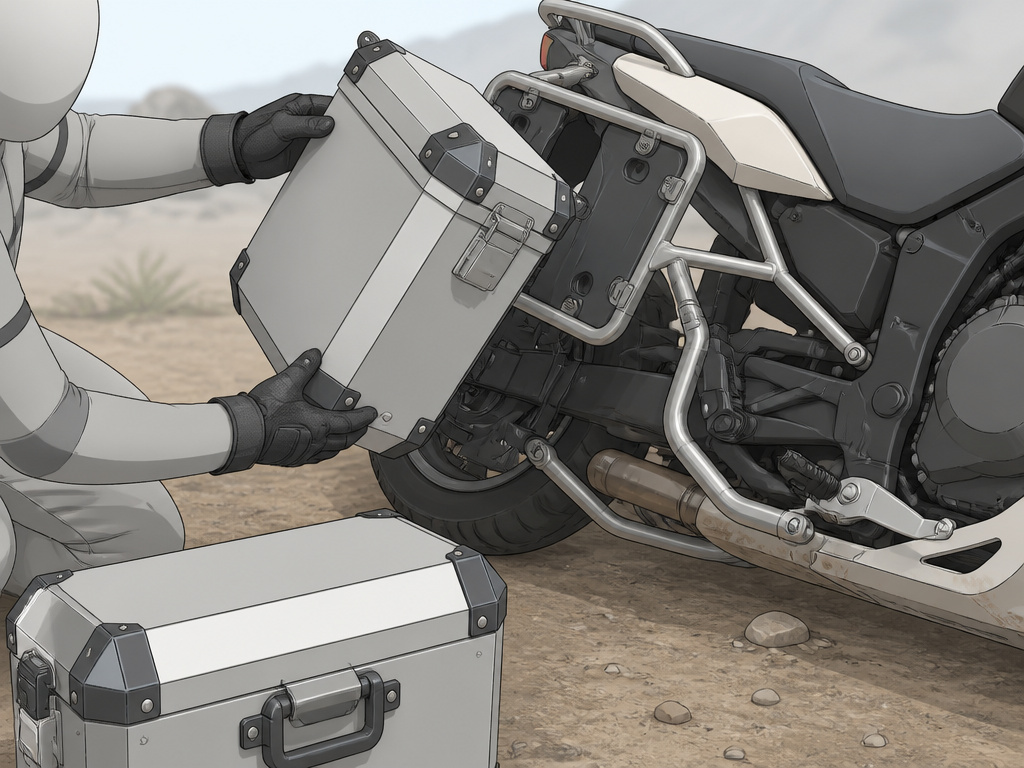
- Luggage: If you’re heading into technical terrain, take a hard look at what’s in your panniers. Do you need all of it? Shifting weight lower and closer to the bike’s center helps, but the best strategy is often to remove the panniers entirely for a tough section. A bike on its side with empty panniers is simpler than one pinned down by loaded metal boxes.
- Your Body: This isn’t about being a weightlifter. It’s about core stability and technique. A few basic deadlifts and farmer’s carries in the gym build the specific strength that keeps your back safe during a recovery. Grip strength matters, too, those handlebars are thick.
Common mistake: Gripping the bars tightly and trying to muscle the bike up with your arms and back. That’s a one-way ticket to a strained back. Your arms are just hooks connecting the bike to your legs, which do all the work.
When to Use a Mechanical Advantage
Sometimes, the smartest move is to not lift it at all by yourself. If you’re on a severe slope, in deep mud, or if you feel a twinge in your back, stop. The cost of pride is a hernia or a bike tumbling down a hill.
This is where a motorcycle lift table proves its value off the trail. In your garage, a hydraulic table is the ultimate center stand. It lifts the bike securely to a perfect working height for maintenance, from chain adjustments to tire changes. It’s the acknowledgment that these machines are heavy, and there’s no award for risking injury in your own workshop.
For on-trail recovery with a buddy, coordination is your mechanical advantage. The person at the front controls the handlebars and steering; the person at the back lifts at the passenger footpeg or subframe. Lift on the count of three, in a smooth, steady motion. The person at the front then guides the bike onto the kickstand.
Getting help / buddy lift technique
When a motorcycle is too heavy to lift alone, having an assistant is the safest approach. Factory setup instructions explicitly call for an assistant to prevent the motorcycle from falling over during critical unpacking and setup tasks, such as removing a tension belt from the rear wheel spindle or taking the vehicle off its shipping pallet. A second person provides essential stability and counterbalance, allowing you to focus on the lifting mechanics without the immediate risk of the bike tipping. This principle applies directly to recovering a dropped adventure bike; a buddy can stabilize the machine while you position your body and apply force, making the process controlled and far less likely to cause injury or further damage.
Frequently Asked Questions
What is the safest way to pick up a heavy motorcycle alone?
The safest solo method is the back-to-bike squat lift, using your legs to walk the bike upright. For significantly heavier bikes or difficult terrain, using a dedicated motorcycle lift strap to gain mechanical advantage is the safest upgrade, as it drastically reduces the strain on your back.
Should I use the center stand on an adventure bike?
You should use the center stand only as the manufacturer directs: for the unloaded vehicle on a firm, level surface like concrete or asphalt. The KTM manual explicitly warns that the stand components are designed only for the weight of the vehicle itself, not the bike plus luggage and fuel.
How do you pick up a motorcycle that fell on the exhaust side?
For a bike on its exhaust side, first try to turn the handlebar to full lock away from the ground. Then, use the handlebar and leg lunge technique: face the bike, grab the lower handlebar with both hands, plant your foot near the bike, and use a powerful leg push to rock the bike up onto its tires. Once it’s on the tires, you can complete the lift with the standard back-to-bike method.
What is the best lift assist device for a motorcycle?
The most effective and portable lift assist device is a simple, heavy-duty nylon lift strap. For garage work, a hydraulic motorcycle lift table is the best tool, providing stable, elevated access for maintenance without any lifting required.
Does picking up a motorcycle void the warranty?
The fact sheet does not address whether the physical act of lifting your motorcycle voids the warranty. However, KTM’s warranty terms state that service work prescribed in the manual must be carried out by an authorized workshop. The fact sheet states that damage caused by tampering with or conversions on the vehicle is not covered by the manufacturer warranty.
Before You Go
The official manual gives you one answer for one perfect scenario. The trail gives you a hundred problems. Your job is to bridge that gap with the right technique for the actual ground under your boots.
If you only remember one thing, make it this: turn the handlebar to full lock before you touch anything. That small, free action does more to make a heavy bike liftable than any amount of brute force. Pair that with a lift strap in your kit, and you’ve solved 90% of recovery situations without ever throwing out your back.
For the other 10%, the steep hill, the deep bog, there’s no shame in waiting for help. The bike isn’t going anywhere. Your long-term riding health is more important than saving five minutes of embarrassment.
